WordPress is a free and open-source content management system (CMS) written in hypertext preprocessor (PHP) language and paired with a MySQL or MariaDB database with supported HTTPS. Features include a plugin architecture and a template system, referred to within WordPress as "Themes". WordPress was originally created as a blog-publishing system but has evolved to support other web content types including more traditional mailing lists and Internet fora, media galleries, membership sites, learning management systems (LMS) and online stores. WordPress is used by 42.8% of the top 10 million websites as of October 2021.
To function, WordPress has to be installed on a web server, either part of an Internet hosting service like WordPress.com or a computer running the software package WordPress.org in order to serve as a network host in its own right.
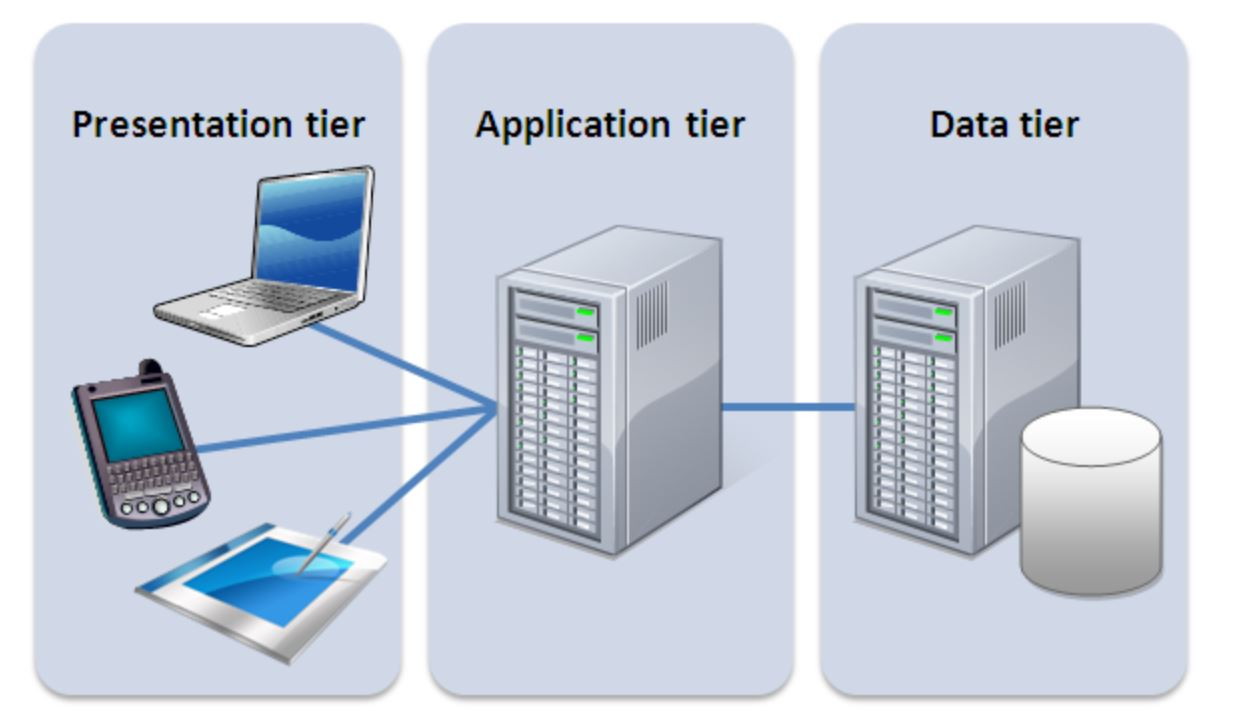
A three-tier architecture is a client-server architecture in which the functional process logic, data access, computer data storage and user interface are developed and maintained as independent modules on separate platforms.
Three-tier architecture is a software design pattern and a well-established software architecture.
Three-tier architecture allows any one of the three tiers to be upgraded or replaced independently.
The user interface is implemented on any platform such as a desktop PC, smartphone or tablet as a native application, web app, mobile app, voice interface, etc. It uses a standard graphical user interface with different modules running on the application server.
The relational database management system on the database server contains the computer data storage logic.
The middle tiers are usually multitiered.
Since the three are not physical but logical in nature, they may run in different servers both in on-premises based solutions, as well as in software-as-a-service (SaaS).
-
it provides great freedom to development teams who can independently update or replace only specific parts of the application without affecting the product as a whole.
-
The application can be scaled up and out rather easily by detaching the front-end application from the databases that are selected according to the individual needs of the customer.
-
New hardware, such as new servers, can also be added at a later time to deal with massive amounts of data or particularly demanding services.
-
A three-tier-architecture also provides a higher degree of flexibility to enterprises who may want to adopt a new technology as soon as it becomes available.
-
Critical components of the application can be encapsulated and retained while the whole system keeps evolving organically.
-
Development cycle or upgrade times are significantly improved ensuring minimal disruption in customer’s experience.
Different teams can work on different sections of the application rather than on the full stack according to their areas of expertise, improving their efficiency and speed.
Occupies the top level and displays information related to services commonly available on a web browser or web-based application in the form of a graphical user interface (GUI).
It constitutes the front-end layer of the application and the interface with which end-users will interact directly.
This tier is usually built on web development frameworks, such as CSS or JavaScript, and communicates with other tiers by sending results to the browser and other tiers in the network through API calls.
This tier is also called the middle tier, logic tier, business logic or logic tier — is pulled from the presentation tier.
It controls the application’s core functionality by performing detailed processing and is usually coded in programming languages, such as Python, Java, C++, .NET, etc.
Houses database servers where information is stored and retrieved.
Data in this tier is kept independent of application servers or business logic, and is managed and accessed with programs, such as MongoDB, Oracle, MySQL, and Microsoft SQL Server.
- In this project, We will have the hands-on experience that showcases Three-tier Architecture while also ensuring that the disks used to store files on the Linux servers are adequately partitioned and managed through programs such as gdisk and LVM respectively. The following steps will be followed to achieve our aim and objectives of this project.
- A Laptop or PC to serve as a client
- An EC2 Linux Server as a web server (This is where we will install WordPress)
- An EC2 Linux server as a database (DB) server
For this project, we will use RedHat OS
-
Launch an EC2 instance that will serve as "Web Server". Create 3 volumes in the same AZ as your Web Server EC2, each of 10 GiB.
-
Create and Attach all three volumes one by one to your Web Server EC2 instance
-
Open SSH client of your choice to connect to the EC2 instances using public IP Address and begin configuration
-
Use
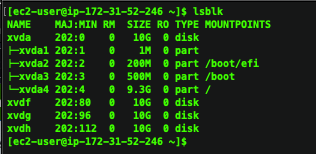
lsblkcommand to inspect what block devices are attached to the server. Notice names of your newly created devices. All devices in Linux reside in /dev/ directory. Inspect it with ls /dev/ and make sure you see all 3 newly created block devices there – their names will likely be xvdf, xvdh, xvdg.
-
Use
df -hcommand to see all mounts and free space on your server -
Use
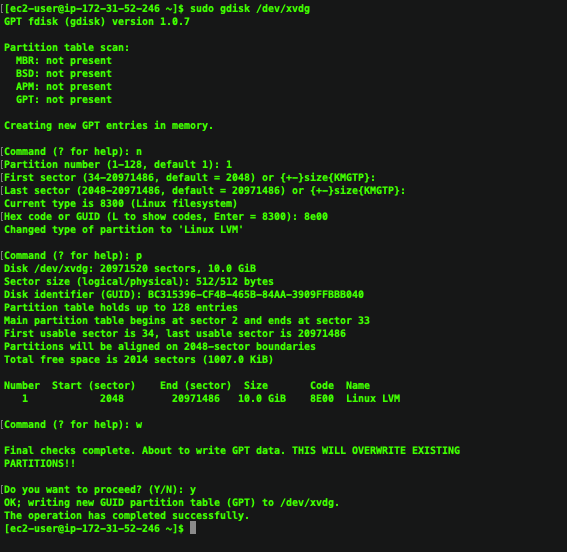
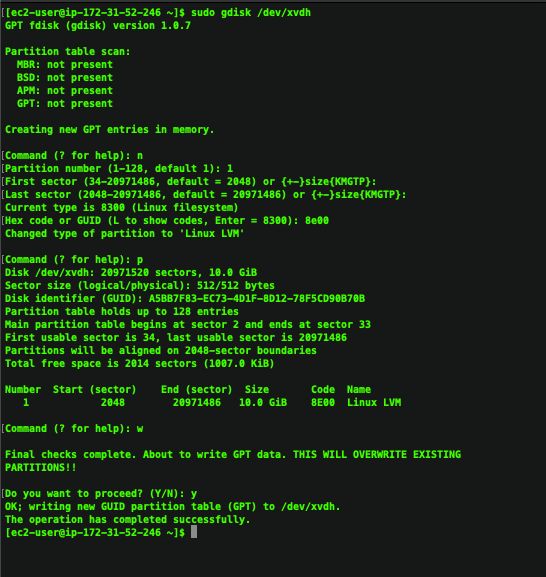
gdiskutility to create a single partition on each of the 3 disks with the command below
sudo gdisk /dev/xvdf
- Use
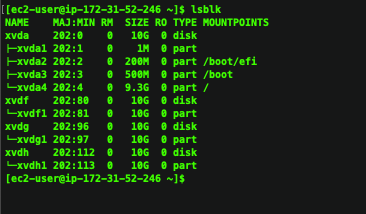
lsblkutility to view the newly configured partition on each of the 3 disks.
- Install
lvm2package usingsudo yum install lvm2. Runsudo lvmdiskscancommand to check for available partitions.

Note that previously, in Ubuntu we used apt command to install packages, in RedHat/CentOS a different package manager is used, so we shall use yum command instead.
- Use
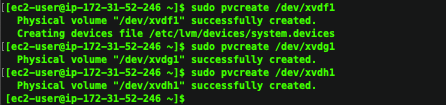
pvcreateutility to mark each of 3 disks as physical volumes (PVs) to be used by LVM
sudo pvcreate /dev/xvdf1
sudo pvcreate /dev/xvdg1
sudo pvcreate /dev/xvdh1
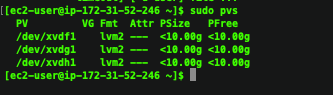
- Verify that your Physical volume has been created successfully by running
sudo pvs
- Use vgcreate utility to add all 3 PVs to a volume group (VG). Name the VG vg-webdata, then verify that VG has been created successfully by running
sudo vgs
sudo vgcreate vg-webdata /dev/xvdh1 /dev/xvdg1 /dev/xvdf1

- Use
lvcreateutility to create 2 logical volumes. apps-lv (Use half of the PV size), and logs-lv Use the remaining space of the PV size. NOTE: apps-lv will be used to store data for the Website while, logs-lv will be used to store data for logs.
sudo lvcreate -n apps-lv -L 14G vg-webdata
sudo lvcreate -n logs-lv -L 14G vg-webdata

- Verify that your Logical Volume has been created successfully by running
sudo lvs

- Verify the entire setup
sudo vgdisplay -v #view complete setup - VG, PV, and LV
sudo lsblk
- Use
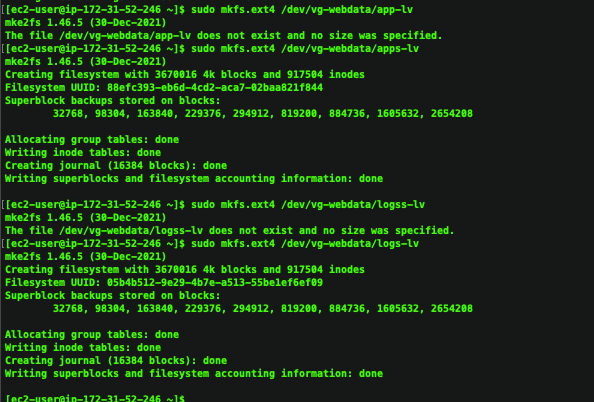
mkfs.ext4to format the logical volumes with ext4 filesystem
sudo mkfs -t ext4 /dev/vg-webdata/apps-lv
sudo mkfs -t ext4 /dev/vg-webdata/logs-lv
- Create
/var/www/htmldirectory to store website files
sudo mkdir -p /var/www/html
- Create
/home/recovery/logsto store backup of log data
sudo mkdir -p /var/www/html
- Mount
/var/www/htmlonapps-lvlogical volume
sudo mount /dev/webdata-vg/apps-lv /var/www/html/
- Use rsync utility to backup all the files in the log directory
/var/loginto/home/recovery/logs(This is required before mounting the file system)
sudo rsync -av /var/log/. /home/recovery/logs/
- Mount
/var/logonlogs-lvlogical volume. (Note that all the existing data on /var/log will be deleted. That is why step 15 above is very important)
sudo mount /dev/webdata-vg/logs-lv /var/log
- Restore log files back into
/var/logdirectory
sudo rsync -av /home/recovery/logs/. /var/log
- Update
/etc/fstabfile so that the mount configuration will persist after restart of the server. Click on the next Step To update the/etc/fstabfile
The UUID of the device will be used to update the /etc/fstab file;
sudo blkid
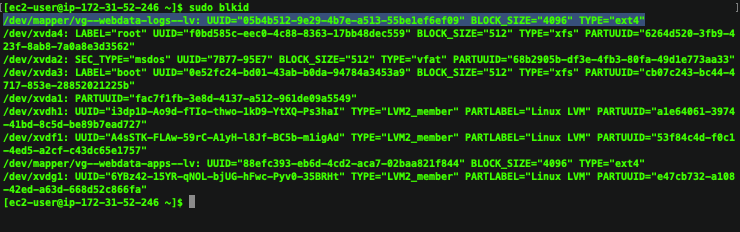
sudo vi /etc/fstab
- Update
/etc/fstabin this format using your own UUID and rememeber to remove the leading and ending quotes.
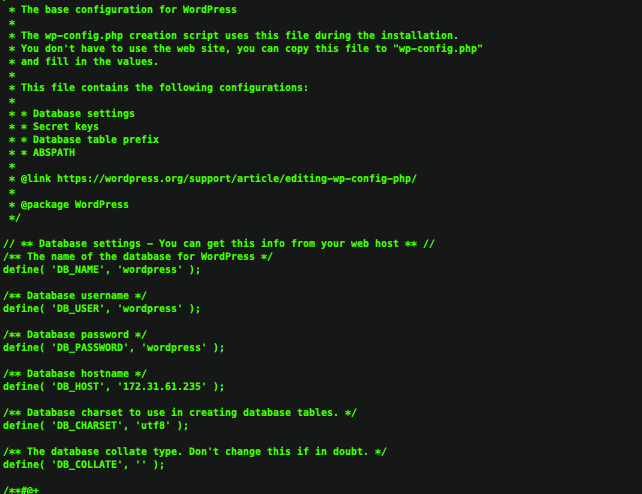
- Test the configuration and reload the daemon with this commands
sudo mount -a
sudo systemctl daemon-reload
- Verify your setup by running
df -h, the output should look like this:
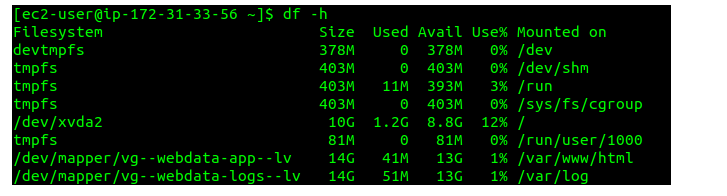
Step 2 — Prepare the Database Server Launch a second RedHat EC2 instance that will have a role – ‘DB Server’ Repeat the same steps as for the Web Server, but instead of apps-lv create db-lv and mount it to /db directory instead of /var/www/html/.
-
Launch a second RedHat EC2 instance that will have a role – ‘DB Server’
-
Create and Attach all three volumes one by one to your DB Server EC2 instance
-
Open MobaXterm and connect Ec2 instances using public IP Address and begin configuration
-
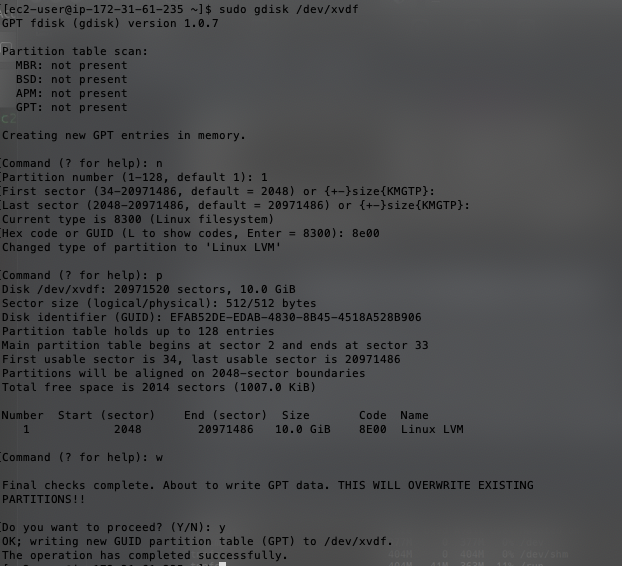
We need to create a single partition on each of the 3 disks we added
sudo gdisk /dev/xvdf
sudo gdisk /dev/xvdg
sudo gdisk /dev/xvdh
-
We will use the
lsblkcommand to view the newly configured partition on each of the 3 disks -
We use
sudo lvmdiskscancommand to check for available storage for Logical Volume Manager (LVM). Of course that is after installinglvm2 -
Use
pvcreateutility to mark each of 3 disks as physical volumes (PVs) to be used by LVM
sudo pvcreate /dev/xvdf1 /dev/xvdg1 /dev/xvdh1

-
Verify that your Physical volume has been created successfully by running
sudo pvs -
Use
vgcreateutility to add all 3 PVs to a volume group (VG). Name the VG vg-database
sudo vgcreate vg-database /dev/xvdh1 /dev/xvdg1 /dev/xvdf1
- Verify that your VG has been created successfully by running
sudo vgs

- Use
lvcreateutility to create a logical volumesdb-lvand verify the logical volume withsudo lvs

- Use
mkfs.ext4to format the logical volumes with ext4 filesystem
sudo mkfs -t ext4 /dev/vg-database/db-lv
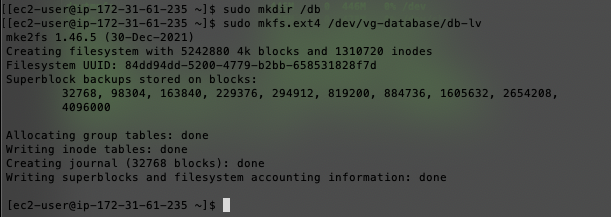
-
We need to create /db directory with
sudo mkdir /dbto store our database files as shown in the image above -
We need to Mount /db on db-lv logical volume
sudo mount /dev/vg-database/db-lv /db
- We need to update the /etc/fstab file so that the mount configuration will persist upon restart of the server.
sudo blkid
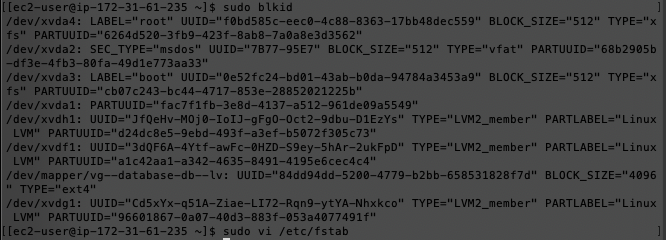
sudo vi /etc/fstab
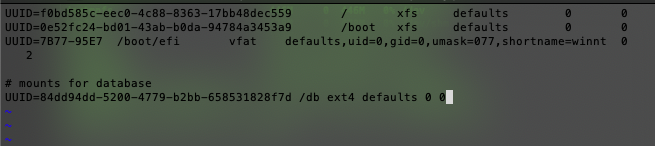
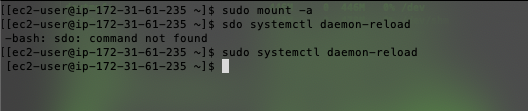
- Test the configuration and reload the daemon
sudo mount -a
sudo systemctl daemon-reload
- Update the repository
sudo yum -y update
- Install wget, Apache and it’s dependencies
sudo yum -y install wget httpd
- Start Apache
sudo systemctl enable httpd
sudo systemctl start httpd
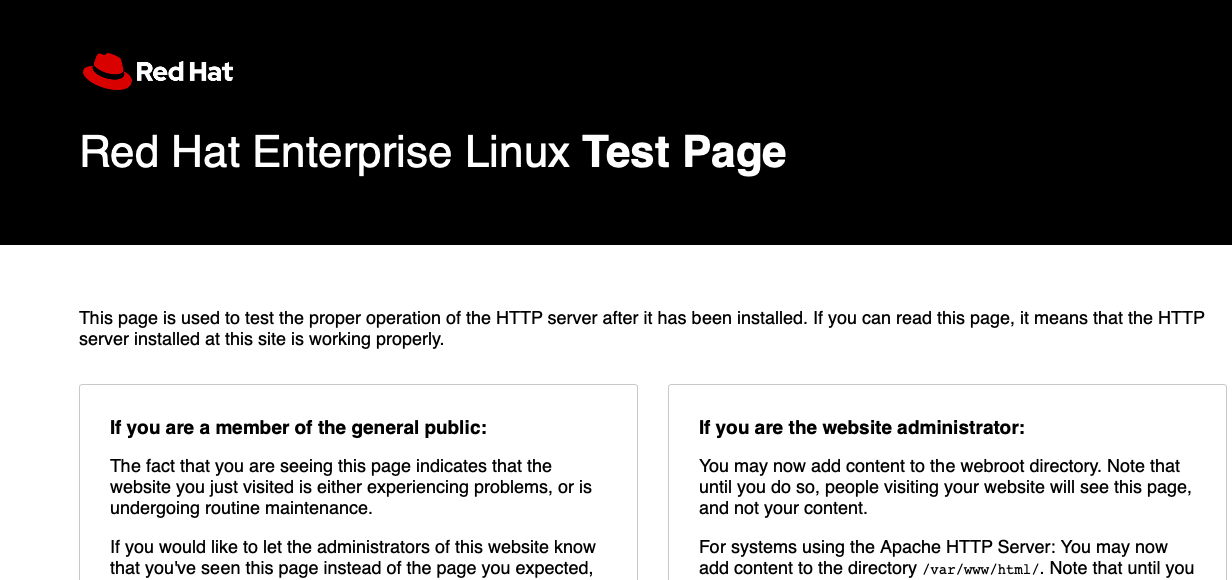
- To confirm that Apache is successfully installed, navigate to the public IP address of the web server using a web browser and you should get this;
- To install PHP and it’s depemdencies that are compatible with Wordpress
sudo dnf install -y https://dl.fedoraproject.org/pub/epel/epel-release-latest-9.noarch.rpm
sudo dnf install -y https://dl.fedoraproject.org/pub/epel/epel-release-latest-9.noarch.rpm
sudo dnf module list php
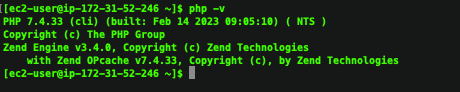
sudo dnf module enable php:remi-7.4
sudo dnf install php php-cli php-common
sudo yum install php php-opcache php-gd php-curl php-mysqlnd
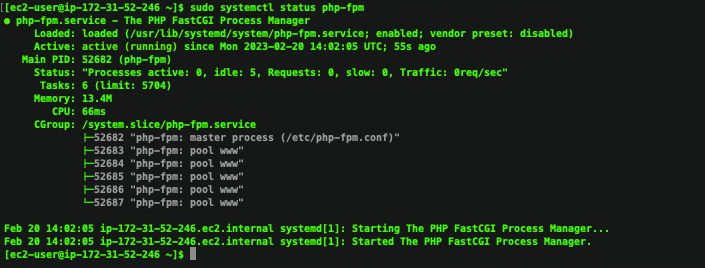
sudo systemctl start php-fpm
sudo systemctl enable php-fpm
setsebool -P httpd_execmem 1

- Restart Apache
sudo systemctl restart httpd

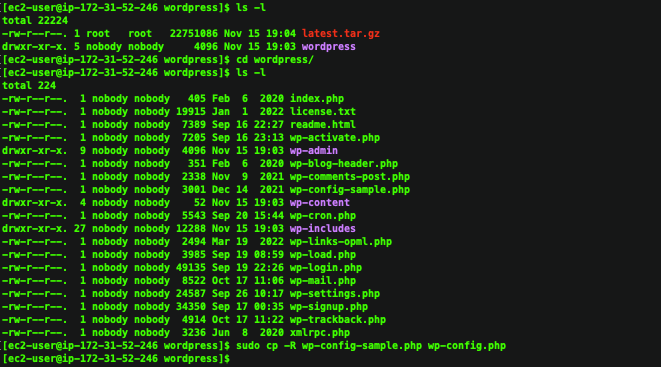
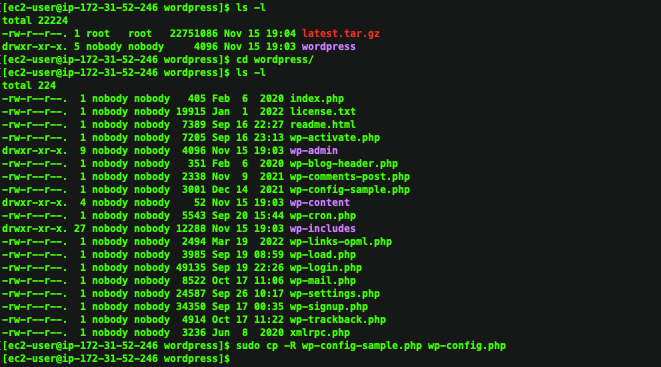
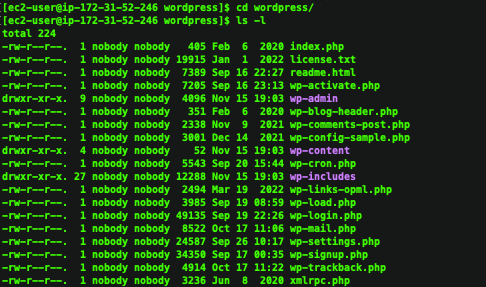
- Download wordpress and copy wordpress to var/www/html
mkdir wordpress
cd   wordpress
sudo wget http://wordpress.org/latest.tar.gz
sudo tar xzvf latest.tar.gz
sudo rm -rf latest.tar.gz
cp wordpress/wp-config-sample.php wordpress/wp-config.php
cp -R wordpress /var/www/html/

- Configure SELinux Policies
sudo chown -R apache:apache /var/www/html/wordpress
sudo chcon -t httpd_sys_rw_content_t /var/www/html/wordpress -R
sudo setsebool -P httpd_can_network_connect=1
sudo yum update
sudo yum install mysql-server
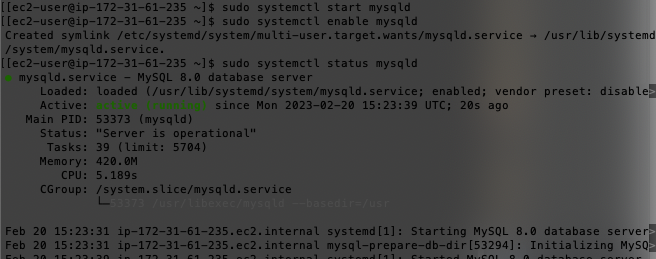
- Verify that the service is up and running by using sudo systemctl status mysqld, if it is not running, restart the service and enable it so it will be running even after reboot:
sudo systemctl restart mysqld
sudo systemctl enable mysqld
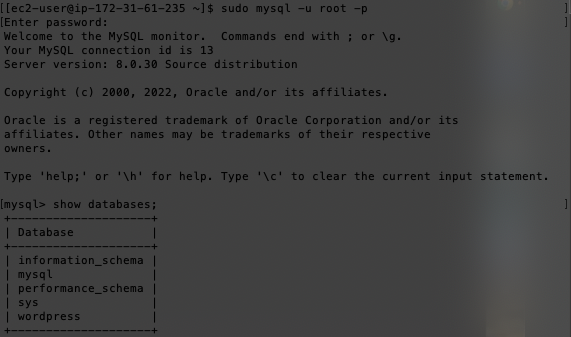
sudo mysql -u root -p
CREATE DATABASE wordpress;
SHOW DATABASES;
CREATE USER 'wordpress'@'%' IDENTIFIED mysql-native_password BY 'wordpress';
GRANT ALL PRIVILEGES ON *.* TO 'wordpress'@'%' WITH GRANT OPTION';
FLUSH PRIVILEGES;
Sselect user, host from mysql.user;
exit
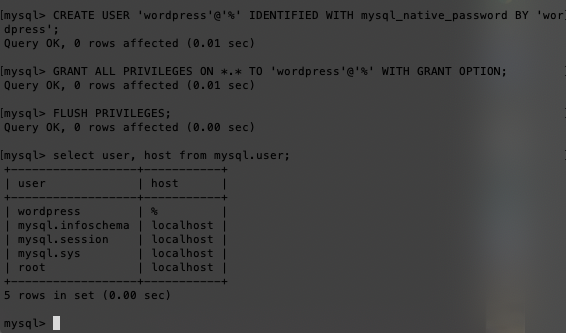
Do not forget to open MySQL port 3306 on DB Server EC2. For extra security, you shall allow access to the DB server ONLY from your Web Server’s IP address, so in the Inbound Rule configuration specify source as /32
- Install MySQL client and test that you can connect from your Web Server to your DB server by using mysql-client
sudo yum install mysql
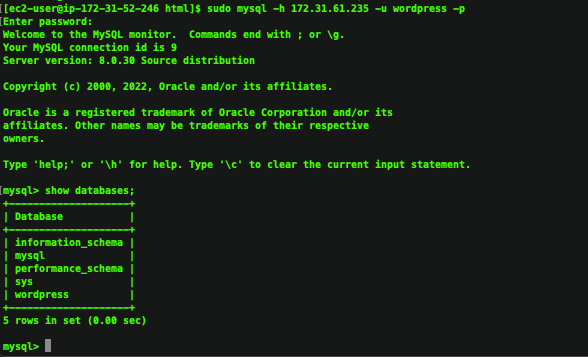
sudo mysql -u admin -p -h <DB-Server-Private-IP-address>
We will Get the private IP address of the Database Server Instance and use it to connect to our database from the Web Server
- Verify if you can successfully execute SHOW DATABASES; command and see a list of existing databases.
-
Change permissions and configuration so Apache could use WordPress:
-
Enable TCP port 80 in Inbound Rules configuration for your Web Server EC2 (enable from everywhere 0.0.0.0/0 or from your workstation’s IP)
-
Try to access WordPress from your browser through the Web Server's public IP address with extension http:///wordpress/
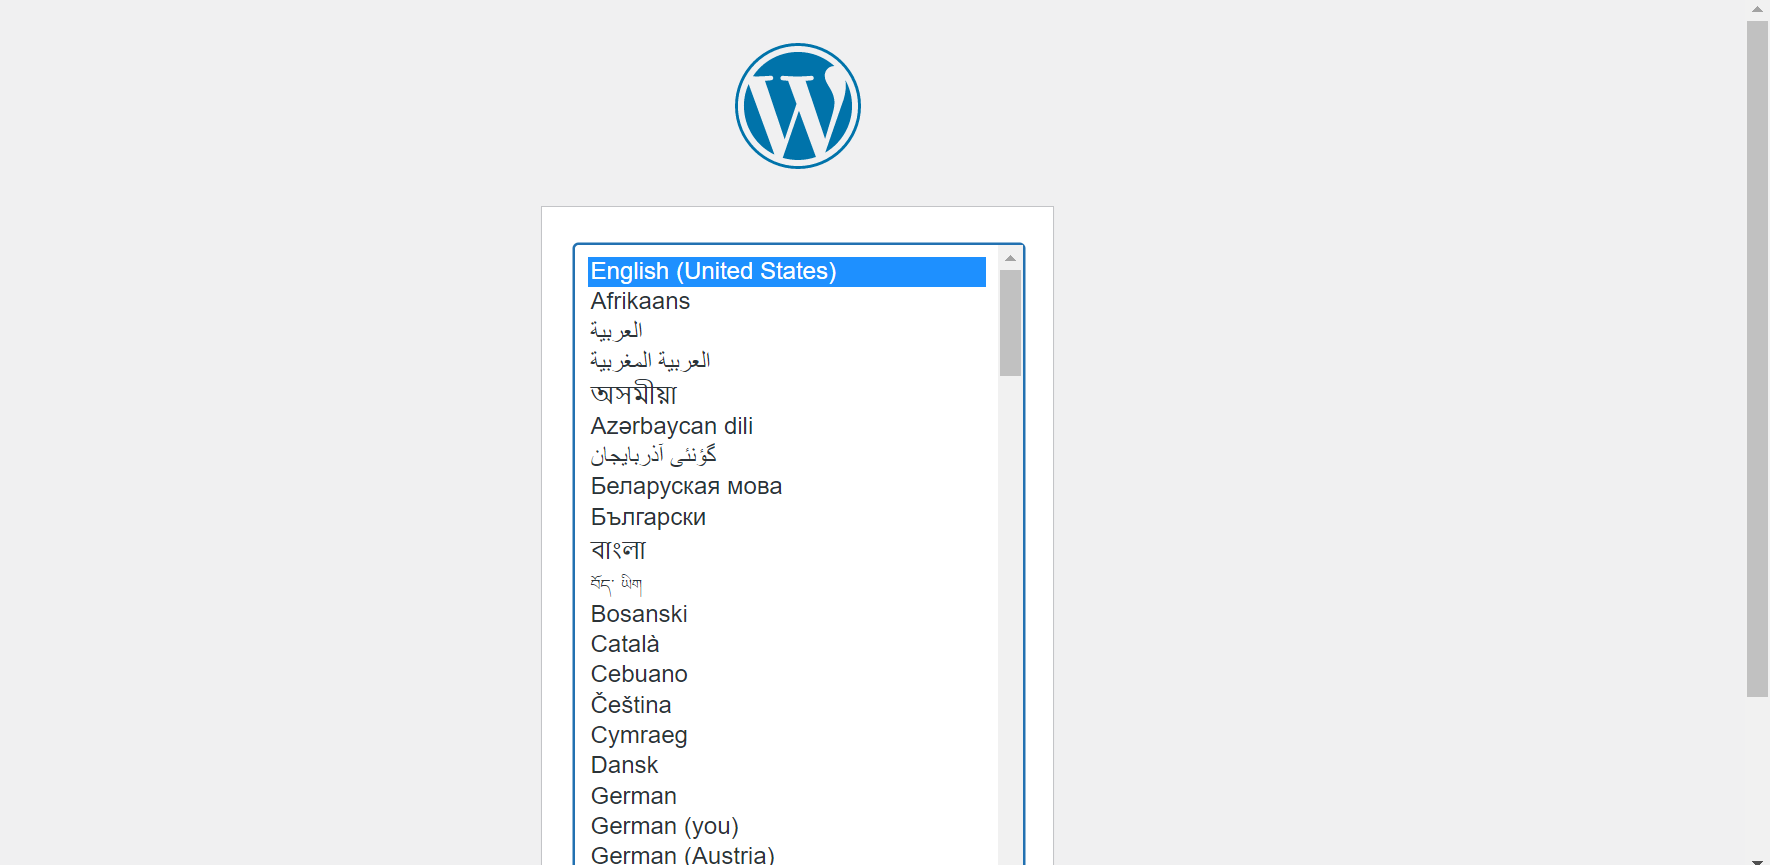
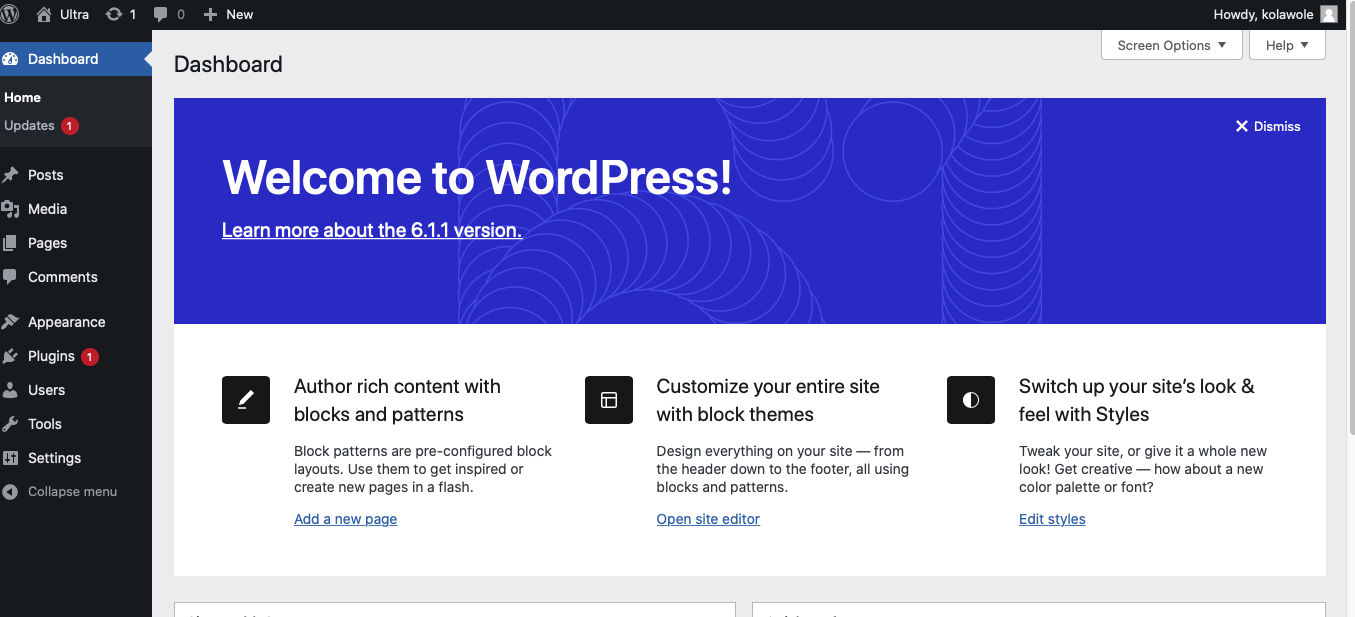
CONGRATULATIONS! We have successfully configured Linux storage susbystem and also deployed a full-scale Web Solution using WordPress and MySQL RDBMS!