This is the document for SIM7600G-H LTE(4G) modem board.
Features of this board:
-
Same dimension as Raspberry Pi, easily stacked up with Raspberry Pi.
-
Support all functions provided by SIM7600G-H.
-
Powered by micro-USB cable or external 5.0V DC supply.
-
Push-push Nano-SIM socket.
-
Flip-open micro-SD socket.
-
3.5mm earphone socket and 2-pin speaker connector.
-
On-board micphone.
-
40-pin connector at same place with Raspberry Pi(Not mounted).
-
20-pin connector that exports major signals of SIM7600G-H.
-
SMA connectors for main/aux and GPS antenna.
-
Buttons for Reset and Power function.
-
2-pin connectors for boot mode, flight mode, and power up selection.
-
2 LEDs for power and net status indication.
Features of SIM7600G-H:
-
LTE Cat4 module, supports LTE-TDD/LTE-FDD/HSPA+/GSM/GPRS/EDGE etc.
-
Multi-constellation GNSS receiver.
-
Frequency bands:
LTE-TDD B34/B38/B39/B40/B41.
LTE-FDD B1/B2/B3/B4/B5/B7/B8/B12/B13/B18/B19/B20/B25/B26/B28/B66.
UMTS/HSPA+ B1/B2/B4/B5/B6/B8/B19.
GSM/GPRS/EDGE 850/900/1800/1900MHz.
-
Data rate:
LTE Cat4: uplink up to 50Mbps, downlink up to 150Mbps.
HSPA+: uplink upto 5.76Mbps, downlink up to 42Mbps.
UMTS: uplink/downlink upto 384Kbps.
EDGE: uplink/downlink upto 236.8Kbps.
GPRS: uplink/downlink upto 85.6Kbps.
-
Control via AT commands.
-
USB drivers for Windows 7/8/10, Linux.
-
TCP/IP/IPv4/IPv6/Multi-PDP/FTP/FTPS/HTTP/HTTPS/DNS.
-
RNDIS/NDIS/ECM.
-
DTMF/Audio Playing.
-
USB audio and VoLTE.
-
Interface: USB 2.0, UART, USIM, PCM, MMC/SD, ADC, I2C. Antenna.
-
Certifications on going: CE/RCM/FCC/IC, PTCRB/GCF, AT&T/Verizon, RoHS/REACH.
The following figure show the resources on the board.
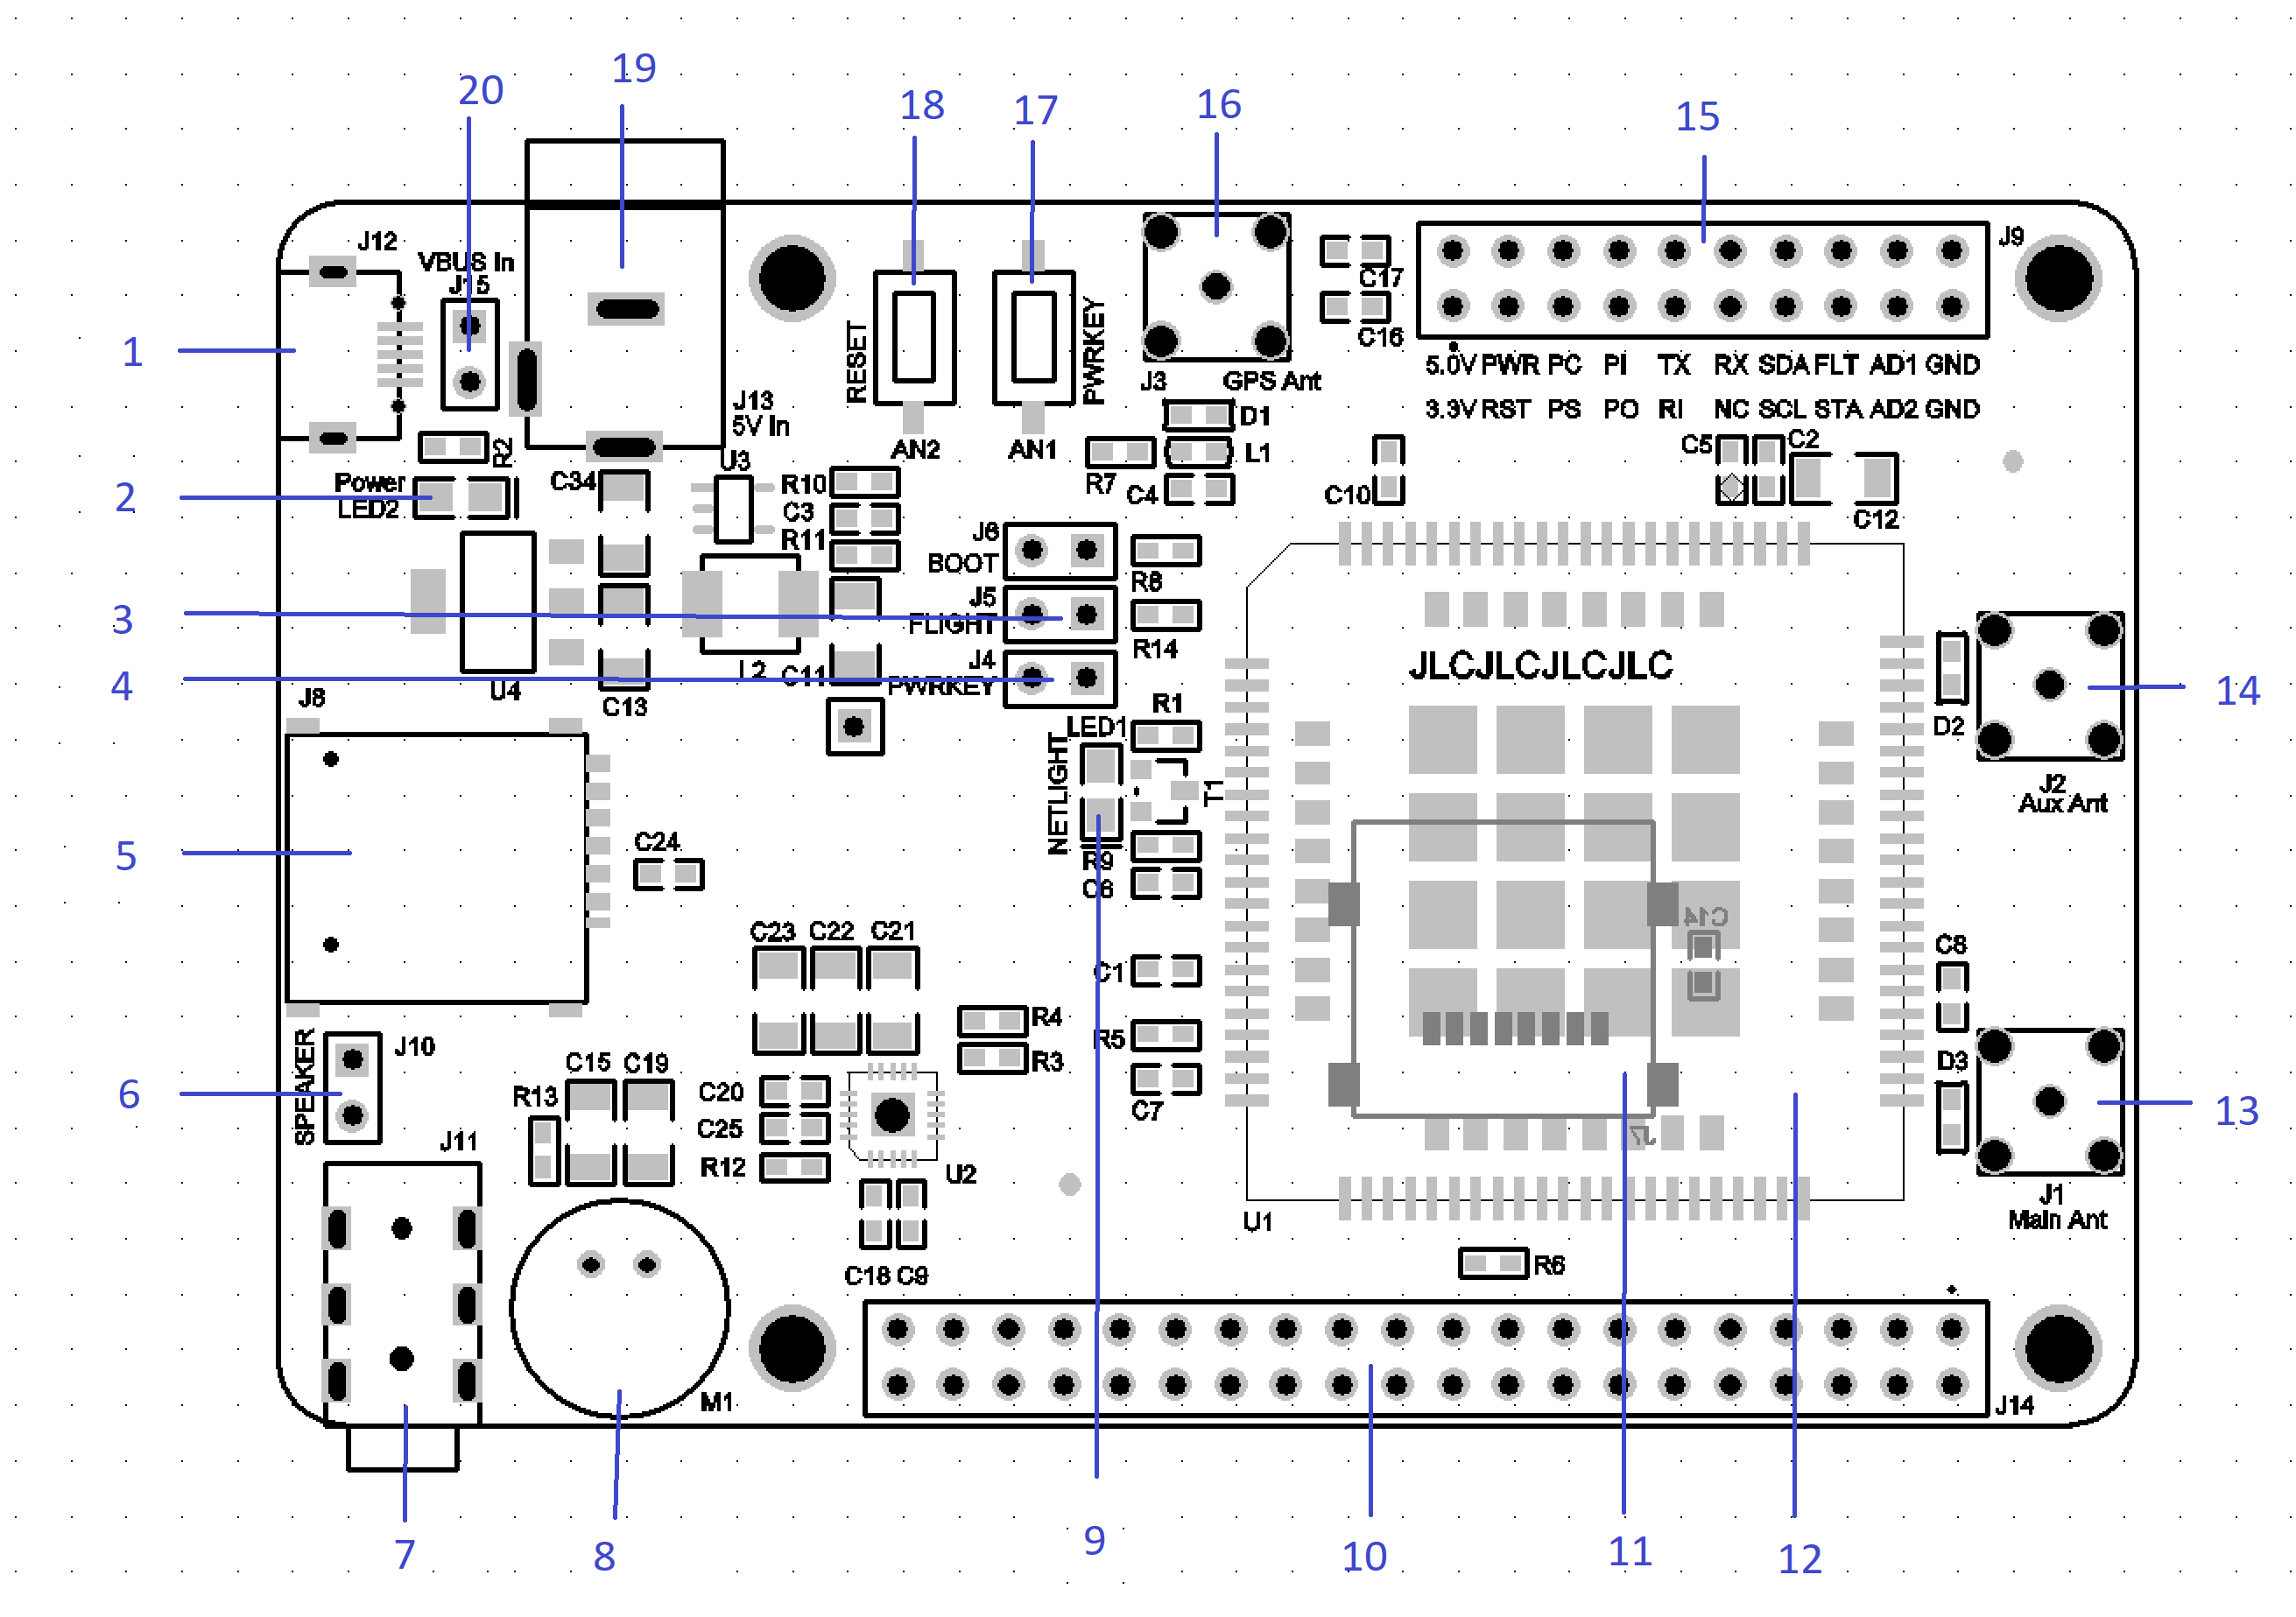
| Number | Reference | Description |
|---|---|---|
| 1 | J12 | MicroUSB connector. |
| 2 | LED2 | Power LED. |
| 3 | J5 | Connect this jumper to enable flight mode. |
| 4 | J4 | Connect this jumper to enable power. |
| 5 | J8 | NanoSIM card socket. |
| 6 | J10 | Speaker connector. |
| 7 | J11 | 3.5mm earphone connector. |
| 8 | M1 | Micphone. |
| 9 | LED1 | Net status LED. |
| 10 | J14 | 40-pin raspberry Pi connector, NO connection with other part on this board, just for stacking. |
| 11 | J7 | MicroSD card socket. |
| 12 | U1 | SIM7600 module. |
| 13 | J1 | Main antenna. |
| 14 | J2 | Aux. antenna. |
| 15 | J9 | 20-pin connector, refer to the next section for its pin assignment. |
| 16 | J3 | GPS antenna. |
| 17 | AN1 | Power button if J4 is not connect. |
| 18 | AN2 | Reset button. |
| 19 | J13 | 5V DC power supply connector. |
| 20 | J15 | Connect this jumper to supply power from MicroUSB; DO NOT connect it while using J13 to supply power. |
Most of important signals are exported by 20-pin connector J9, the following table shows its assignment.
| Number | SIM7600G-H Pin | Description |
|---|---|---|
| 1 | 3.3V | |
| 2 | 5.0V | |
| 3 | 4 | RESET |
| 4 | 3 | PWRKEY |
| 5 | 75 | PCM_SYNC |
| 6 | 76 | PCM_CLK |
| 7 | 73 | PCM_OUT |
| 8 | 74 | PCM_IN |
| 9 | 69 | UART1_RI |
| 10 | 71 | UART1_TXD |
| 11 | Not connect | |
| 12 | 68 | UART1_RXD |
| 13 | 55 | I2C_SCL |
| 14 | 56 | I2C_SDA |
| 15 | 49 | STATUS |
| 16 | 54 | FLIGHTMODE |
| 17 | 46 | ADC2 |
| 18 | 47 | ADC1 |
| 19 | GND | |
| 20 | GND |
Delivery includes:
-
1 main board.
-
2 LTE antenna.
-
1 GNSS antenna.
-
1 MicroUSB cable.
-
4 jumpers.
-
Clone the following git repo:
git clone https://github.com/strongtek/4G-modem.git -
Go to tool/windows_usb_driver_v1.02/<your_windows_version>, copy the directory to your local driver, and right click and select Install on all the *.inf in that directory, for example:
android_winusb.inf
qdbusb.inf
simfilter.inf
simgnddusb.inf
simmdm.inf
simser.inf
simwwan.inf
You will see "The operation completed successfully." message box after each driver is installed.
-
You will see the following devices in the Device Manager of Windows, after install the drivers and connect hardware.
-
Modems
- SimTech HS-USB Modem 9001
-
Network Adapters
- SimTech HS-USB WWAN Adapter 9001
-
Ports(COM & LPT)
-
SimTech HS-USB AT Port 9001 (COM*)
-
SimTech HS-USB AT Audio 9001 (COM*)
-
SimTech HS-USB AT Diagnostics 9001 (COM*)
-
SimTech HS-USB AT NMEA 9001 (COM*)
-
-
Universal Serial Bus controller
- SimTech HS-USB Composite Device 9001
The * in the COM port number will depend on your system.
-
-
Install a serial port console application that you prefer, for example MobaXterm from the following URL:
https://mobaxterm.mobatek.net/download.html
For the latest Ubuntu 24.04 LTS version, you don't need to install additional drivers for this module.
But you may like to install certain serial console application, such like minicom:
sudo apt install minicom
If your system has no other USB to serial convertor, the /dev/ttyUSB1 would be the NMEA port, and /dev/ttyUSB3 would be the port for entering AT command.
For the latest RaspberryPi OS version, you don't need to install additional drivers for this module.
But you may like to install certain serial console application, such like minicom:
sudo apt install minicom
If your system has no other USB to serial convertor, the /dev/ttyUSB1 would be the NMEA port, and /dev/ttyUSB3 would be the port for entering AT command.
You may skip certain steps according to your needs.
-
NanoSIM: insert NanoSIM card to J8.
-
MicroSD: insert a MicoSD card to J7 on the bottom side.
-
Speaker: connect a speaker to the 2-in 2.54mm connector J10.
-
Earphone: connect to 3.5mm earphone socket J11.
-
Antenna: Connect 4G antenna to main and aux antenna SMA socket J1, J2.
-
GNSS: Connect GNSS antenna to SMA socket J3.
-
PWRKEY jumper: if you want to power up by default, connect a jumper to J4.
-
Power: Most of USB host port can be used to supply this module.
If you want to power the module with USB cable, connect jumper J15, and leave the DC connector J13 unconnected.
If your USB host port can't supply enough current to this module, leave jumpper J15 unconnected, and connect an external 5V DC supply with 5mm*2.5mm(internal pole is positive) connector to J13.
-
USB: connect MicroUSB cable to host with socket J12.
After power up the module, the LED2 will be turned on.
If you leave PWRKEY jumper J4 unconnected, you have to press button AN1 PWRKEY to start the module.
If you insert a valid NanoSIM card, the NETLIGHT LED1 will start to flash after join the network.
After you've done all the hardware setup, connect to the COM port labeled with "SimTech HS-USB AT Port 9001", with the setting 115200/8/N/1 in your serial port console application, type "AT" (without quote), and you will see the module returns "OK".
AT
OK
This chapter will list some common usage examples, please refer to the following document for more information:
doc/SIM7500_SIM7600 Series_AT Command Manual_V3.00.pdf
In the fowllowing code sample, the content start from '#' is comment, do NOT enter them in the serial console.
AT+CSDVC=3      # 1: output with earphone; 3: output with speaker.
AT+CLVL=4       # range: 0~5.
ATD10086;       # replace 10086 to the number you want to call. Don't forget the ';' at the end of command.
AT+CHUP         # hang up call.
If there is a incomming call, the serial console would print "RING". In this case you can answer with command:
ATA
Send a message:
AT+CMGF=1                                       # set short message to TEXT mode
AT+CMGS="10086"                                 # replace 10086 to the number you want to text. serial console will return a promote '>'
>hello, this is a test from SIM7600 module.     # enter you text after '>', and press Ctrl+Z to send.
After sending the message, serial console will print '+CMGS: ', the will be the number of messages that have been send.
Read a message:
When there is a message comming, the serial console will print:
+CMTI: "SM",<number>" # the <number> will be the number of messages that have been received.
You can use the following command to read a message:
AT+CMGR=26              # replace "26" with the <number> of the +CMTI promote.
AT+CMGD=26              # delete the message.
AT+CGPS=1               # enable GPS.
AT+CGPSINFO             # get GPS fixed position information
AT+CGPS=0               # disable GPS.
Note:
-
It takes about 10 or more seconds before AT+CGPSINFO can get position information after AT+CGPS=1.
-
GPS antenna should be placed out door.
-
You can also get position information from the serial port labled "SimTech HS-USB AT NMEA 9001 (COM*)".
The MicroSD card should format with FAT32.
AT+FSCD=D:                      # select current directory.
AT+FSLS                         # list directories/files in current directory.
AT+CFTRANTX="D:/test.txt"       # display file content.
AT+CSDVC=3                      # 1: output with earphone; 3: output with speaker.
AT+CLVL=4                       # range: 0~5.
AT+CCMXPLAY="D:/sound.mp3",0,0  # play D:/sound.mp3.
AT+CCMXSTOP                     # stop playing.
If you install driver correctly and disable other internet connections on your computer, the Cellular adapter should be used for internet access.
Make sure it is enabled in "Control Panel->Network and Internet->Network Connections->Cellular".

-
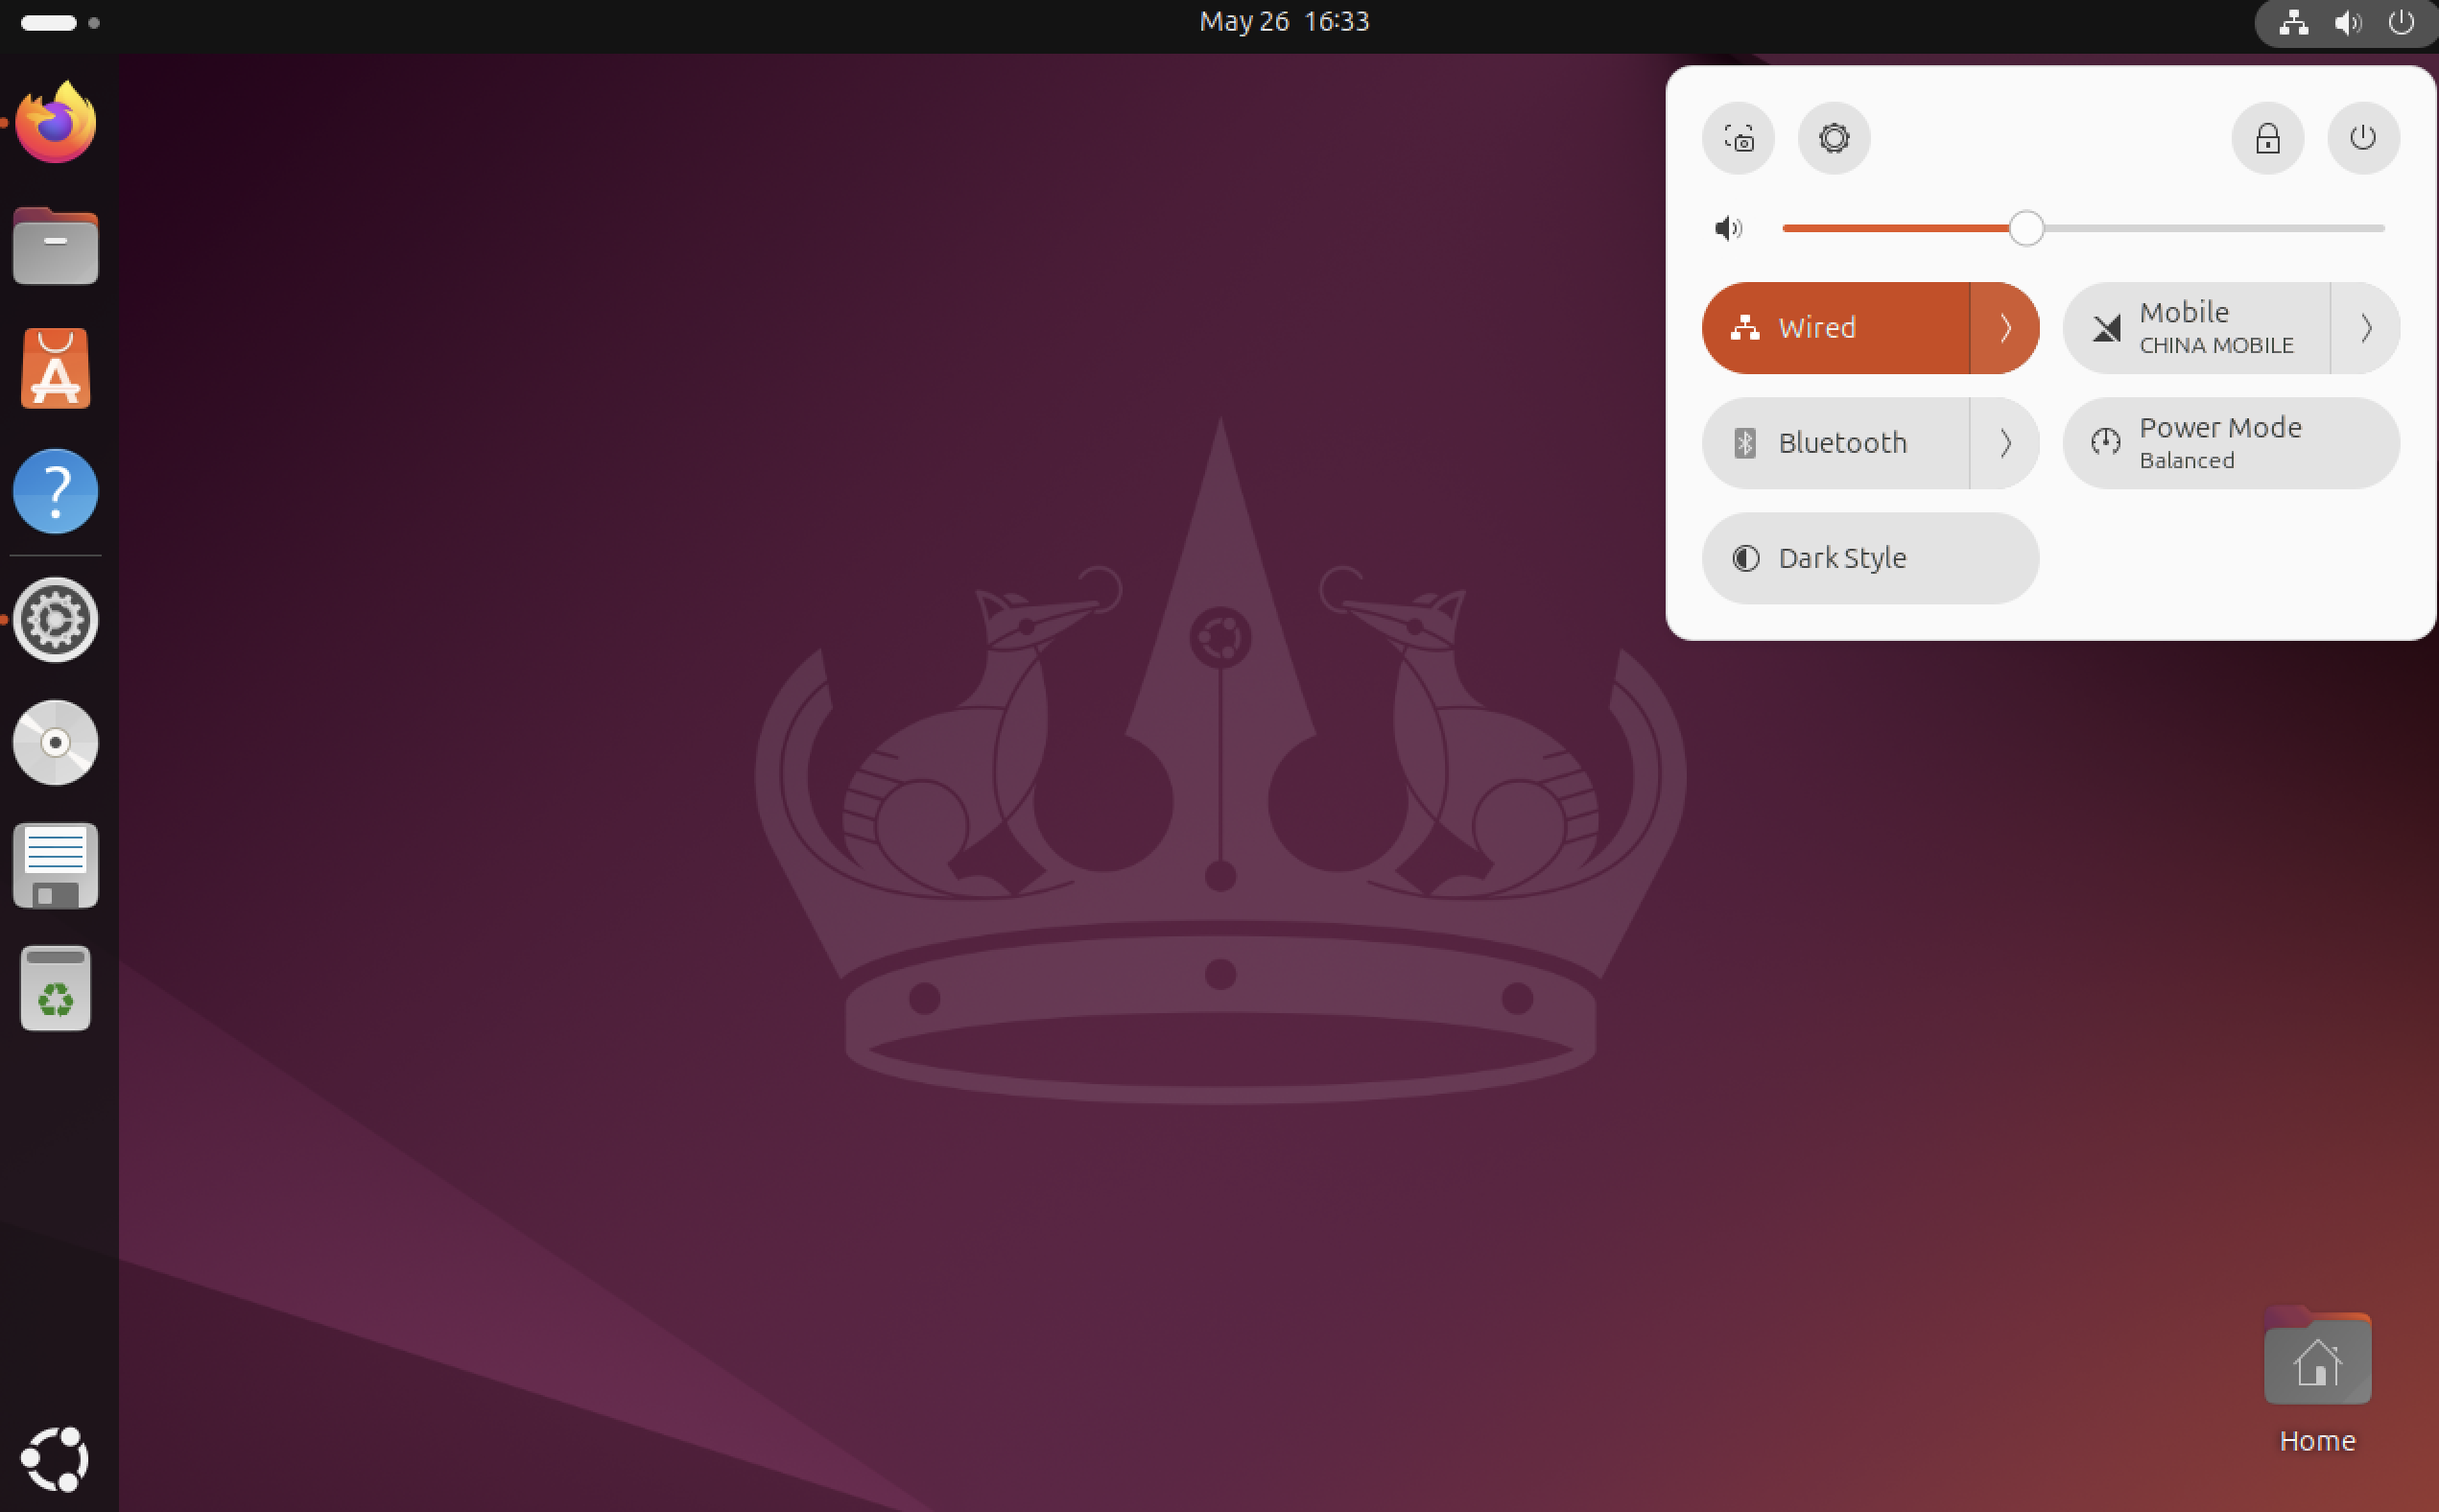
Click on the upper-right corner of the Ubuntu desktop, and then click on the gear button to open the Ubuntu settings.
-
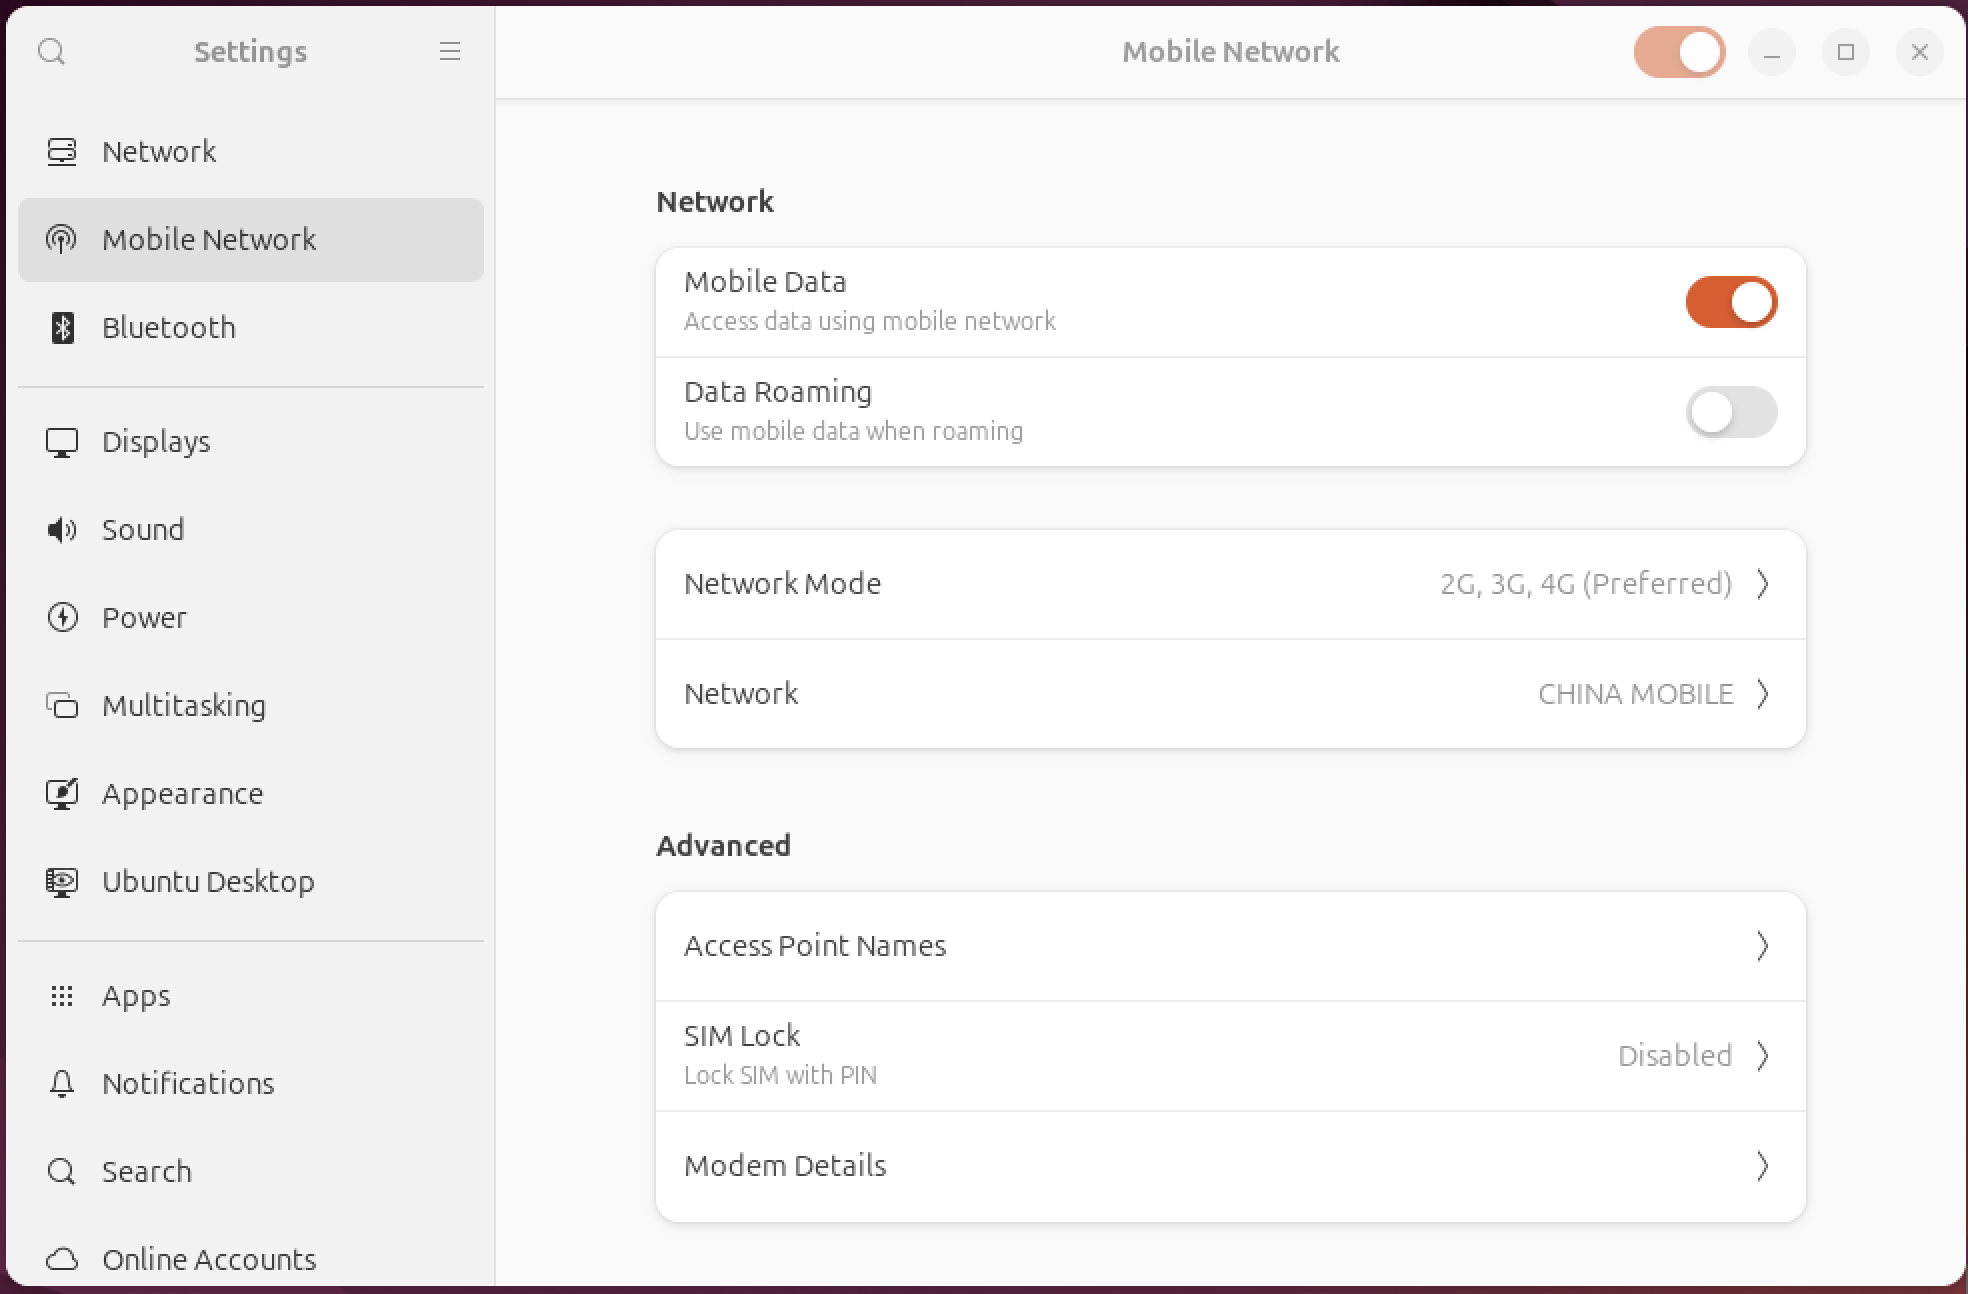
In the "Network" section, disable the wired connections.
-
In the "Mobile Network" section, enable "Mobile Network" and "Mobile Data".
-
Then you can access internet with this module.
-
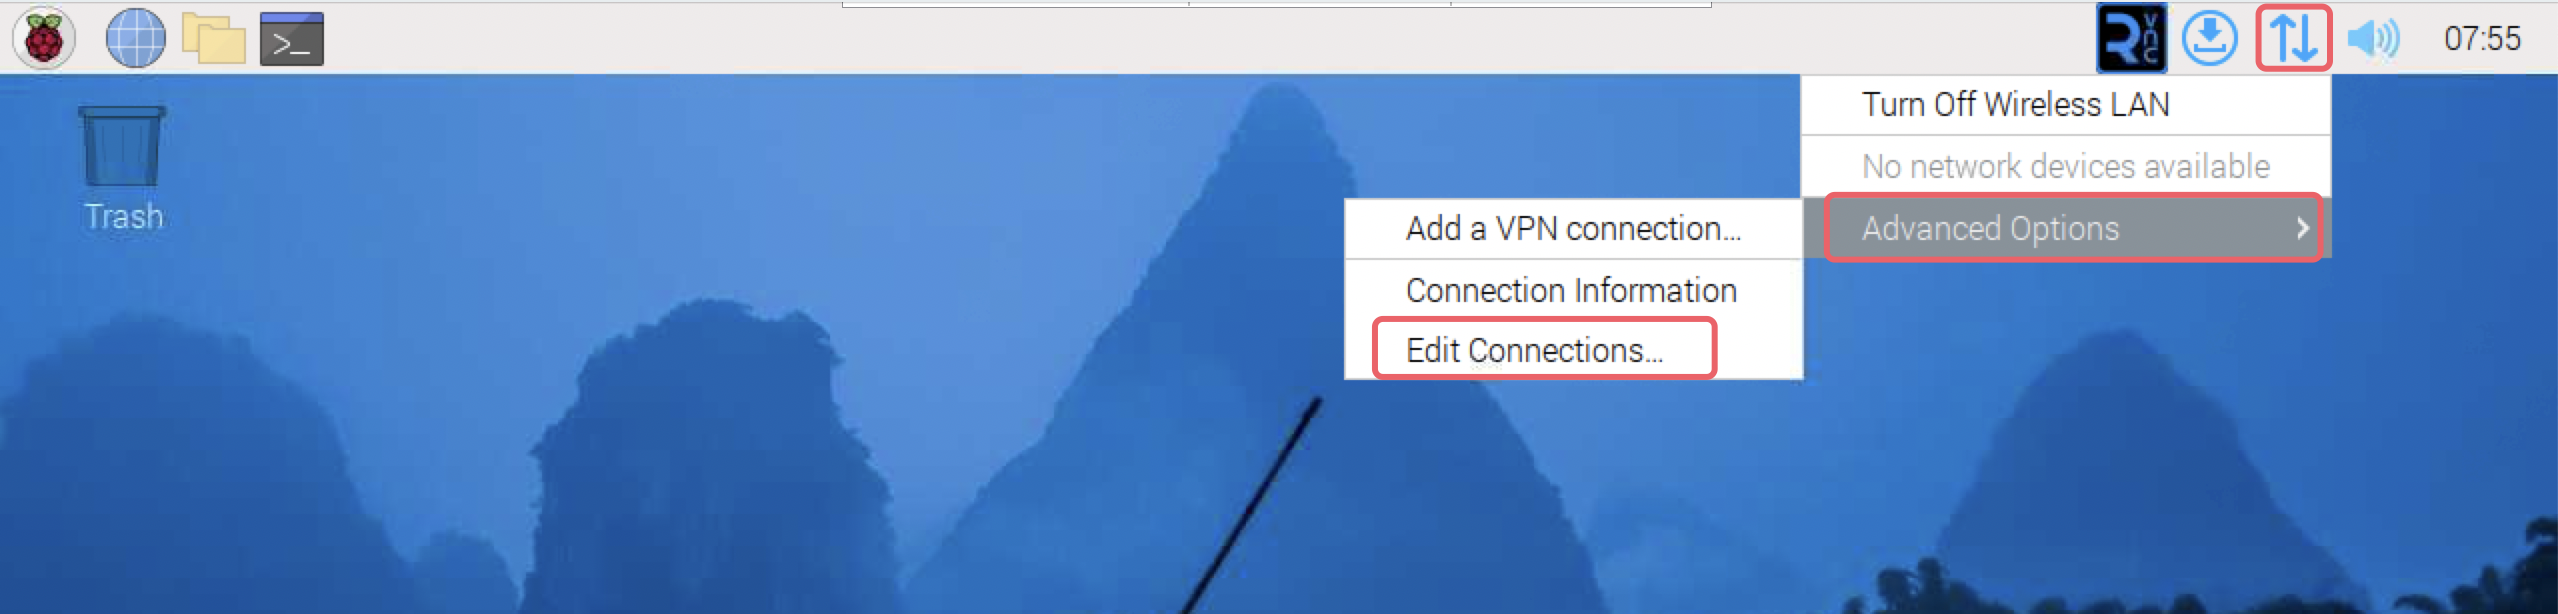
Click on the upper-right coner of the Raspberry Pi OS desktop, and then click "Advanced Option->Edit Connections...".
-
Click "+" in the "Network Connections" dialog, and then select "Mobile Broadband" in the list.
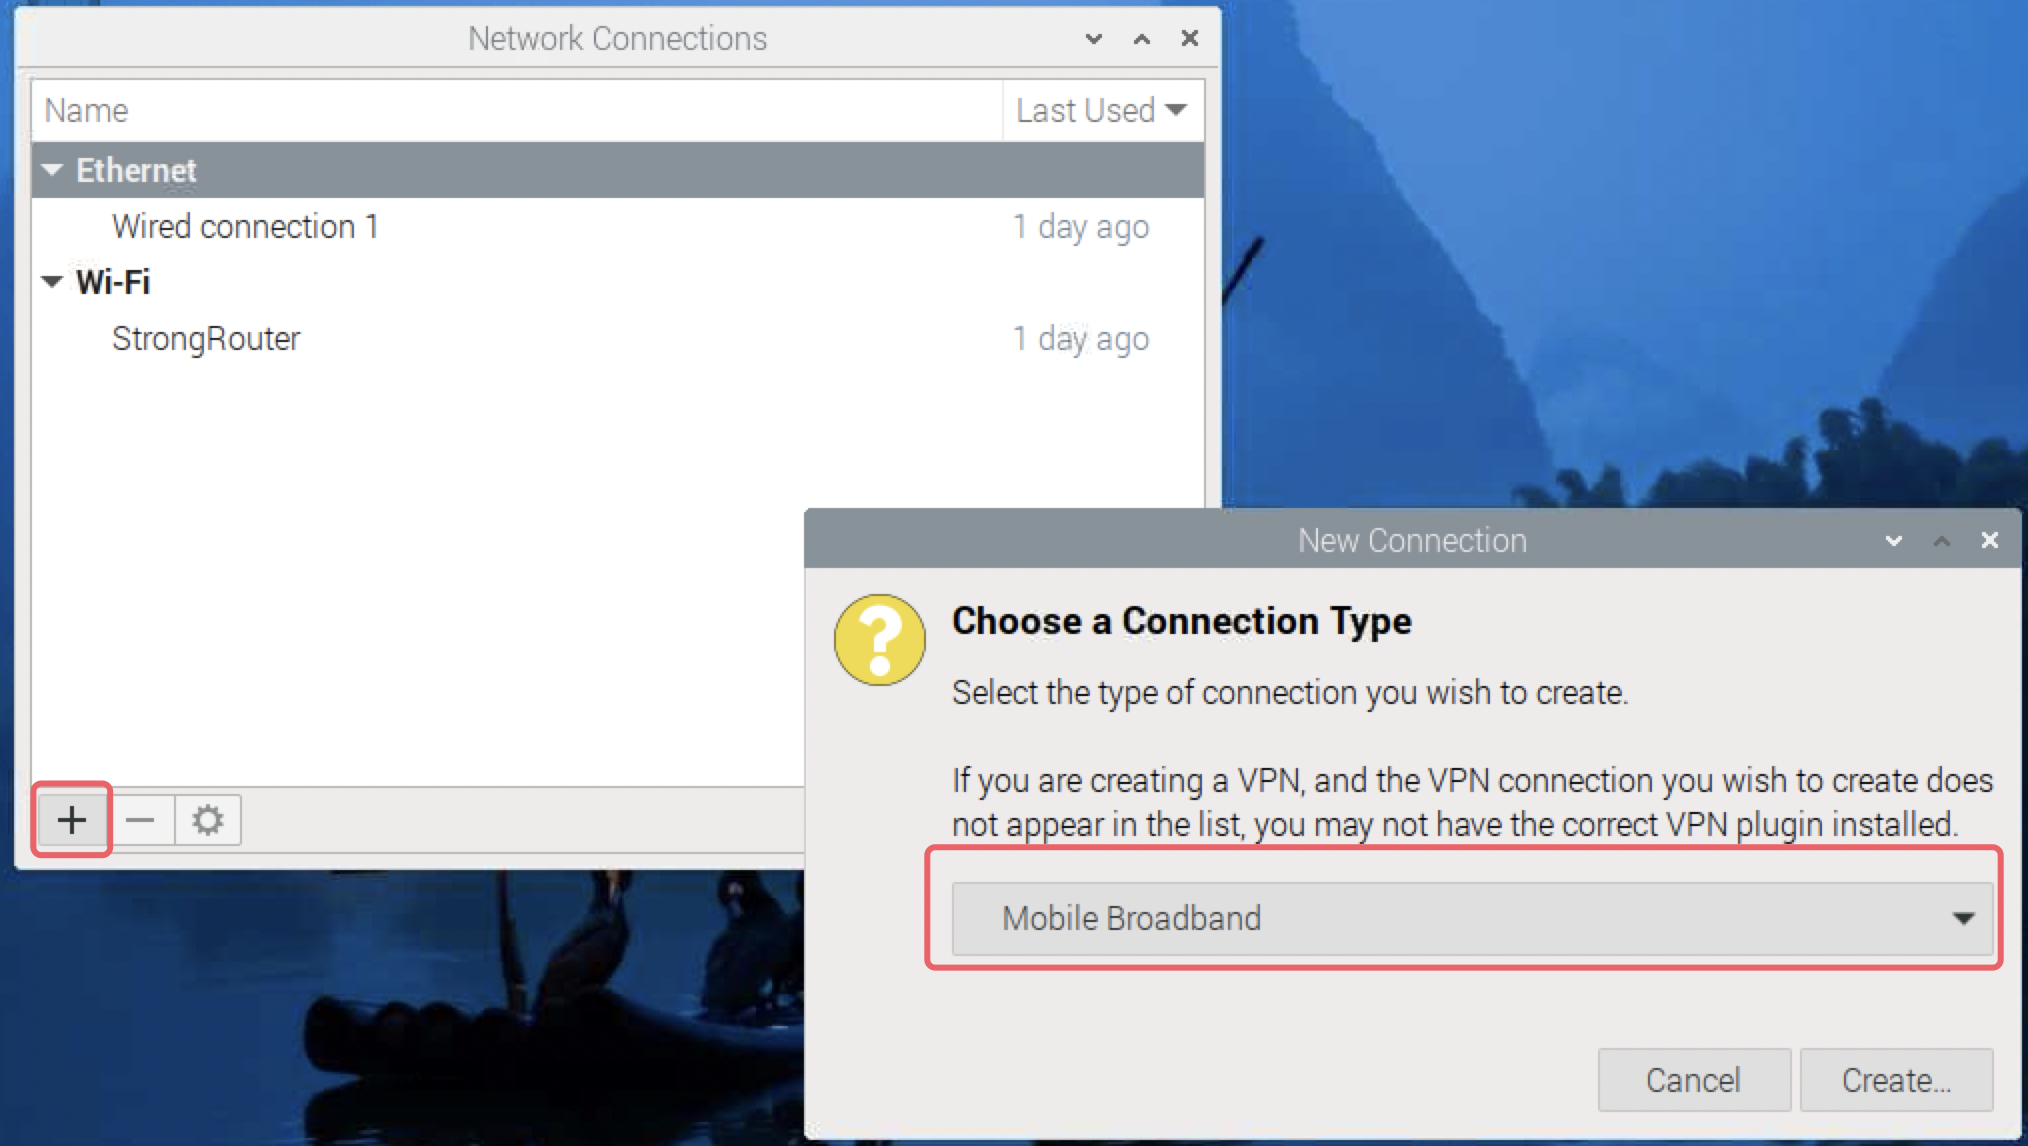
-
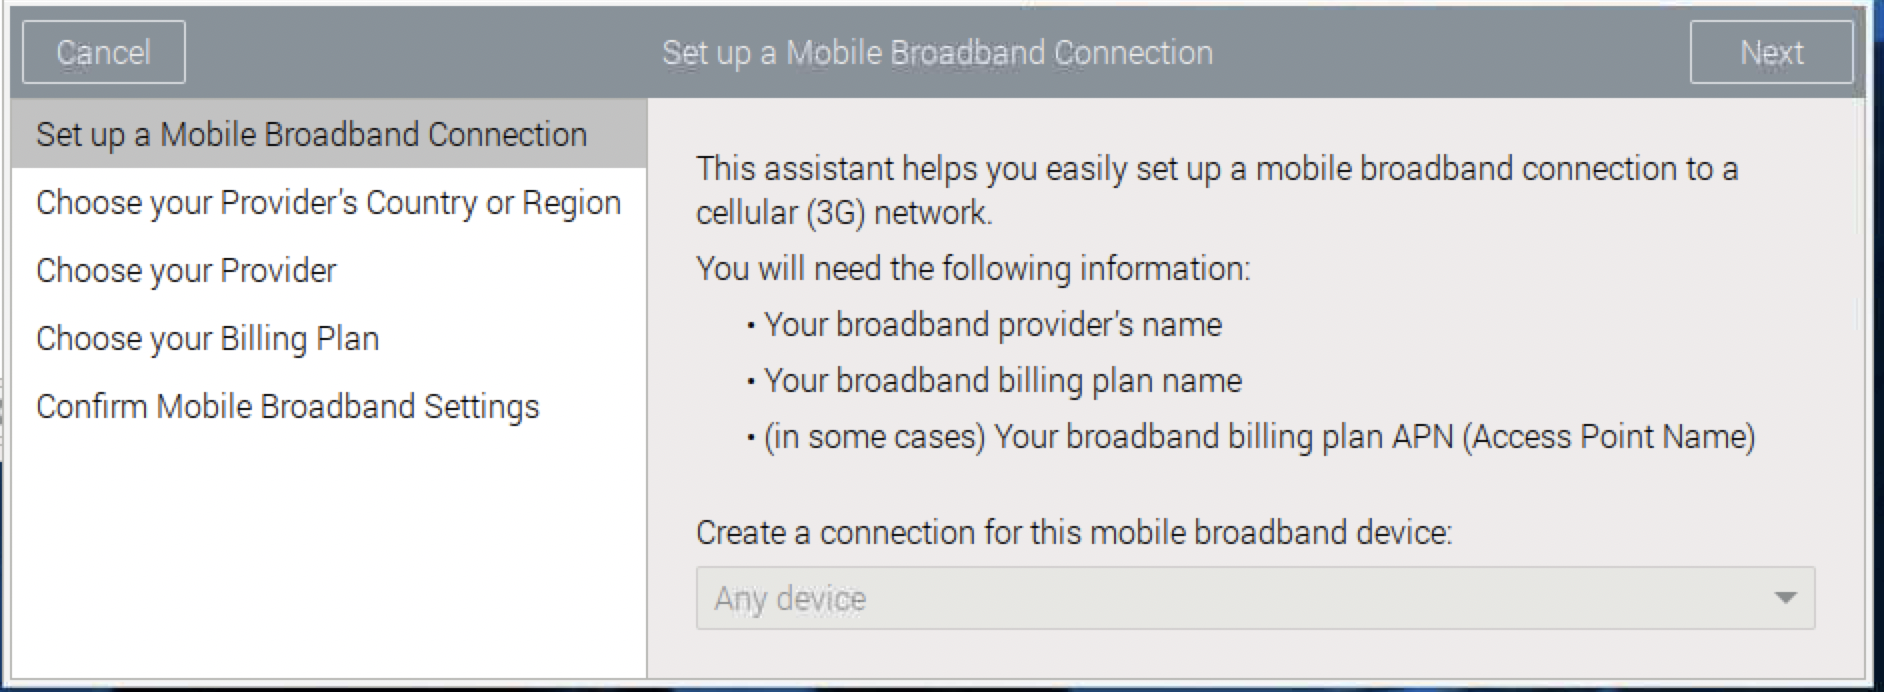
Click "Next" in the "Set up a Mobile Broadband Connection" step.
-
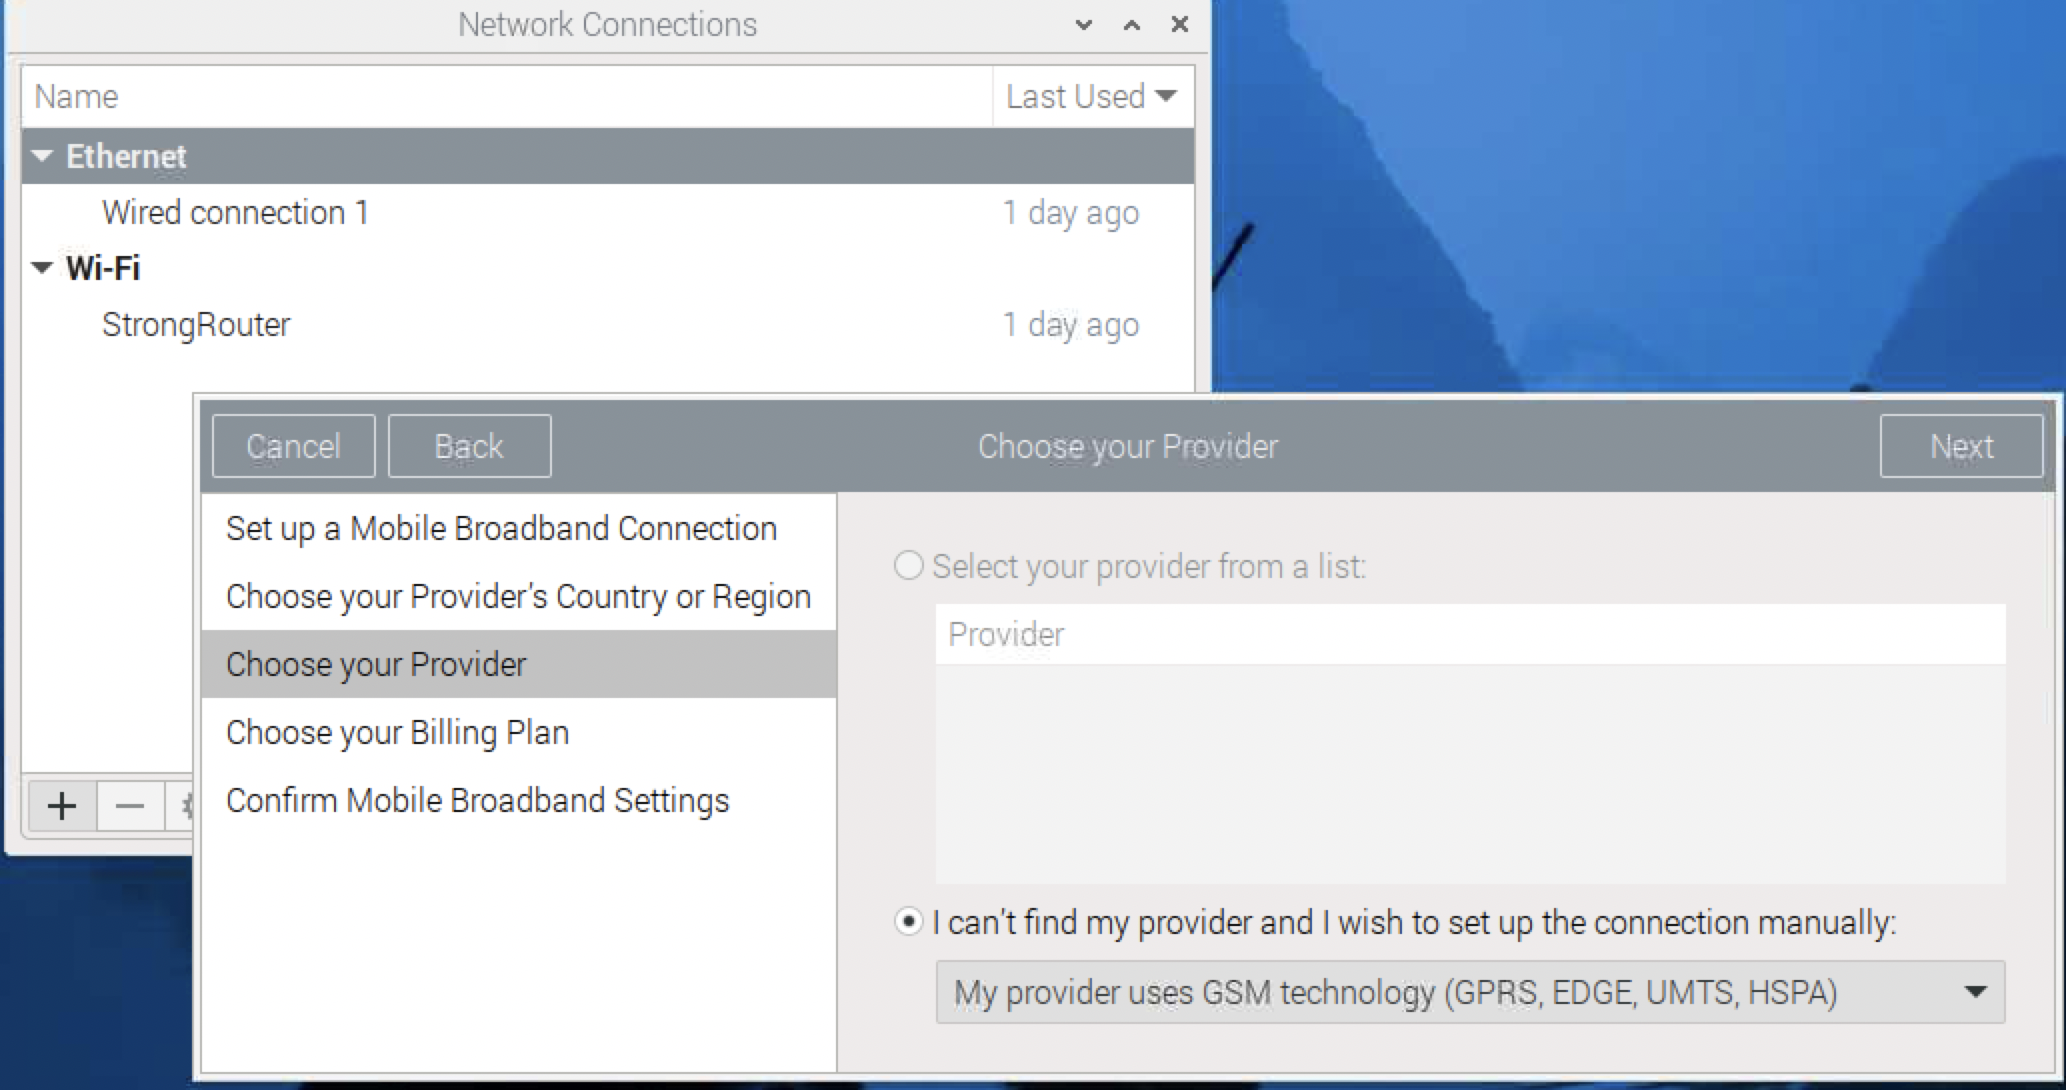
Select "My provider uses GSM technology(GPRS, EDGE, UMTS, HSPA)" in the "Choose your provider" step, and click "Next"
-
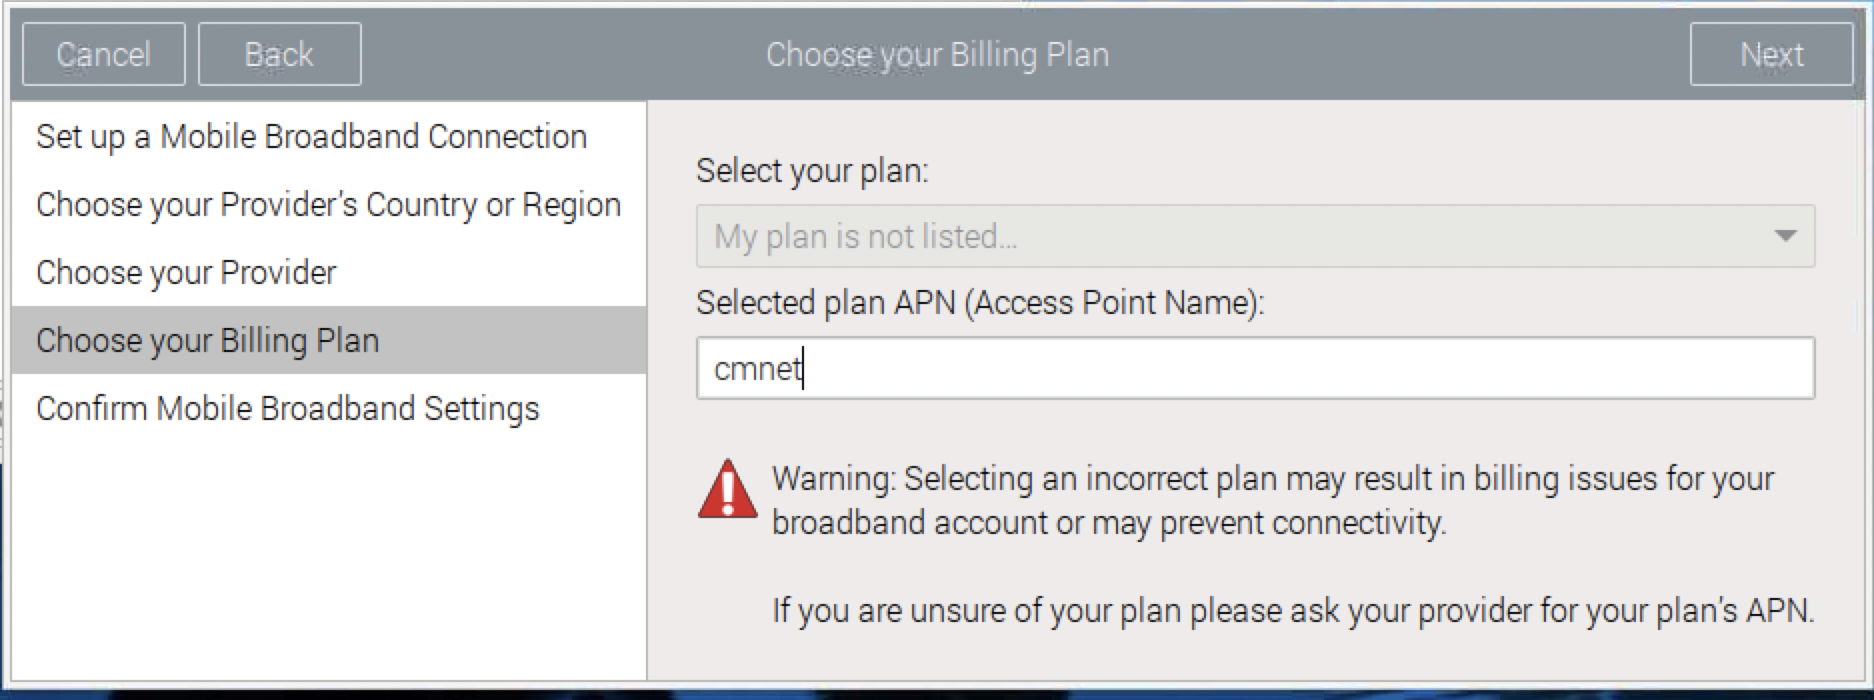
Enter the APN of your service provider, you may find this information in your phone or by searching on the internet. And then click "Next".
-
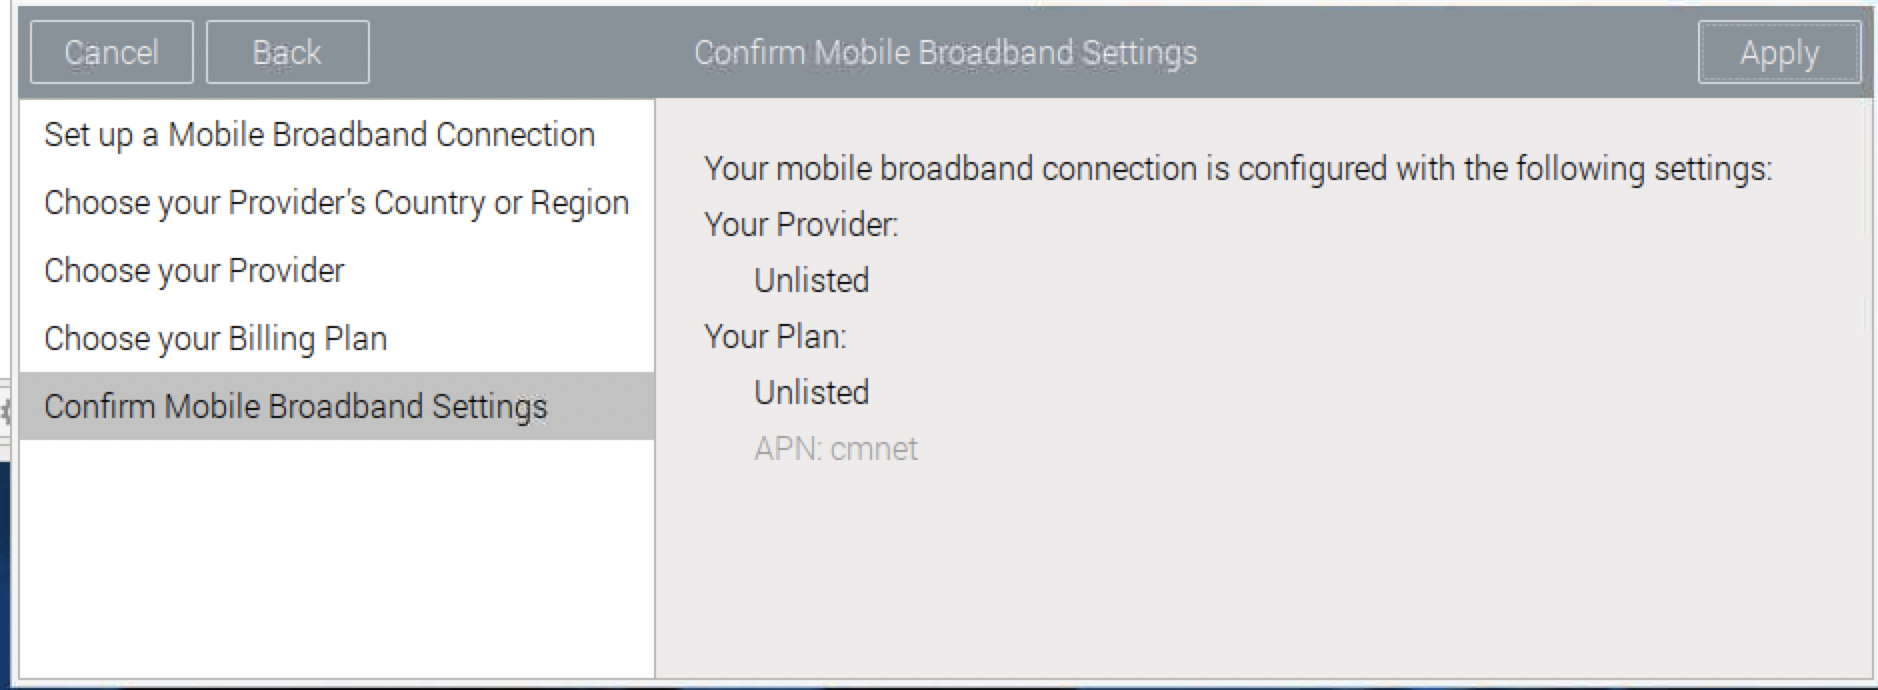
Confirm your settings, and then click "Next".
-
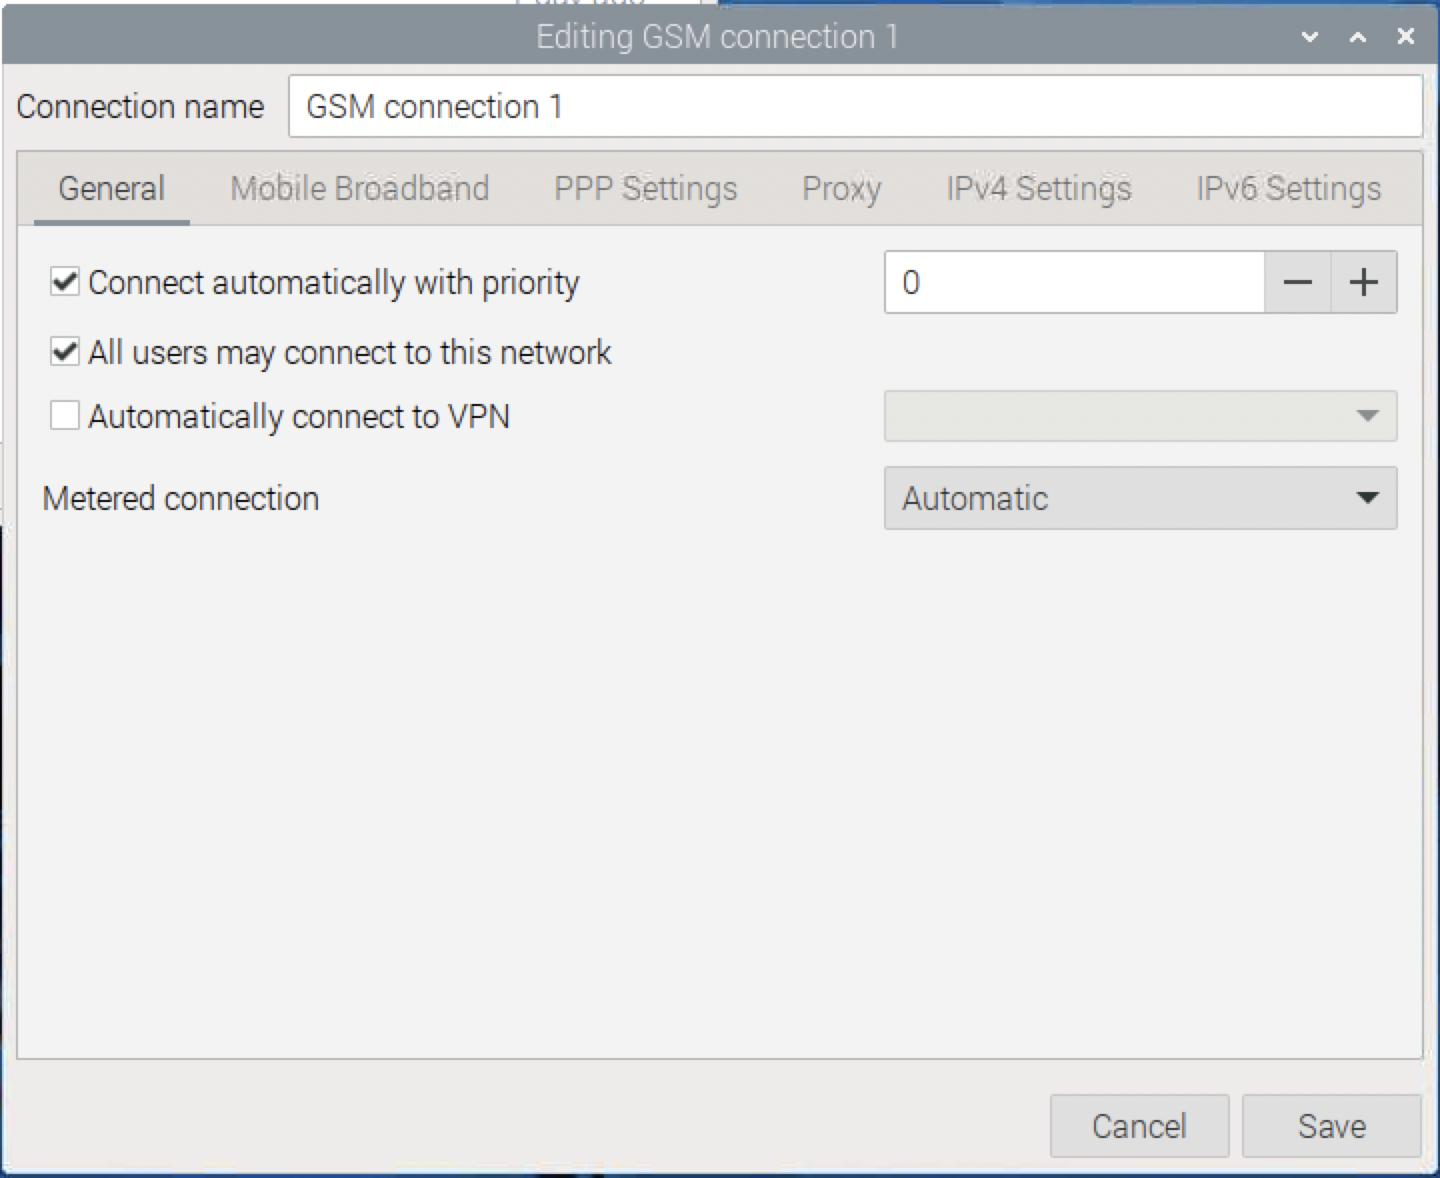
Enable "Connect automatically with priority", and click "Save".
-
You will be able to use this module to access internet, after disable other wired and WiFi connection.
In most cases, mobile ISP will assign a private IP address to your LTE modem. Your host can use this private IP address to access the internet, but you can't make other hosts connect to your host directly.
If this is the case, you may use SSH reverse tunnel to access your host from other hosts.
First, you need a SSH server with public IP address, that your host can login.
This server might be a cloud server with static public IP address, or it can be another computer in your house with dynamic public IP address.
In the later case, you may want to setup a DDNS to access your in-house server with a domain name, instead of the changable dynamic IP.
Here is the settings on the SSH server:
sudo vi /etc/ssh/sshd_config
Search "GatewayPorts" and "AllowTcpForwarding" in the config file, and make the lines like:
AllowTcpForwarding yes
GatewayPorts yes
After saving the sshd_config file, restart the SSH server.
sudo systemctl restart ssh
Then, you need to do some setup on your host:
-
Generate key files, and copy the public key to SSH server, this will make your host login into the SSH server without entering password everytime.
ssh-keygen ssh-copy-id <ssh_server_user_name>@<ssh_server_address> -
Make a quick test:
ssh -nNTv -R 0.0.0.0:2222:localhost:22 <ssh_server_user_name>@<ssh_server_address>Then you can try to access your host from the server:
ssh -p 2222 <your_host_user_name>@localhostYou can also login into your host from other hosts, not only from the SSH server:
ssh -p 2222 <your_host_user_name>@<ssh_server_address>If your SSH server is located in your house, make sure open 2222 and route it to your SSH server. This is usually done in the "Virtual server" setting page of your router.
-
Install autossh in your host, and make it run at startup.
sudo apt install autossh
sudo vi /etc/default/autossh
In the /etc/default/autossh, entering the following text:
AUTOSSH_POLL=60
AUTOSSH_FIRST_POLL=30
AUTOSSH_GATETIME=0
AUTOSSH_PORT=22000
SSH_OPTIONS="-N -R 2222:localhost:22 <ssh_server_user_name>@<ssh_server_address>"
Create a systemd setting file for autossh service:
sudo vi /etc/systemd/system/autossh.serviceIn the /etc/systemd/system/autossh.service, entering the following text:
[Unit]
Description=autossh
Wants=network-online.target
After=network-online.target

[Service]
Type=simple
User=<your_host_user_name>
EnvironmentFile=/etc/default/autossh
ExecStart=/usr/bin/autossh $SSH_OPTIONS
Restart=always
RestartSec=60

[Install]
WantedBy=multi-user.target
Start and enable the autossh service:
sudo systemctl daemon-reload
sudo systemctl start autossh
sudo systemctl enable autossh
sudo reboot
After reboot, you may check autossh is running by:
sudo systemctl status autosshNow, you can SSH to your host from any hosts that can access the SSH server:
ssh -p 2222 <your_host_user_name>@<ssh_server_address>Sometimes, your host may fail to make reverse tunnel, that might because the port number is used on the SSH server. Just kill the process that use the port number and retry.
This section is mainly copied from https://www.jeffgeerling.com/blog/2022/ssh-and-http-raspberry-pi-behind-cg-nat, thanks Jeff!