Multi purpose "OnAir Lamp" solution targeted for use in professional broadcast environments https://www.astrastudio.de/en/onairscreen/
The supported way to run OnAirScreen is an official shop build, not this repository.
Ready-to-run packages for Windows, macOS, Linux, and Raspberry Pi (including a preconfigured SD-card image with GPIO) are sold at https://www.astrastudio.de/shop/. Shop builds are signed, include updates via the customer portal, and need no developer toolchain. Buying a licence is the best way to support continued development by an independent developer.
If you need extended support, please contact me.
If you already use OnAirScreen and want to help beyond a shop licence, donations are appreciated.



This repository is source-available under OASL 1.0 for transparency, audit, forks, and contributors — not as an installer.
Building from source is allowed (private and internal use of self-compiled binaries) but unsupported for studio use. Contributors need Python 3.11+ and the stack in requirements.txt. A generic Python run does not include shop updates or the packaged Raspberry Pi GPIO extras. Compiled/binary redistribution still needs written permission.
OnAirScreen is provided under the OnAirScreen Source-Available License (OASL 1.0). See [LICENSE](LICENSE). This is not an OSI open-source license.
You may:
- read, copy, modify, and redistribute the source code (keep copyright and license notices)
- compile your own builds and use them privately or internally, including commercial internal use
- fork the project
You may not, without prior written permission from the copyright holder:
- redistribute compiled or executable versions (installers, packages, container images, GitHub Releases, and similar)
- sell or give away binaries, including copies of official shop builds
- present a modified version as an official OnAirScreen release
Official precompiled builds are sold by the copyright holder. Third-party libraries and assets stay under their own licenses; see [THIRD_PARTY_LICENSES.md](THIRD_PARTY_LICENSES.md).
Complete user manuals covering all settings, hotkeys, and remote control:
- USER_MANUAL.md – English
- BEDIENUNGSANLEITUNG.md – Deutsch




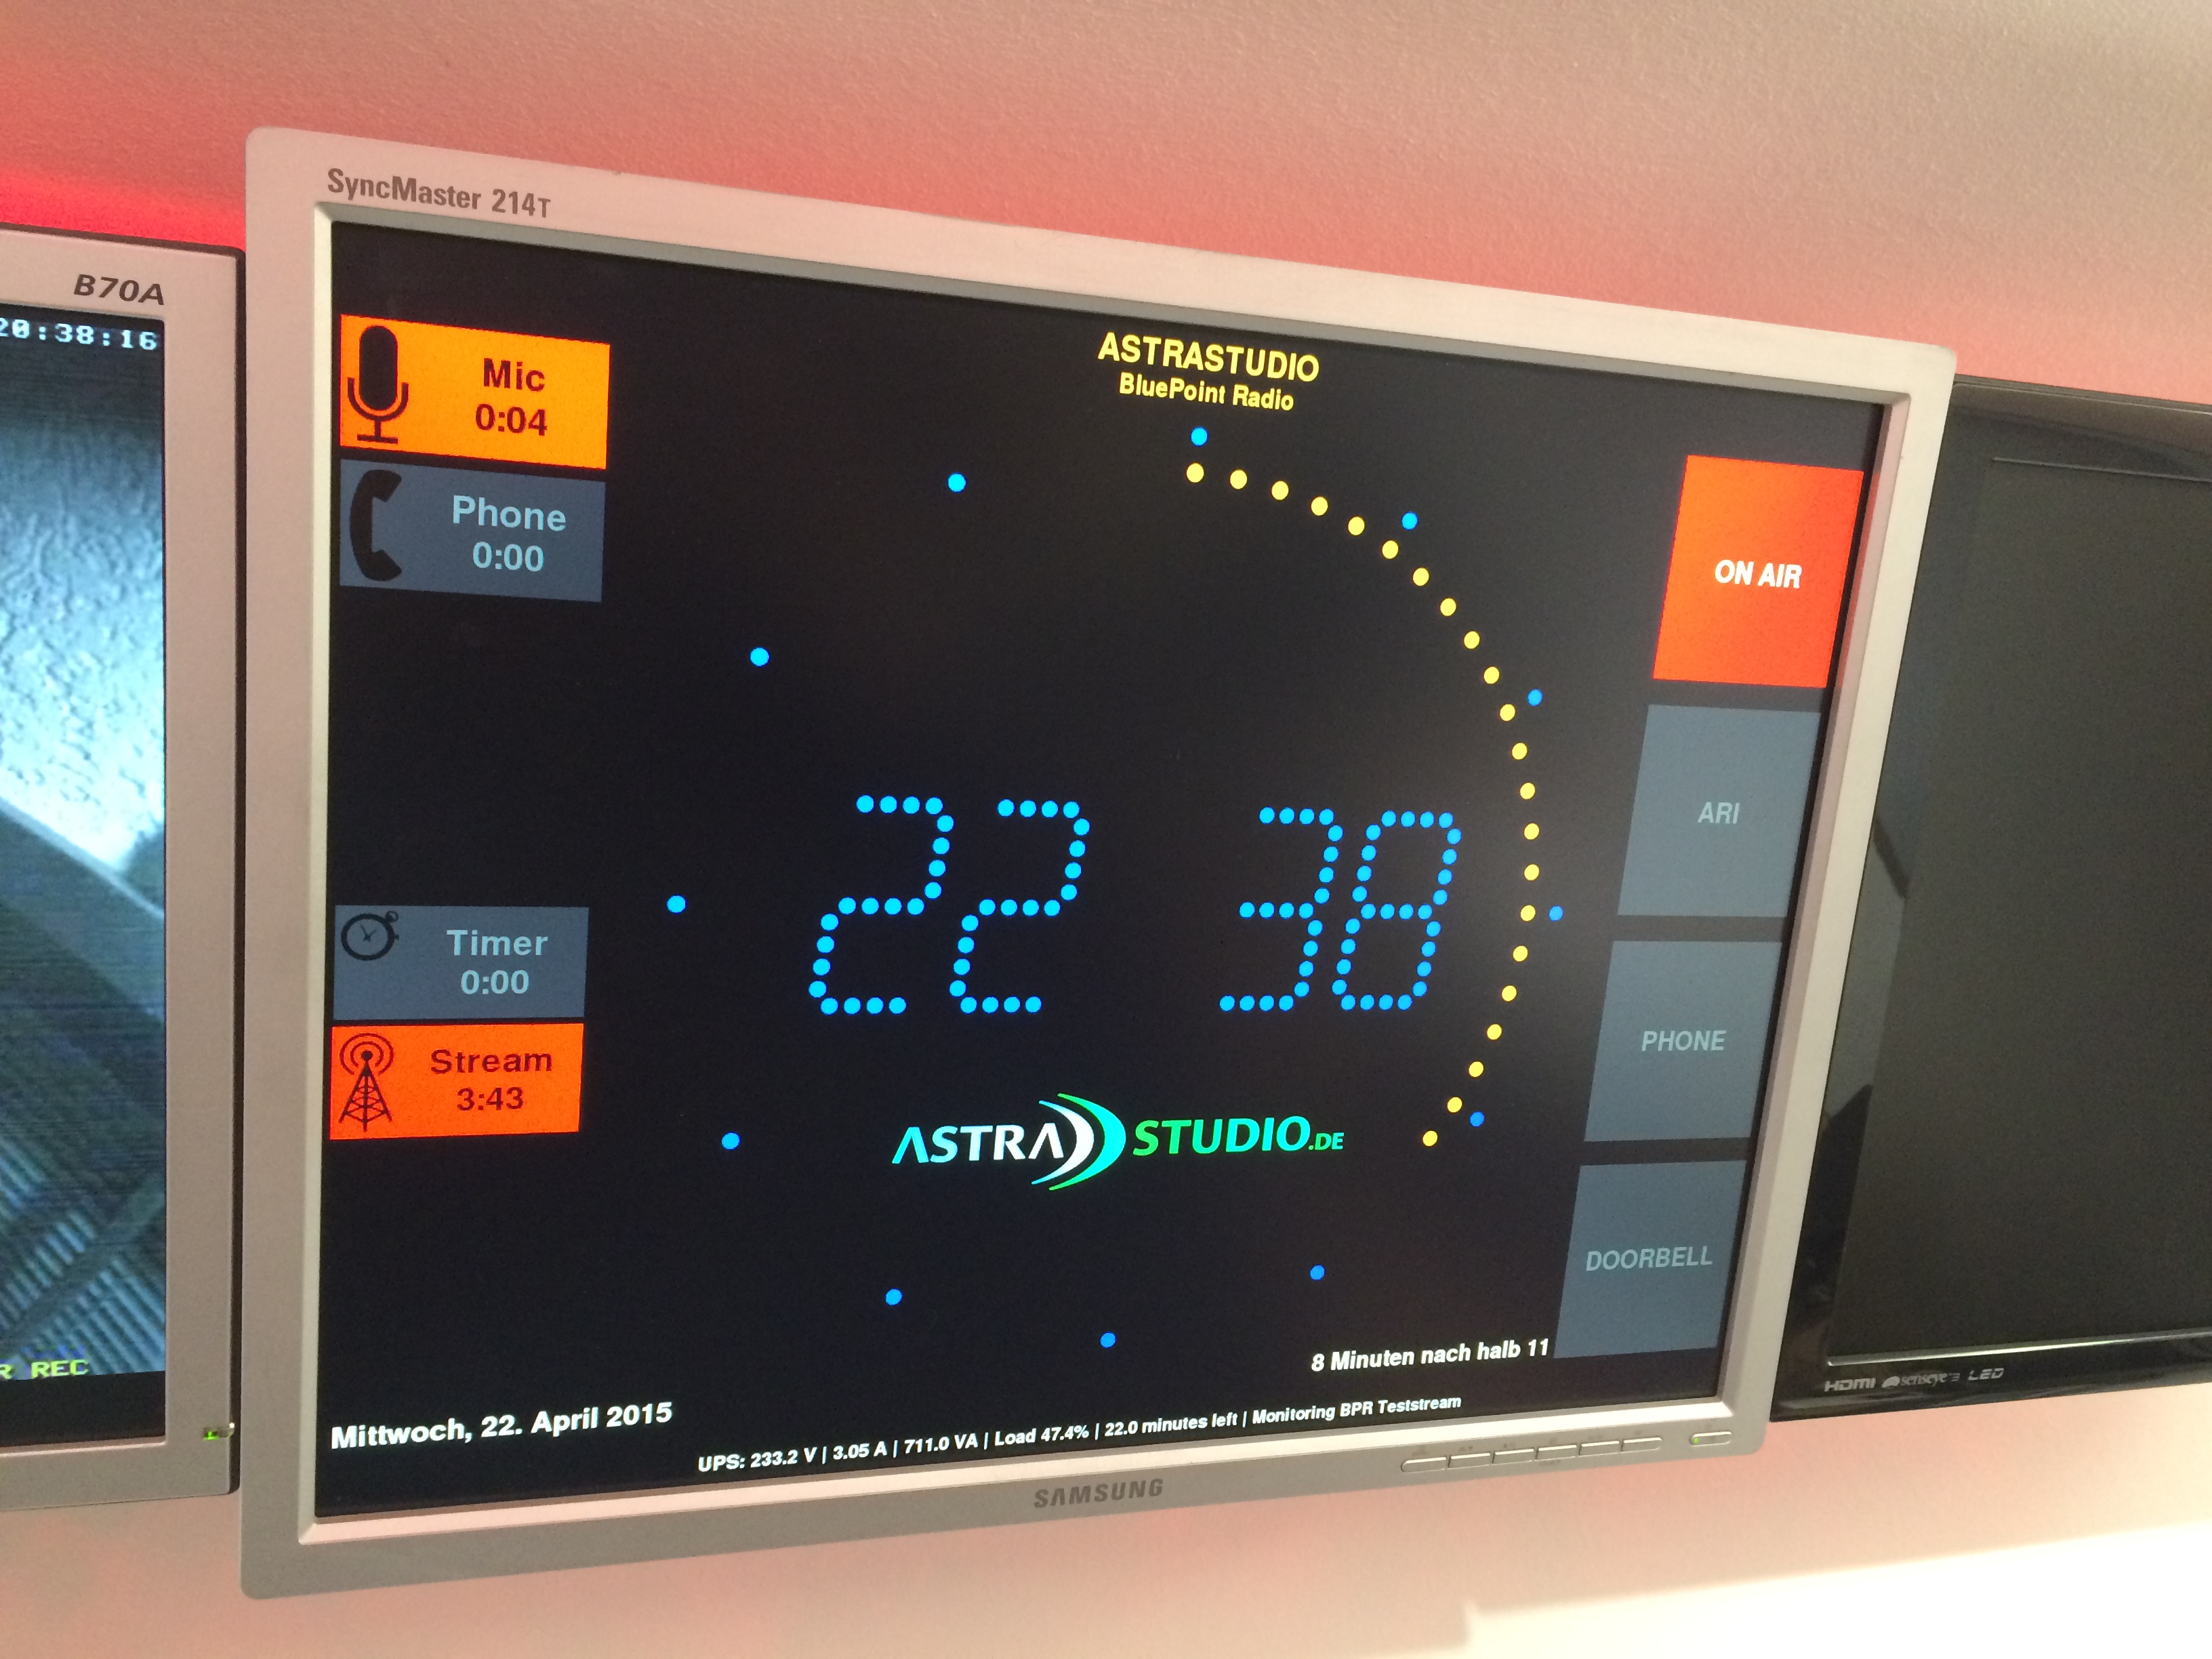
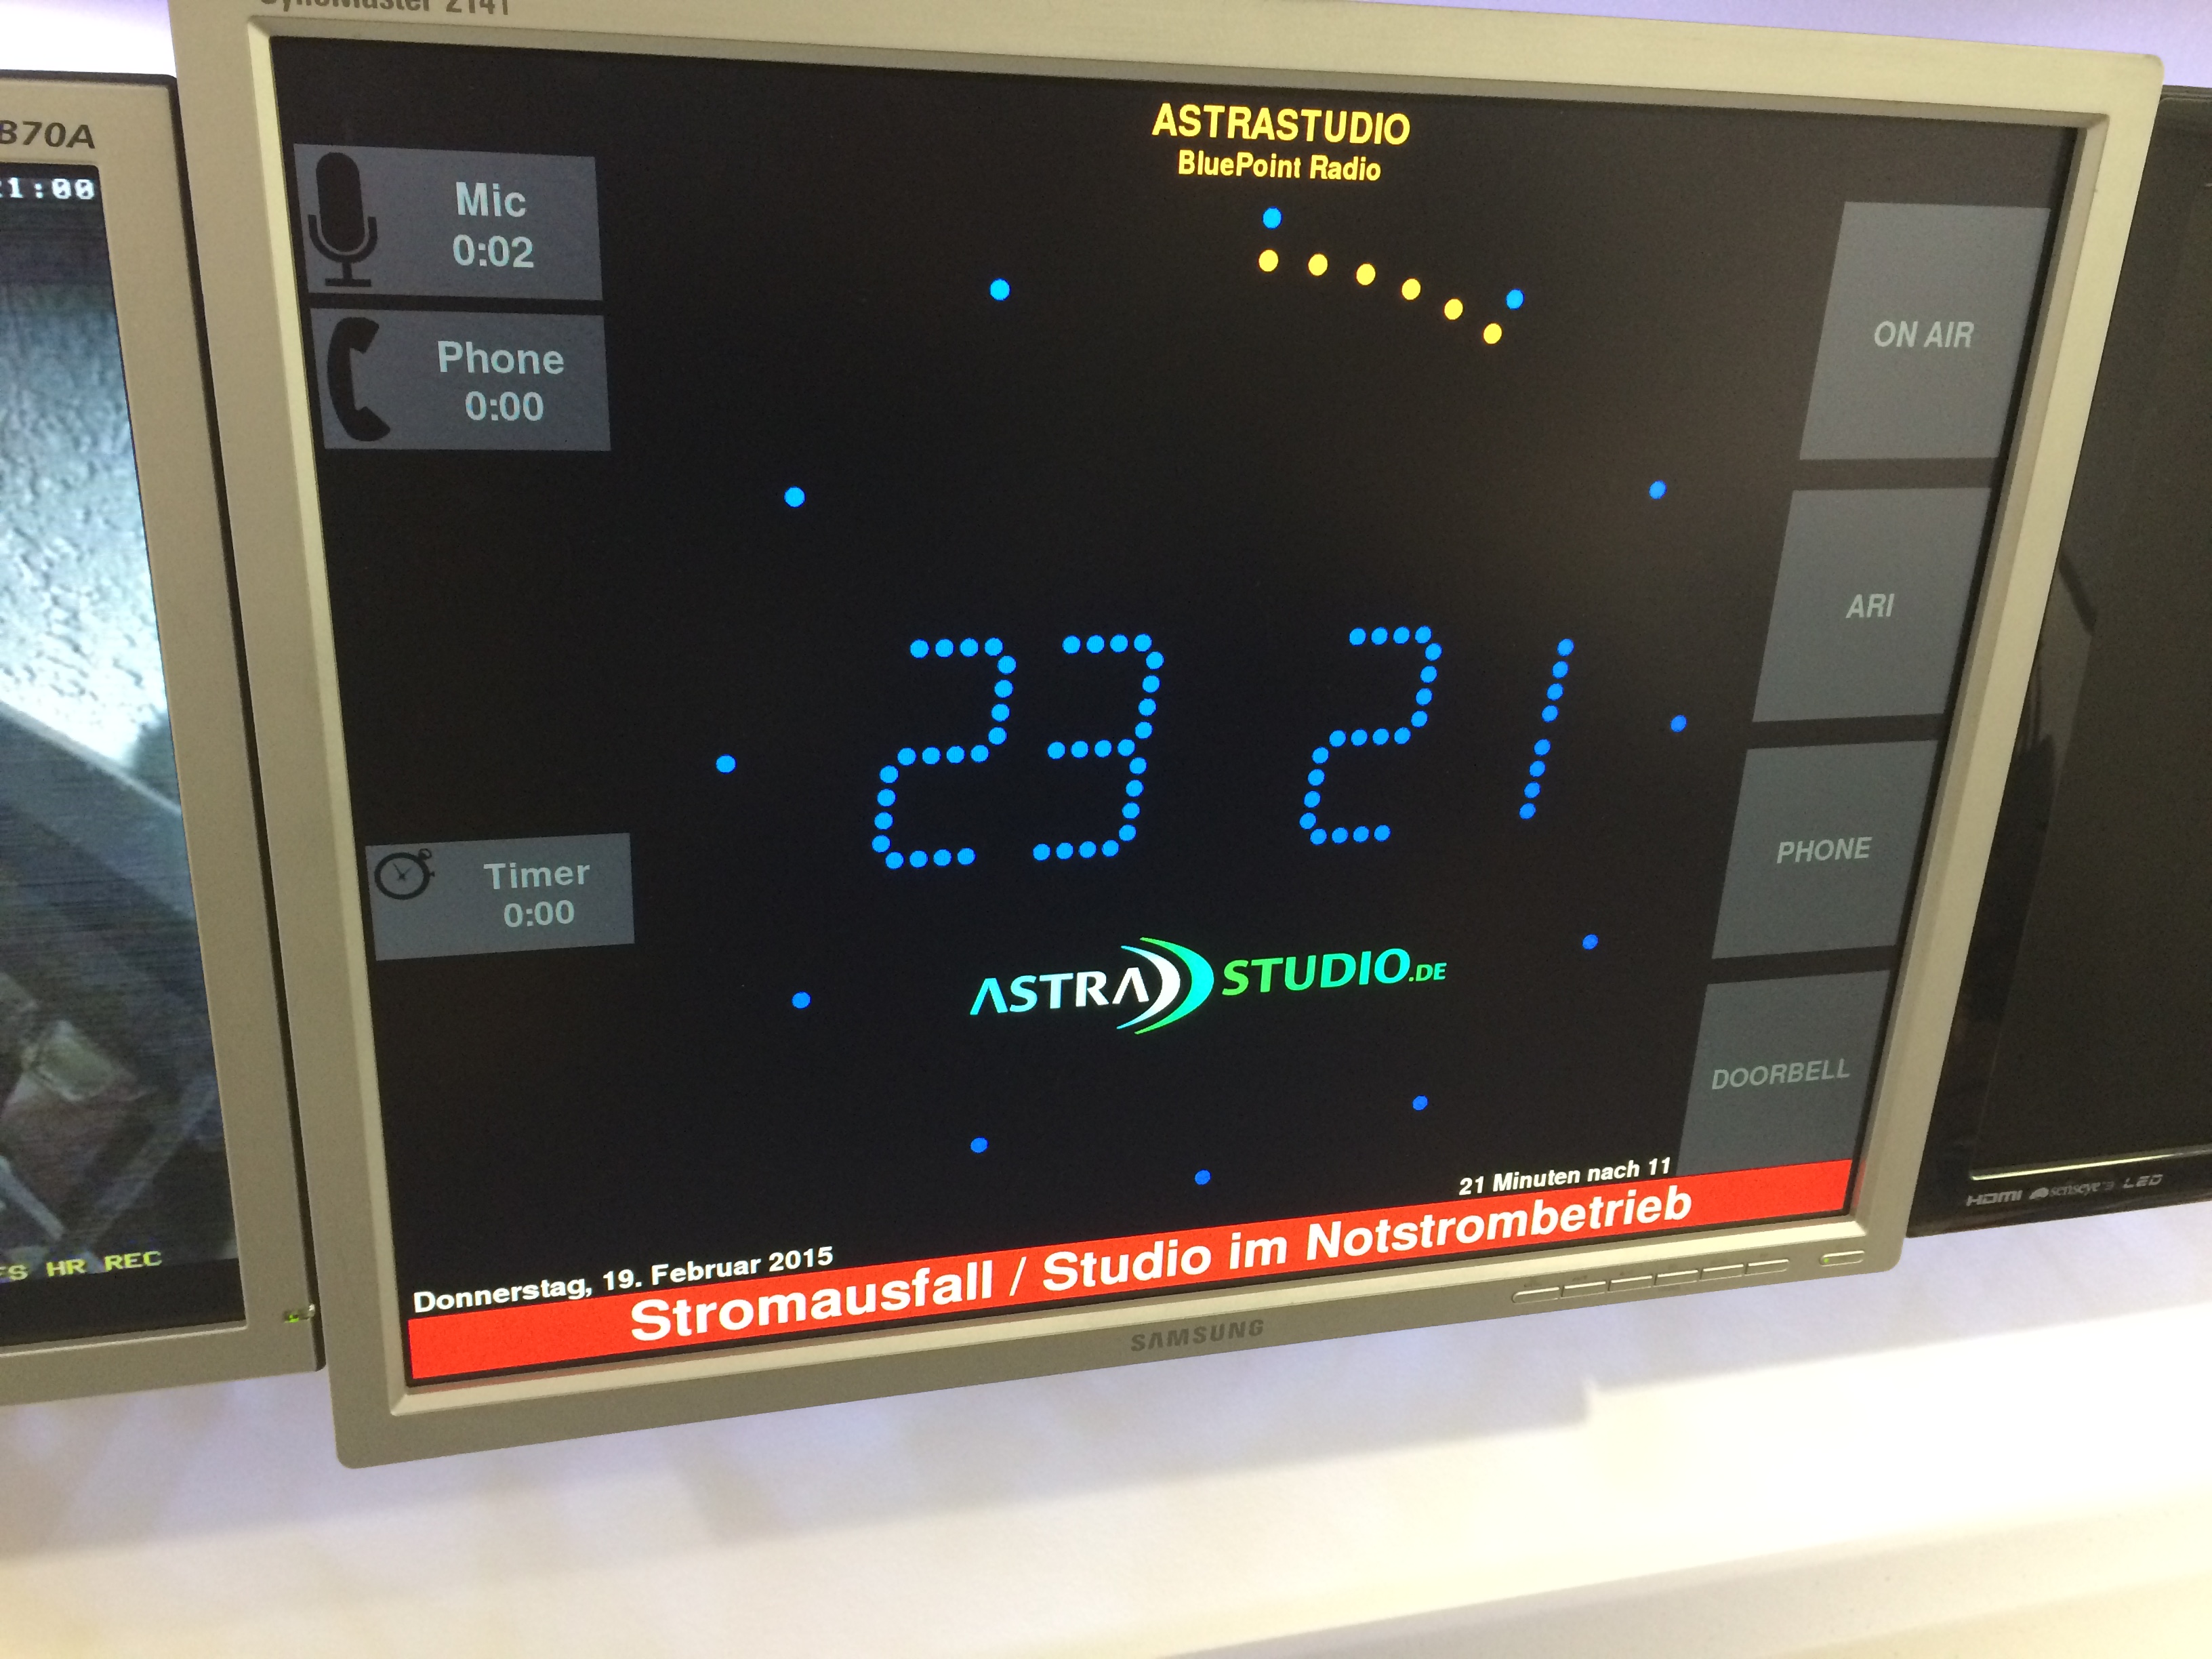
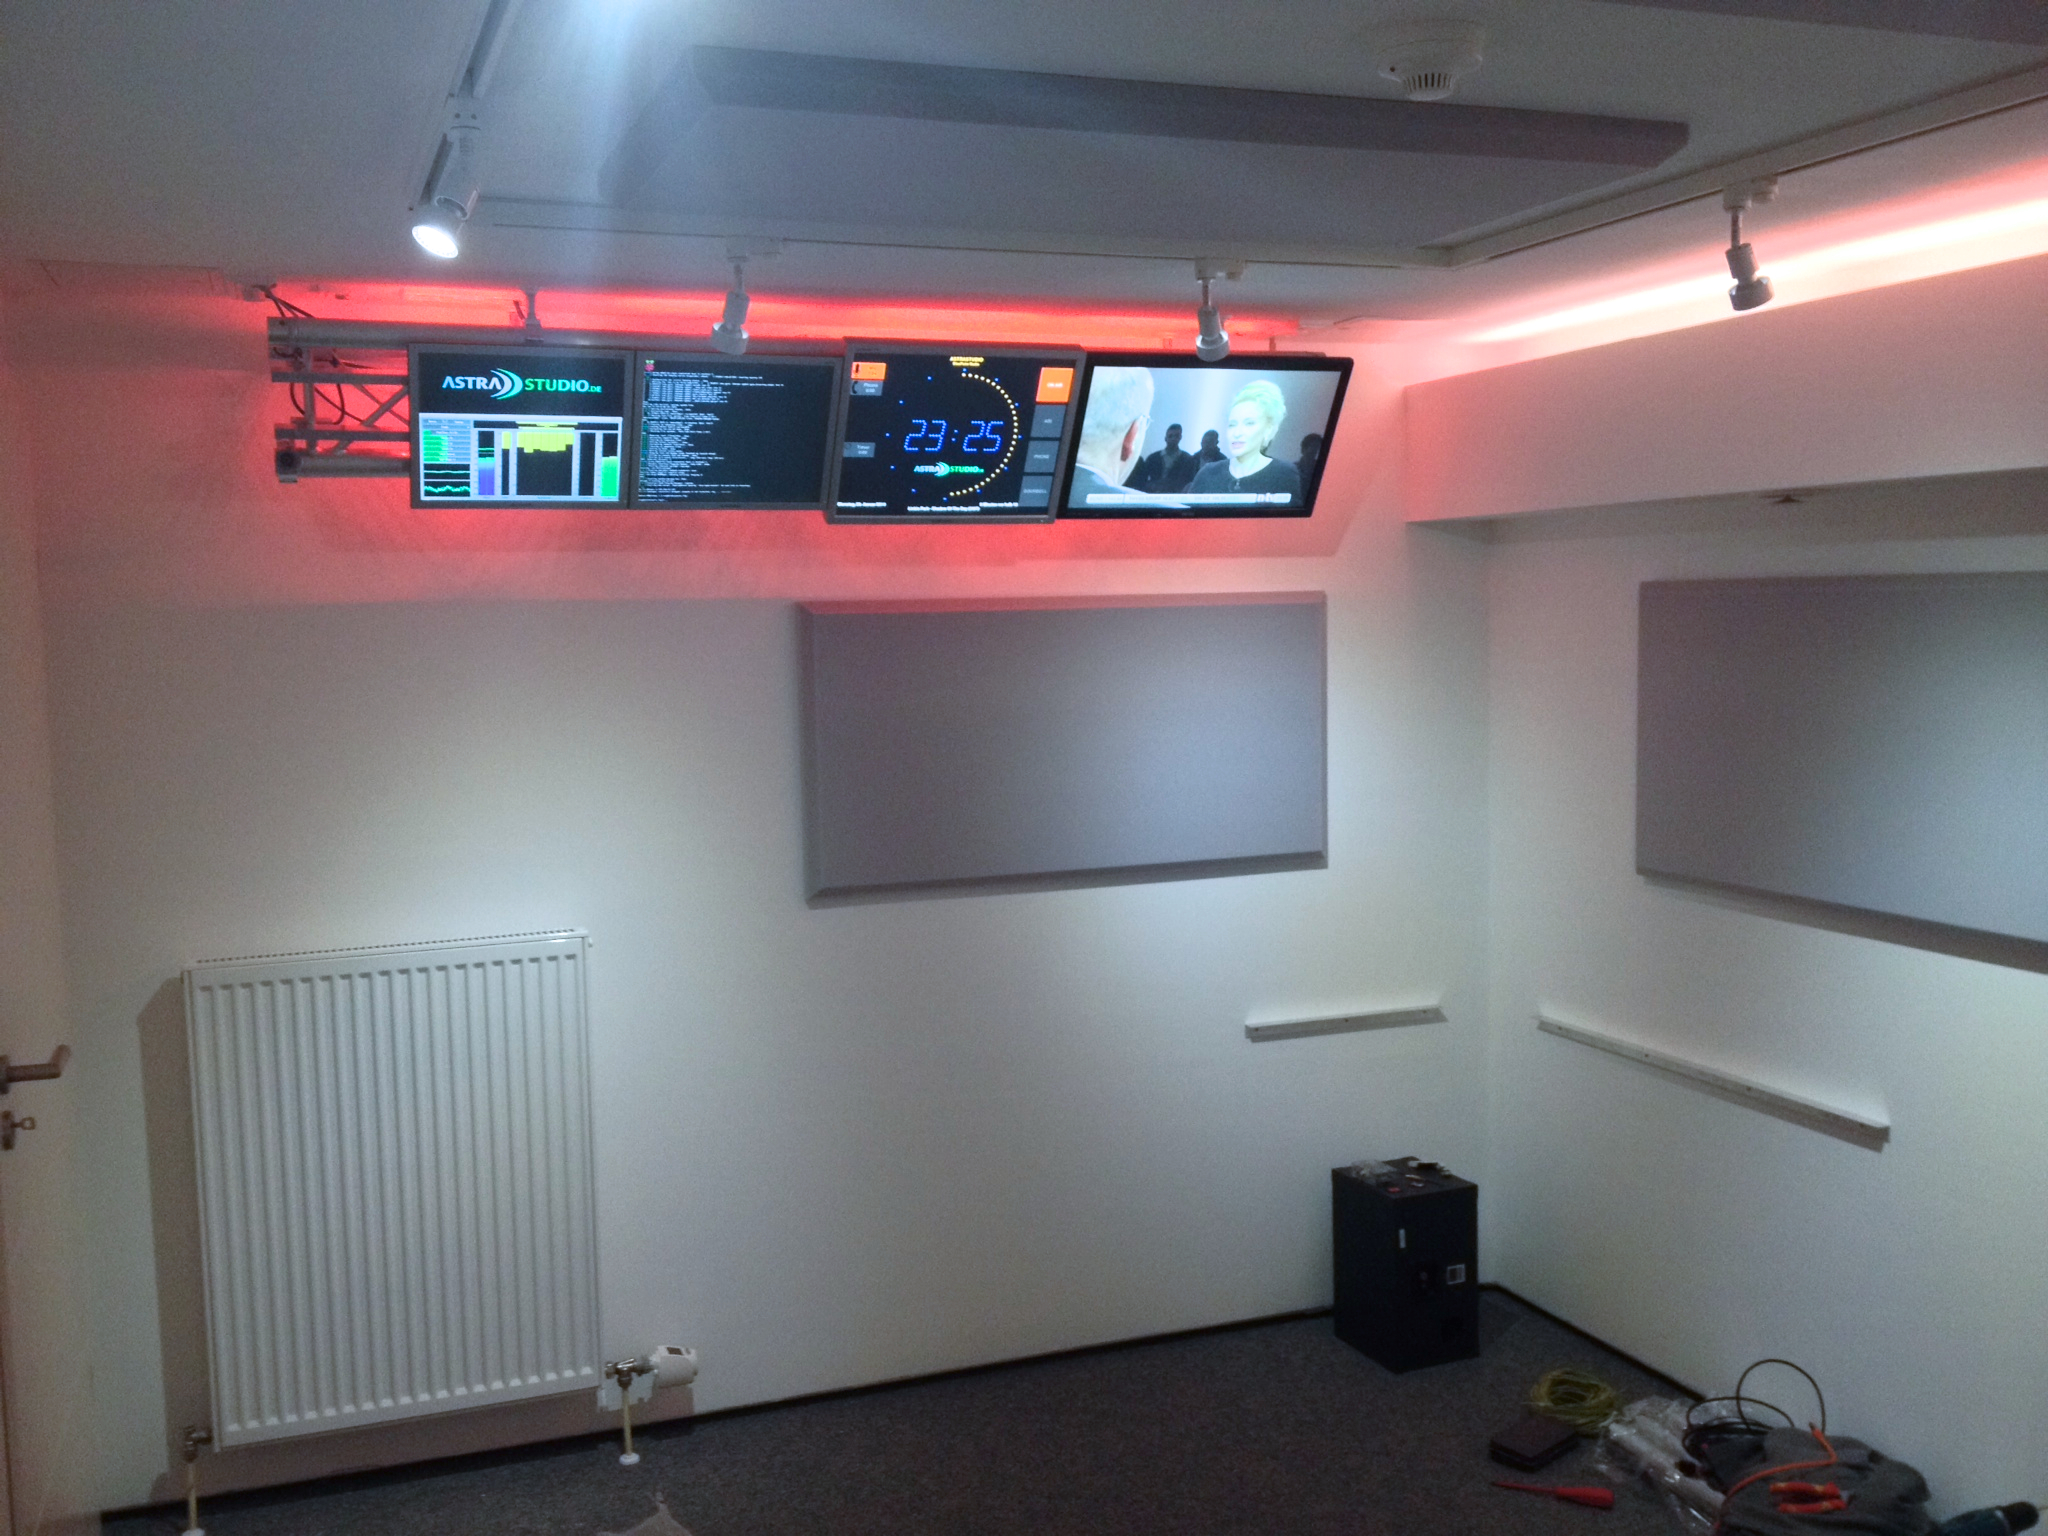
- Flexible integration into existing studio setups
- Customizable logo, colors and labels
- 4:3 and 16:9/16:10 monitor aspect ratio support
- Easy installation (Win/Linux/Mac binaries available)
- Runs on RaspberryPi
- Raspberry Pi GPIO inputs (mixer GPI via optocoupler → LEDs and AIR timers)
- Runs on Windows, Mac, Linux
- Controlled via keyboard and network
- Web-UI for remote control via browser
- Web-UI: Dark Mode support with theme persistence
- Web-UI: Real-time status updates via WebSocket
- Web-UI: Warning priority system (NTP, Normal, Medium, High)
- Web-UI: Improved compact layout for better space efficiency
- REST-style API endpoints (/api/status, /api/command)
- MQTT integration with Home Assistant Autodiscovery support
- Bitfocus Companion HTTP module (LEDs, AIR timers, live status); Generic OSC remains as an alternative
- OSC remote control (UDP)
- Event logging system for tracking all actions
- Configurable log level settings (DEBUG, INFO, WARNING, ERROR, CRITICAL, NONE)
- Command-line option to override log level (--loglevel)
- Tooltips for all settings widgets
- Preset/Profile management for saving and loading configurations
- Unified error handling system with custom exceptions for better error tracking and debugging
- Modular architecture with separated concerns (NTP, UI updates, system operations, etc.)
- Weather Widget
- Stereo audio meters (dBFS / dBTP / LUFS / BBC PPM) with selectable live input
- “TOO LOUD” warning based on true-peak threshold (dBTP)
- Silence Detection with optional WARN, MQTT/HTTP boolean, and HTTP GET trigger
- static or blinking colon in digital clock mode
- OnAir Timer, Stopwatch, Countdown and more
- Top-of-Hour countdown in the Radio Timer (AIR3): wall-clock synchronized countdown to the next full hour
- Time source: local system clock, NTP server, software PTPv2 (IEEE 1588-2008), or SMPTE LTC (Leo Bodnar LBE-1110 serial or local audio decode); NTP/PTP/LTC do not change the OS clock
OnAirScreen shows full-height stereo L/R meters on the left side of the screen (on by default, Local Input). Configure them under Settings → Audio Meters:
- Enable meters and choose the audio source:
- Local Input — PortAudio capture device (mic/line)
- Livewire — Axia Livewire AoIP multicast (pick an announced source or enter a channel 1–32767)
- AES67 — multicast RTP stream discovered via SAP (or pasted SDP)
- Shared AoIP Interface for Livewire/AES67 IGMP join (Default = system route)
- Livewire source combo (announced names while Settings are open) plus channel number
- AES67 stream combo (None, live SAP when the set changes, or pasted SDP)
- Display units: dBFS, dBTP (true peak), LUFS (momentary), BBC PPM (Type IIa, marks 1–7)
- LUFS reference peg via presets (EBU R128 −23, ATSC A/85 −24, AES −16/−18, Custom)
- Optional peak hold marker (default 1.5 s, can be disabled)
- Display style: Solid or Bargraph (1px segments with 1px gaps)
- Adjustable meter width (extra width goes into thicker L/R bars)
- Optional TOO LOUD action: warning message or trigger a configurable LED (1–4) when true peak exceeds threshold
- dBTP ceiling peg uses the TooLoud threshold
- Optional Silence Detection on the same audio source: dBFS threshold, duration (default 10 s), recovery time, optional on-screen WARN, optional HTTP GET on trigger; missing device/stream can count as silence
Livewire notes: The PC must be on the AoIP/Livewire VLAN with working IGMP/multicast. While Settings are open, advertised sources are listed from 239.192.255.3 UDP 4001 (standard stereo streams only). You can pick a name from the combo or type a channel number. Channel N maps to multicast 239.192.0.0 + N on UDP port 5004 (48 kHz / 24‑bit stereo RTP). After Apply, capture uses the stored channel even if advertisements stop.
AES67 notes: Discovery listens for SAP on 239.255.255.255 and RFC 2974 224.2.127.254 UDP 9875 (only while the settings dialog is open). Supported encodings: L16/L24 at 44.1/48/96 kHz. Stereo meters use the first two channels (mono is duplicated). Dante AES67 streams that announce via SAP are listed like any other stream (a=keywords:Dante is label-only). No PTP clocking and no audio playout — metering only. Capture uses the stored multicast address/port even if SAP is silent after Apply.
Troubleshooting: If no Livewire or AES67 sources appear, check AoIP interface, VLAN, and IGMP. Livewire ads are 239.192.255.3:4001; SAP is 239.255.255.255:9875 and 224.2.127.254:9875. If a stream is listed but the meter stays silent, check RTP port and codec (Livewire is L24/48 kHz; AES67 L16 vs L24).
System requirements for audio capture:
- PortAudio system library: macOS
brew install portaudio, Debian/Ubuntuapt install libportaudio2, Fedora/RHELdnf install portaudio - On macOS, grant Microphone permission to OnAirScreen (local input only)
The Top-of-Hour (TOH) countdown shows the remaining time until the next full hour in the Radio Timer display (AIR3, left timer column). The display uses the format minutes:seconds (e.g. 22:38).
Behavior:
- Press once to start: calculates the remaining time until the next
:00and starts the countdown - Press again (or send
OFF/TOGGLEwhile active): stops the timer and resets the display to0:00 - The countdown is synchronized with the system clock and stops automatically when the hour is reached
- While active, the
/api/statusresponse includes"topOfHour": truein theair[3]object
Control:
| Method | Action |
|---|---|
Hotkey T |
Toggle Top-of-Hour countdown |
AIR3TOH:ON |
Start countdown |
AIR3TOH:OFF |
Stop and reset to 0:00 |
AIR3TOH:TOGGLE |
Toggle countdown |
| Web-UI | "Top of Hour" button at AIR3 |
| MQTT | Publish to {base_topic}/air3/toh (ON/OFF/TOGGLE) |
| Home Assistant | "AIR3 Top of Hour" button (MQTT Autodiscovery) |
Examples:
# UDP
echo "AIR3TOH:TOGGLE" > /dev/udp/127.0.0.1/3310

# HTTP
curl "http://127.0.0.1:8010/?cmd=AIR3TOH:TOGGLE"

# REST-style API
curl "http://127.0.0.1:8010/api/command?cmd=AIR3TOH:ON"

# MQTT
mosquitto_pub -h mqtt-broker -t onairscreen_a1b2c3/air3/toh -m "TOGGLE"| Hotkeys | Function |
|---|---|
Ctrl+F or F |
Toggle fullscreen |
Ctrl+Q or Q or Ctrl+C or ESC |
Quit OnAirScreen |
Ctrl+S or Ctrl+, |
Open settings dialog |
Space or 0 |
Timer start/stop |
. or , or R |
Timer reset to 0:00 |
1 |
LED1 on/off |
2 |
LED2 on/off |
3 |
LED3 on/off |
4 |
LED4 on/off |
M or / |
Mic Timer start/stop |
P or * |
Phone Timer start/stop |
T |
Top-of-Hour countdown in Radio Timer (AIR3) start/stop |
Enter |
opens set timer dialog |
On OSX use the command ⌘ key instead of Ctrl
OnAirScreen can receive API commands via UDP port 3310
Here is an easy example on how to control a local OnAirScreen instance on a linux system.
Set LED1 Text to "FOO" and switch LED1 on:
echo "CONF:LED1:text=FOO" > /dev/udp/127.0.0.1/3310
echo "LED1:ON" > /dev/udp/127.0.0.1/3310OnAirScreen can receive API commands via HTTP (port 8010 by default).
Here is an easy example of how to control a local OnAirScreen instance on a linux system.
Set LED1 Text to "FOO" and switch LED1 on:
curl http://127.0.0.1:8010/?cmd=CONF:LED1:text=FOO
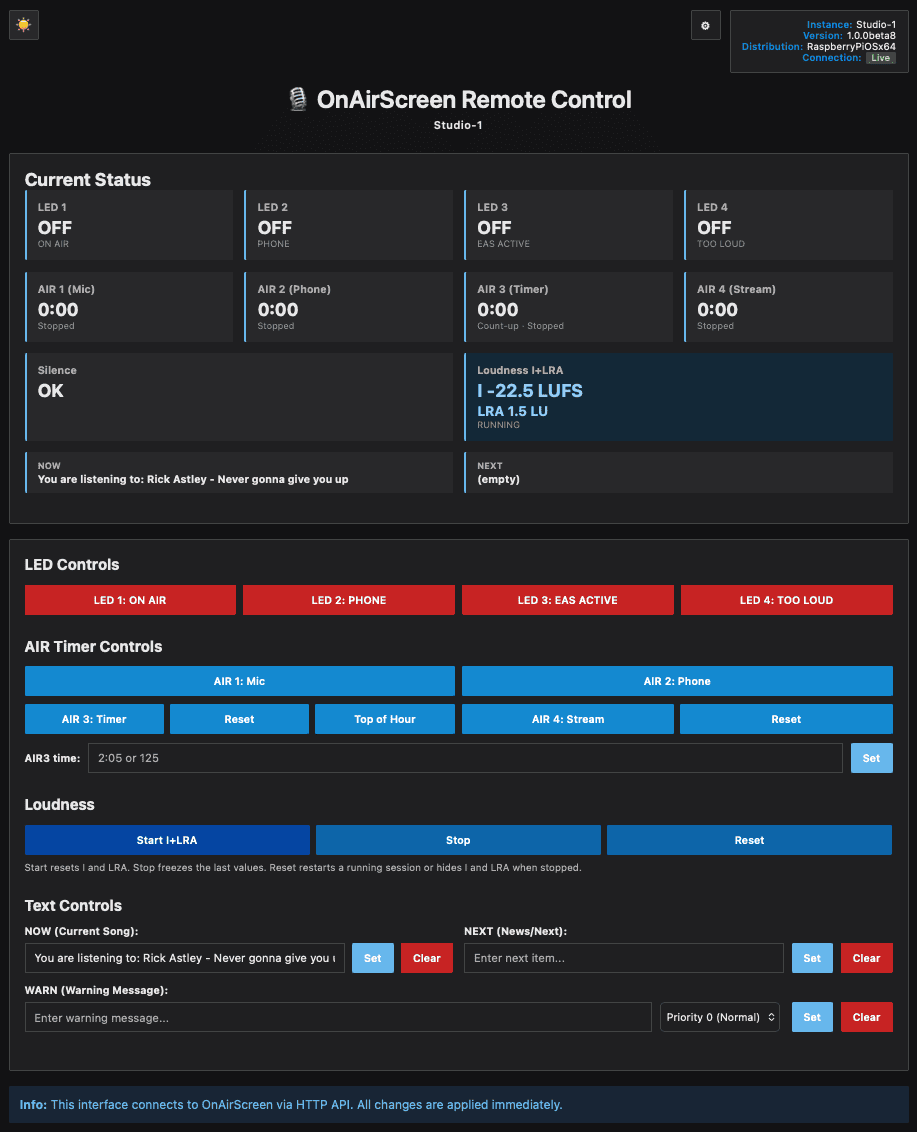
curl http://127.0.0.1:8010/?cmd=LED1:ONOnAirScreen provides a complete web-based remote control interface accessible via your browser.
Simply open http://127.0.0.1:8010/ (or the IP address of your OnAirScreen instance) in any modern web browser.
The Web-UI provides:
- Real-time status display for LEDs, AIR timers, text fields (NOW/NEXT/WARN), silence alarm, and loudness I+LRA
- Real-time updates via WebSocket (with HTTP polling fallback)
- Dark Mode support with automatic theme persistence
- Warning priority system: Display NTP warnings and user warnings with priorities (Normal, Medium, High)
- Delete warnings directly from status display with X button
- LED control buttons with toggle functionality
- AIR timer controls with start/stop and reset buttons
- Start / Stop / Reset for programme loudness I + LRA (
LUFSI:START/LUFSI:STOP/LUFSI:RESET) - Loudness I+LRA status tile shows live I (LUFS) and LRA (LU) plus RUNNING/STOPPED
- Top-of-Hour button for AIR3 (countdown to next full hour)
- AIR3 time input to set the radio timer (
m:ss,m,ss, or seconds) - AIR3 count-up vs. countdown shown in the status tile
- Keys
1–4toggle LEDs (ignored while typing in a text field) - Text input controls for NOW, NEXT, and WARN messages (NOW/NEXT follow the live status unless you are editing)
- Compact, organized layout for better space efficiency
- Version and distribution information display
- Persistent connection badge (Live / Polling / Offline) plus connection error modal
OnAirScreen also provides REST-style API endpoints:
Status Endpoint:
curl http://127.0.0.1:8010/api/statusReturns JSON with current LED status, AIR timer status, text field values, silence boolean, loudness I+LRA session (lufsIntegrated) plus I (lufsI) and LRA (lra), version, and distribution information. For AIR3, the topOfHour field indicates whether the Top-of-Hour countdown is active, and countDown is true while the radio timer is in countdown mode (after AIR3TIME or TOTH). The silence field is independent of the on-screen WARN. lufsI and lra are null until enough audio has been measured.
Command Endpoint:
curl "http://127.0.0.1:8010/api/command?cmd=LED1:ON"Sends commands and returns JSON response with status confirmation.
OnAirScreen can be controlled via MQTT and integrates seamlessly with Home Assistant using MQTT Autodiscovery.
Configure MQTT settings in the OnAirScreen settings dialog (Server, Port, Username, Password, Device Name).
Base Topic:
The MQTT base topic is automatically generated from onairscreen + a unique device ID (last 6 hex characters of the MAC address). This ensures each OnAirScreen instance has a unique topic, even when multiple instances are running on the same network. For example: onairscreen_a1b2c3.
Home Assistant Integration: OnAirScreen automatically publishes device configurations to Home Assistant, creating:
- LED Switches (LED1-4): Control LEDs on/off
- AIR Timer Switches (AIR1-4): Start/stop timers
- AIR Timer Sensors (AIR1-4 Time): Display elapsed time in seconds
- Reset Buttons (AIR3/AIR4 Reset): Reset timers to 0:00
- Top-of-Hour Button (AIR3): Start/stop countdown to next full hour
- Text Entities (NOW, NEXT, WARN): Set and display text fields
- Binary Sensors: Warning Active, Silence
- Loudness I+LRA Switch: Start (resets) / stop the programme I + LRA session
- Loudness I+LRA Reset Button: Restart if running; hide I and LRA if stopped
- Loudness I / LRA Sensors: Current gated I (LUFS) and LRA (LU)
MQTT Topics: All commands use the same format as UDP/HTTP API commands, published to:
{base_topic}/led{1-4}/set          → ON/OFF
{base_topic}/air{1-4}/set          → ON/OFF
{base_topic}/air{3-4}/reset        → PRESS (button)
{base_topic}/air3/toh              → ON/OFF/TOGGLE
{base_topic}/lufs/integrated/set   → ON/OFF/TOGGLE/RESET
{base_topic}/lufs/integrated/reset → PRESS
{base_topic}/text/now/set          → TEXT
{base_topic}/text/next/set         → TEXT
{base_topic}/text/warn/set         → TEXT
Status updates are automatically published to:
{base_topic}/led{1-4}/state         → ON/OFF
{base_topic}/air{1-4}/state         → ON/OFF
{base_topic}/air{1-4}/time          → seconds (integer)
{base_topic}/air3/toh/state         → true/false
{base_topic}/text/{now|next|warn}/state → TEXT
{base_topic}/warning/active         → true/false
{base_topic}/silence/active         → true/false
{base_topic}/lufs/integrated/state  → ON/OFF
{base_topic}/lufs/i                 → I in LUFS (empty if unknown)
{base_topic}/lufs/lra               → LRA in LU (empty if unknown)
Example using mosquitto_pub:
The base topic is automatically generated (e.g., onairscreen_a1b2c3). Replace {base_topic} with your actual base topic:
mosquitto_pub -h mqtt-broker -t onairscreen_a1b2c3/led1/set -m "ON"
mosquitto_pub -h mqtt-broker -t onairscreen_a1b2c3/air3/set -m "ON"
mosquitto_pub -h mqtt-broker -t onairscreen_a1b2c3/air3/reset -m "PRESS"
mosquitto_pub -h mqtt-broker -t onairscreen_a1b2c3/air3/toh -m "TOGGLE"
mosquitto_pub -h mqtt-broker -t onairscreen_a1b2c3/lufs/integrated/set -m "ON"
mosquitto_pub -h mqtt-broker -t onairscreen_a1b2c3/lufs/integrated/reset -m "PRESS"
mosquitto_pub -h mqtt-broker -t onairscreen_a1b2c3/text/now/set -m "Current Song"| UDP Command | Function |
|---|---|
LED1:[ON/OFF/TOGGLE] |
switch LED1 on/off/toggle |
LED2:[ON/OFF/TOGGLE] |
switch LED2 on/off/toggle |
LED3:[ON/OFF/TOGGLE] |
switch LED3 on/off/toggle |
LED4:[ON/OFF/TOGGLE] |
switch LED4 on/off/toggle |
NOW:TEXT |
set TEXT in first footer line |
NEXT:TEXT |
set TEXT in second footer line |
WARN:TEXT |
set TEXT and switch on red warning mode (priority 0) |
WARN:Prio:TEXT |
set TEXT with priority (Prio: 1=Medium, 2=High) |
AIR1:[ON/OFF/TOGGLE] |
start/stop/toggle Mic Timer |
AIR2:[ON/OFF/TOGGLE] |
start/stop/toggle Phone Timer |
AIR3:[ON/OFF/RESET/TOGGLE] |
start/stop/reset/toggle Radio Timer |
AIR3TIME:seconds |
set Radio Timer to given value in seconds |
AIR3TOH:[ON/OFF/TOGGLE] |
start/stop/toggle Top-of-Hour countdown in Radio Timer |
AIR4:[ON/OFF/RESET/TOGGLE] |
start/stop/reset/toggle Stream Timer |
LUFSI:[START/STOP/TOGGLE/RESET] |
start/stop/toggle/reset programme I + LRA session |
CMD:REBOOT |
OS restart |
CMD:SHUTDOWN |
OS shutdown |
CMD:QUIT |
quit OnAirScreen instance |
CONF:General:stationname=TEXT
CONF:General:slogan=TEXT
CONF:General:stationcolor=COLOR
CONF:General:slogancolor=COLOR
CONF:LED[1-4]:used=[False|True]
CONF:LED[1-4]:text=TEXT
CONF:LED[1-4]:activebgcolor=COLOR
CONF:LED[1-4]:activetextcolor=COLOR
CONF:LED[1-4]:autoflash=[False|True]
CONF:LED[1-4]:timedflash=[False|True]
CONF:Clock:face=[digital|analog|analog_numbers|analog_studio|analog_railway|analog_24h_smooth|analog_24h_ticking]
CONF:Clock:digital=[True|False]
CONF:Clock:showseconds=[True|False]
CONF:Clock:digitalhourcolor=COLOR
CONF:Clock:digitalsecondcolor=COLOR
CONF:Clock:digitaldigitcolor=COLOR
CONF:Clock:logopath=PathToLogo
CONF:Network:udpport=PORT
CONF:Network:tcpport=PORT
CONF:Audio:enabled=[True|False]
CONF:Audio:source=[device|livewire]
CONF:Audio:input_device=DEVICE_NAME
CONF:Audio:livewire_channel=N
CONF:Audio:livewire_iface=IP_OR_EMPTY
CONF:Audio:unit=[dbfs|dbtp|bbc_ppm] (lufs still sets layout to lufs)
CONF:Audio:layout=[lr|lufs|both]
CONF:Audio:tooloud=[True|False]
CONF:Audio:tooloudtext=TEXT
CONF:Audio:tooloud_threshold_dbtp=-1.0
CONF:Audio:tooloud_action=[warning|led]
CONF:Audio:tooloud_led=[1|2|3|4]
CONF:Audio:silence=[True|False]
CONF:Audio:silence_warn=[True|False]
CONF:Audio:silence_on_absent=[True|False]
CONF:Audio:silence_text=TEXT
CONF:Audio:silence_threshold_dbfs=-50.0
CONF:Audio:silence_duration_s=10.0
CONF:Audio:silence_recovery_s=2.0
CONF:Audio:silence_http_url=URL
CONF:Audio:lufs_reference_preset=[ebu_r128|atsc_a85|aes_16|aes_18|custom]
CONF:Audio:lufs_reference=-23.0
CONF:Audio:peak_hold=[True|False]
CONF:Audio:peak_hold_seconds=1.5
CONF:Audio:display_style=[solid|bargraph]
CONF:Audio:meter_width=79
CONF:CONF:APPLY=TRUE
OnAirScreen uses a unified error handling system with custom exceptions for consistent error tracking and debugging:
- Network Errors:
UdpError,HttpError,WebSocketError,MqttError,PortInUseError,PermissionDeniedError - Command Errors:
CommandParseError,CommandValidationError,UnknownCommandError,InvalidCommandFormatError - Configuration Errors:
SettingsError,InvalidConfigValueError - Validation Errors:
TextValidationError,ColorValidationError,ValueValidationError - API Errors:
WeatherApiError,JsonParseError,JsonSerializationError - Encoding Errors:
EncodingError - Widget Errors:
WidgetAccessError
All exceptions inherit from OnAirScreenError and include context information for better debugging. The log_exception() helper function provides consistent logging across the application.
HTTP error responses are automatically mapped to appropriate status codes:
- Validation/Parse errors → 400 (Bad Request)
- Unknown commands → 404 (Not Found)
- Port/Permission errors → 503 (Service Unavailable)
- Serialization errors → 500 (Internal Server Error)