


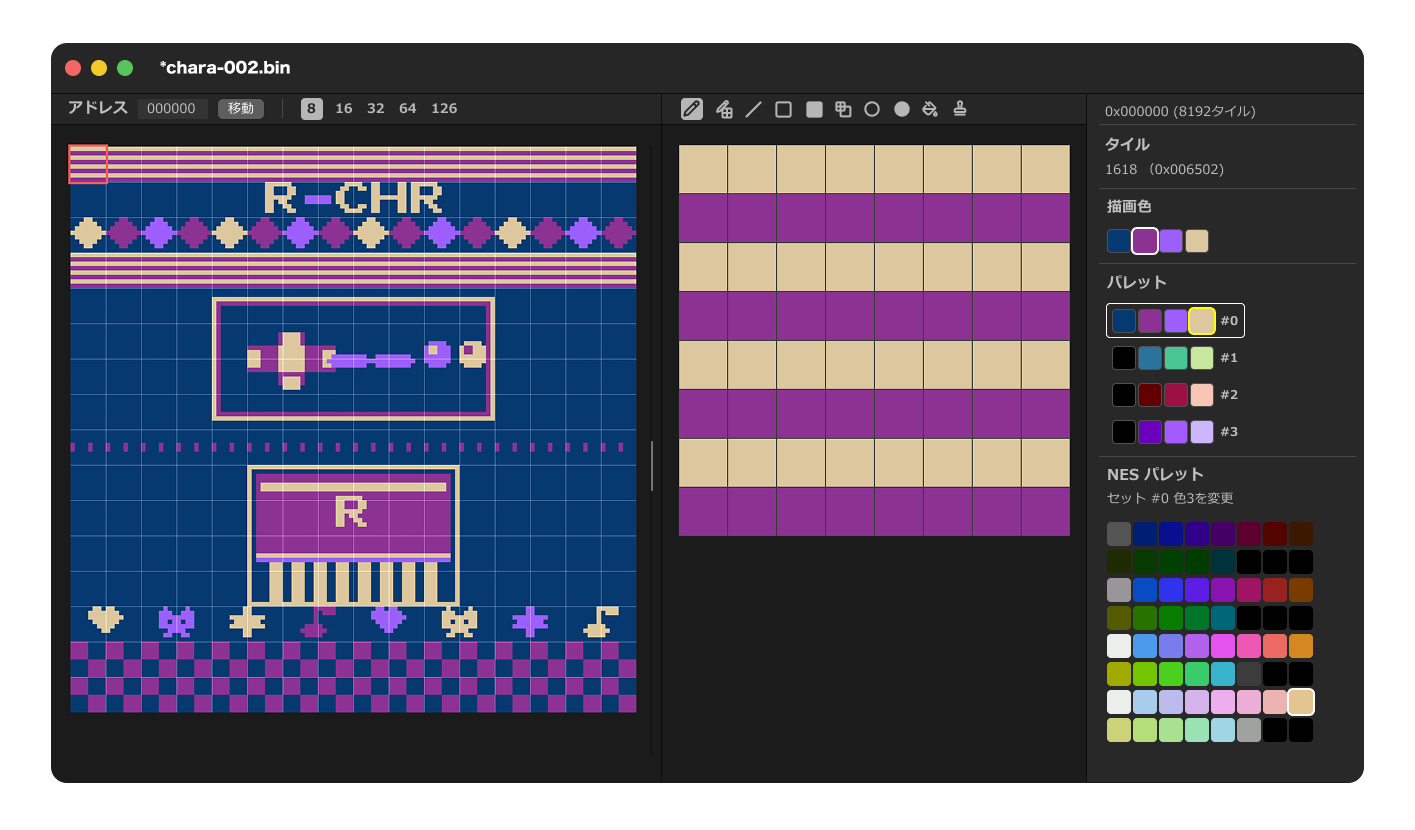
This is a CHR tile editor for the NES (Famicom) created using Rust and egui.
In addition to the basic features of YY-CHR, it includes 10 types of drawing tools, PNG import, and continuous scrolling display, all designed to enhance usability.
cargo run --releaseRequires Rust 1.80 or later.
Cargo will automatically fetch the required libraries.
You can open a file in Bank View by selecting it from File → Open… or by dragging and dropping it into the window.
Supported Formats:
.nes— iNES format. Supports ROMs that include CHR-ROM.bin— Headerless raw CHR binary.zip— Automatically extract and load the first.nesfile in the ZIP
File → New File creates an empty 16KB CHR data file (newfile).
| Action | Shortcut |
|---|---|
| Save | ⌘S / Ctrl+S |
| Save As | ⌘⇧S / Ctrl+Shift+S |
When there are unsaved changes, an asterisk (*) is shown in the title bar.
A confirmation dialog appears when you try to close the window.
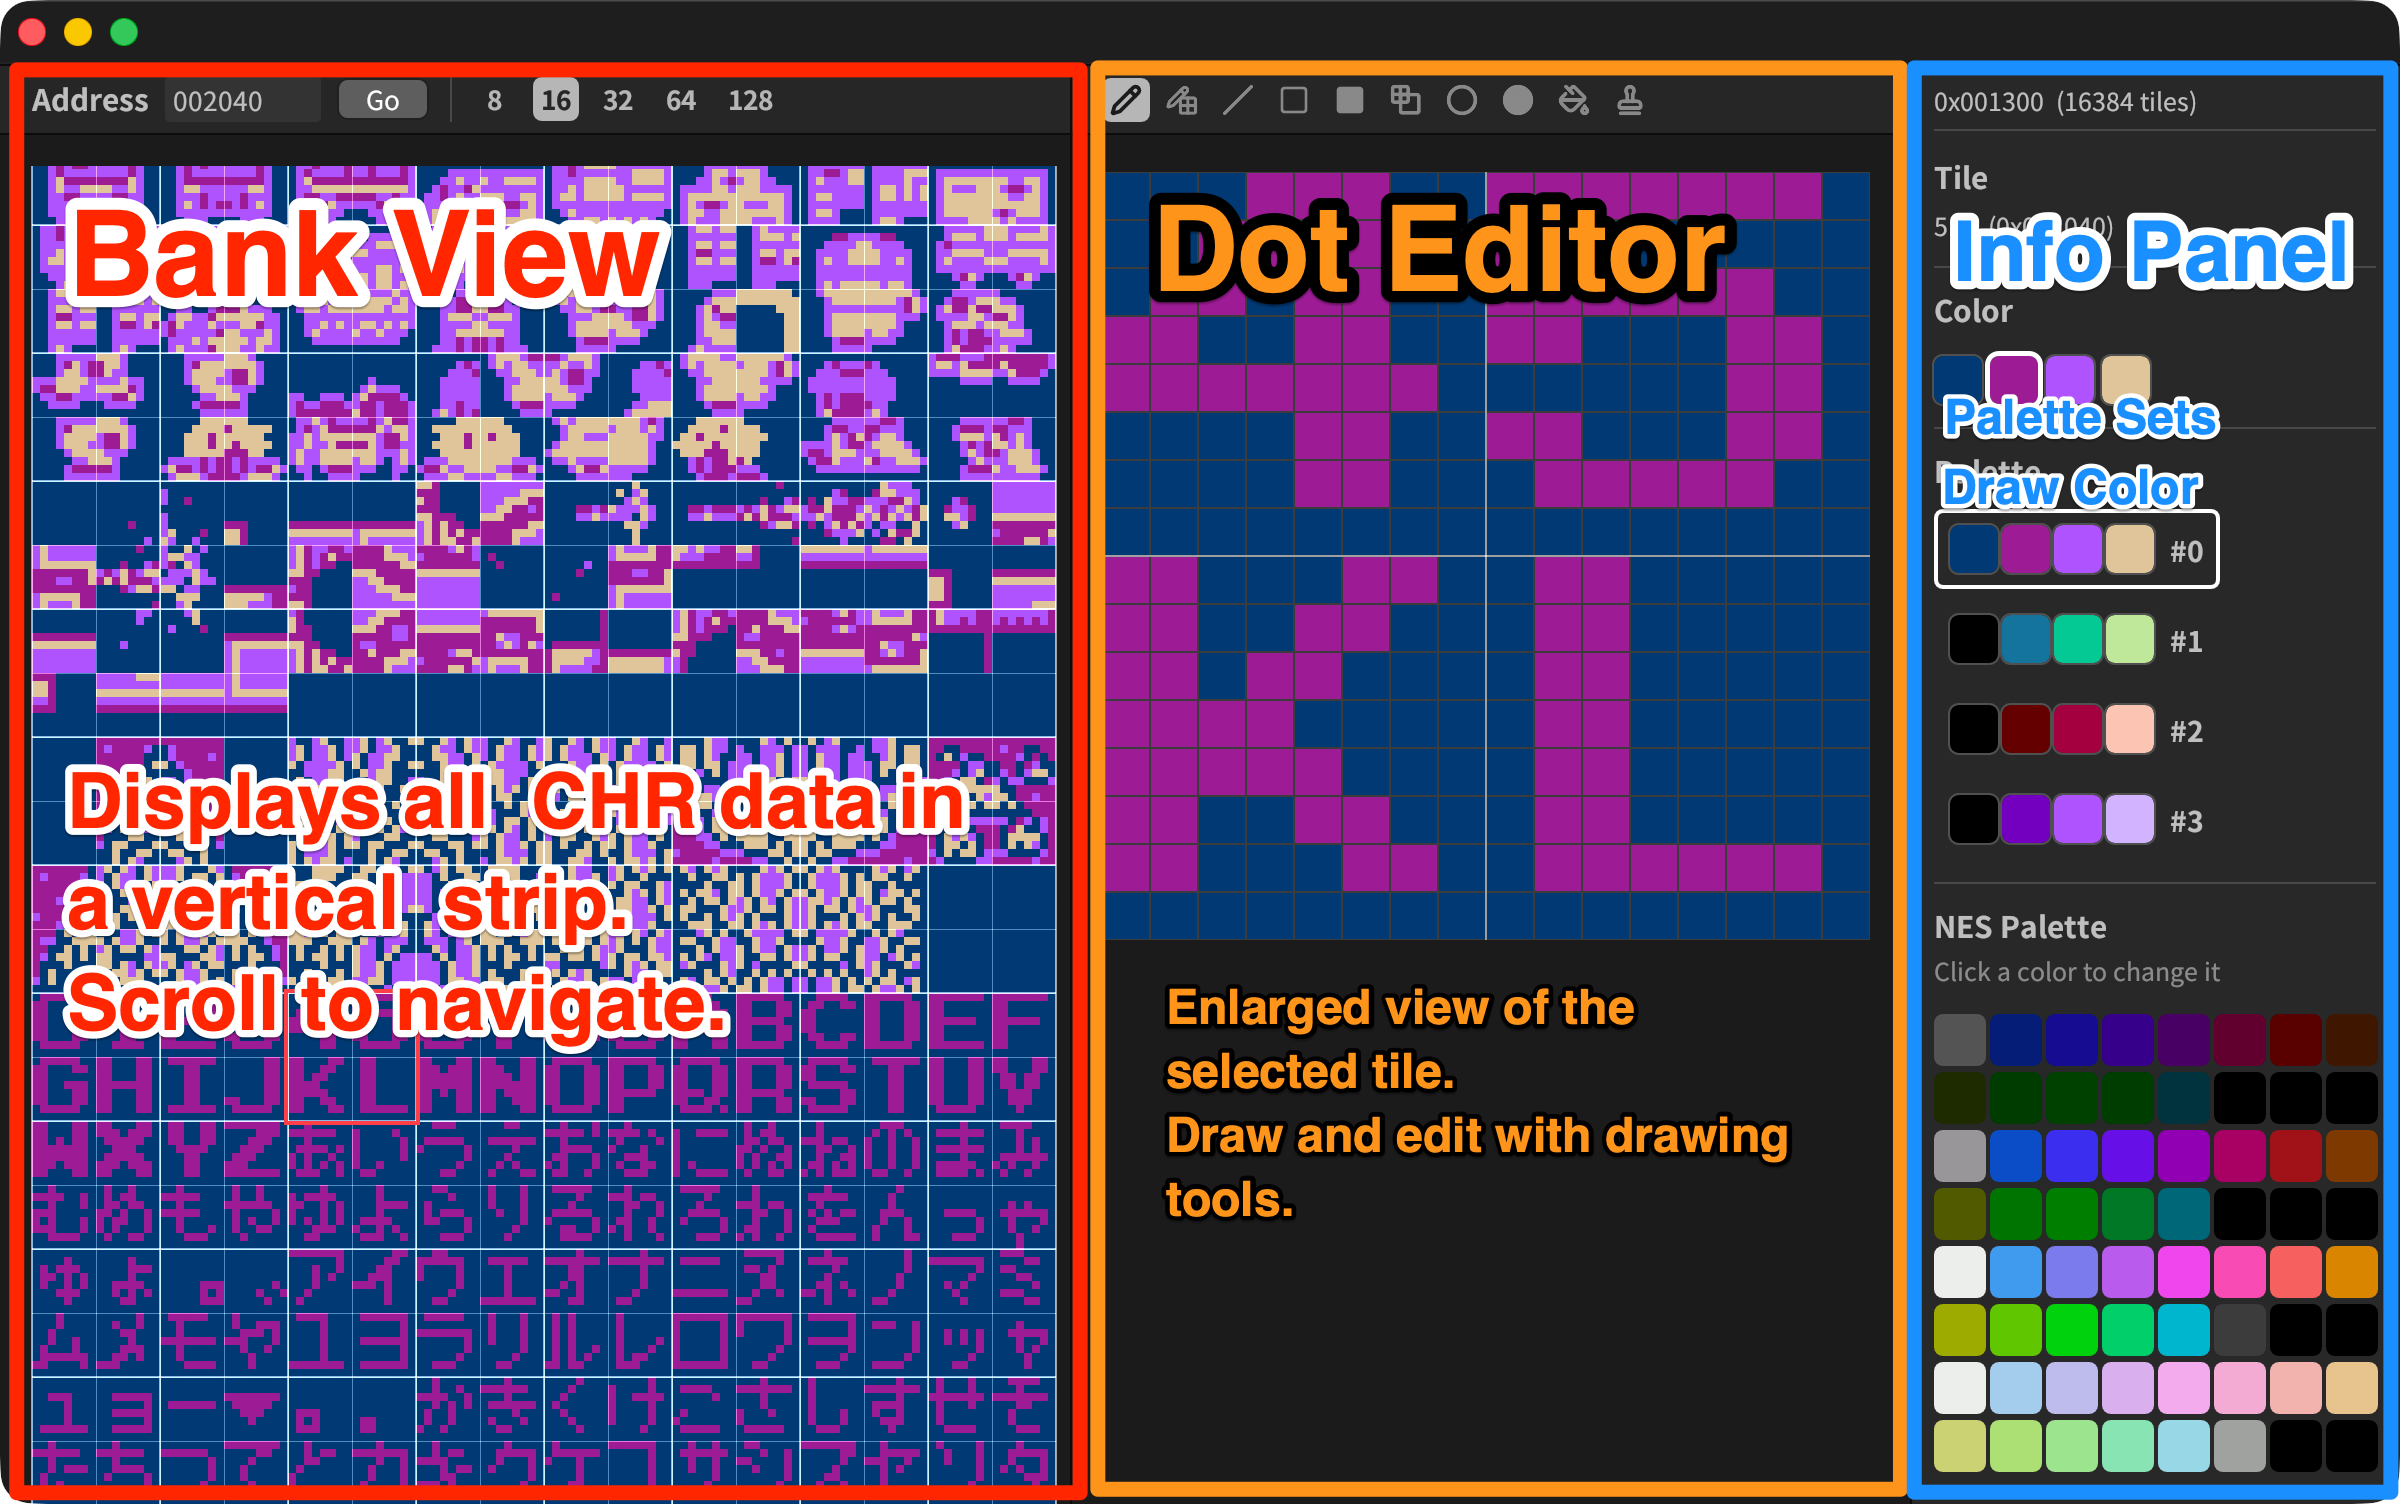
- Bank View (left): Minimum width 410px. Integer-scale zoom to fit window width
- Dot Editor (center): Resizable. Minimum 180px
- Info Panel (right): Fixed width 245px
Displays all CHR data as a vertical texture with 16 tiles per row (128px). 1 row = 16 tiles × 16 bytes = 0x100 bytes. Use the scrollbar to navigate up and down.
Enter a hex address in the "Address:" field in the toolbar and press the Go button or Enter to jump to that position.
The selection block (= editing unit in the Dot Editor) can be switched between 5 sizes.
| Button | Size | Tiles |
|---|---|---|
8 |
8×8 px | 1×1 tiles |
16 |
16×16 px | 2×2 tiles |
32 |
32×32 px | 4×4 tiles |
64 |
64×64 px | 8×8 tiles |
128 |
128×128 px | 16×16 tiles |
Clicking a tile sets it as the selection origin, and the Dot Editor displays the tile block for the current focus size.
The selected tile block (based on focus size) is displayed enlarged for editing. Click the toolbar icons or use keyboard shortcuts to select tools.
| Action | Description |
|---|---|
| Right-click | Eyedropper — sets the clicked pixel's color as the drawing color |

Click and drag to draw one pixel at a time. Even when dragging across multiple tiles, all changes can be undone in a single Undo step.
Draws in a checkerboard pattern using (x+y) % 2 parity from the click origin, skipping every other pixel. The pattern remains seamless even across tile boundaries.
Click to set a start point and drag to draw a straight line. Uses Bresenham's algorithm for integer-precise lines. A real-time preview is shown while dragging. Confirmed on button release.
Drag to specify two corners and draw only the outer border. Confirmed on button release.
Fills the entire interior of the rectangle. Confirmed on button release.
Fills the rectangle area with a checkerboard pattern based on the origin parity. Confirmed on button release.
Defines an ellipse by its bounding box (two diagonal corners) and draws the outline only. Combines left/right row endpoints and top/bottom column endpoints for a gap-free outline. Confirmed on button release.
Fills the entire interior of the ellipse using a scanline method. Confirmed on button release.
Fills all connected pixels of the same color index at the clicked position using BFS (breadth-first search). 4-directional connectivity. Does nothing if the clicked color matches the drawing color.
A two-phase copy & paste tool.
| Phase | Action | Behavior |
|---|---|---|
| Select (Phase 1) | Drag | Preview the selection with a dashed border |
| Release | Confirm the area and copy it into the buffer | |
| Paste (Phase 2) | Drag | Dashed outline + pixel preview follows the cursor |
| Release | Write to CHR (buffer is retained) | |
| Right-click | Cancel and return to Phase 1 |
The buffer is retained so you can stamp the same content multiple times.
| Action | Shortcut |
|---|---|
| Copy | ⌘C / Ctrl+C |
| Paste | ⌘V / Ctrl+V |
Copies the current focus-size tile block to the clipboard and pastes it at the selected tile position. Paste can be undone.
| Key | Action |
|---|---|
↑ ↓ ← → |
Move selected tile by 1 tile |
Z / X / C / V |
Switch palette set 0–3 |
⌘N / Ctrl+N |
New file |
⌘Z / Ctrl+Z |
Undo |
⌘C / Ctrl+C |
Copy tiles |
⌘V / Ctrl+V |
Paste tiles |
⌘S / Ctrl+S |
Save |
⌘⇧S / Ctrl+Shift+S |
Save As |
When the selected tile moves off-screen with the arrow keys, the view auto-scrolls.
Displays the NES palette (DAT palette) as 4 sets × 4 colors. Select a cell and choose a color from the NES 64-color picker to change it.
Switch the set used for Bank View rendering with the Z / X / C / V keys.
The following operations are available from the Palette menu.
| Menu Item | Description |
|---|---|
| Open PAL file… | Load a .pal file (192 bytes = 64 colors × 3 RGB bytes) and overwrite the master palette |
| Open DAT file… | Load a .dat file (16+ bytes) and update the palette sets |
| Save DAT file… | Export the current palette sets as a .dat file |
| Reset Master Palette (NES Standard) | Restore the built-in NES standard 64-color palette |
On startup, assets/rchr.pal (master palette) and assets/rchr.dat (palette sets) are loaded automatically.
Compatible with YY-CHR format.
While YY-CHR's "Paste Image" only supports 8bpp indexed BMP / 8-bit indexed PNG, r-chr accepts all of the following:
- Indexed color PNG (1-bit / 2-bit / 4-bit / 8-bit)
- Full color PNG (RGB / RGBA)
- PNG with transparency (tRNS chunk / alpha channel)
- File → Import PNG… to open a file selection dialog
- Drag and drop a PNG file onto the window
A NES / BIN file must be opened first.
After selecting a PNG, a confirmation dialog appears.
┌────────────────────────────────────────────────────────┐
│  PNG Import                                            │
│                                                        │
│  File: sprite.png  (32×32 px = 4×4 tiles)             │
│                                                        │
│  Mapping Strategy:                                     │
│  ● Palette Match (recommended)  ○ Index Direct  ○ RGB Approx │
│                                                        │
│  ⚠ 3 colors could not be exactly matched and were approximated │
│  ⚠ 1 transparent palette entry → mapped to index 0    │
│                                                        │
│  Preview (after conversion):                           │
│  [Preview rendered in converted CHR colors]            │
│                                                        │
│  Paste at: Tile 0 (0x000000)                          │
│                                                        │
│         [Cancel]      [Paste]                          │
└────────────────────────────────────────────────────────┘
- Paste at: The currently selected tile in Bank View is used as the origin
- After pasting: Can be undone with Undo (
⌘Z/Ctrl+Z) - Mapping Strategy: Switching via radio button updates the preview in real time
3 methods are available for converting PNG pixels to CHR color indices (0–3). The strategy is auto-selected based on the file type, but can be changed manually in the dialog.
Auto-selected when: Indexed color PNG with a PLTE chunk
Ideal when working in Aseprite with the NES master palette.
Conversion flow:
PLTE[i] RGB
  → Nearest-neighbor match among NES master palette 64 colors
  → Select the closest of the 4 colors in the current DAT palette set
  → Convert to CHR index 0–3
Aseprite workflow:
- Create a sprite in Indexed Color mode in Aseprite
- Set the palette from
rchr.palor the game's actual NES palette - File → Export as PNG (keeping indexed color mode)
- Open the file in r-chr and select the target tile
- File → Import PNG… or D&D to import → "Palette Match" is auto-selected
- Check the preview and press Paste
Auto-selected when: Indexed color PNG without a PLTE chunk
Pixel index value mod 4 → CHR index 0–3
Use case: When the first 4 palette entries (indices 0–3) are intentionally mapped to CHR 0–3.
Auto-selected when: Full color PNG (RGB / RGBA)
Each pixel's RGB
  → Calculate RGB distance to the 4 colors in the current DAT palette set
  → Map to the closest color index 0–3 → write to CHR
Use case: Full color PNGs, screenshots, images converted from BMP, or any arbitrary PNG. Color reproduction is approximate only. Accuracy improves when the DAT palette matches the game's actual palette.
When a PNG contains transparent pixels (tRNS chunk / alpha channel), they are automatically mapped to CHR index 0.
| Format | Transparency Condition |
|---|---|
| Indexed PNG (with tRNS) | Palette entries with alpha = 0 in tRNS |
| RGBA PNG | Pixels with alpha value < 128 |
In NES CHR, index 0 corresponds to the background color (transparent color for sprites), so mapping transparent pixels to 0 ensures the sprite appearance is set correctly. The count of transparent pixels is shown in the dialog's warning area.
All drawing operations and PNG imports support Undo.
| Operation | Undo Unit | Max Steps |
|---|---|---|
| Dot Editor editing (pencil, drag) | All tile changes in one drag stroke | 100 |
| Line / Rectangle / Ellipse / Flood Fill | All tile changes for one shape | 100 |
| Stamp | All tile changes in one stamp | 100 |
| Tile Paste | All tile changes in one paste | 100 |
| PNG Import | All affected tiles in one batch | 100 |
src/
  main.rs              — Entry point & window setup
  native_menu.rs       — macOS native menu (muda crate)
  editor/
    mod.rs
    app.rs             — App state & main loop (eframe::App)
    bank_view.rs       — Bank View (full CHR display & tile selection)
    clipboard.rs       — Tile copy & paste
    dot_editor.rs      — Dot Editor & 10 drawing tools
    file_ops.rs        — Open / Save / New file operations
    info_panel.rs      — Right panel (palette, draw color, info display)
    keyboard.rs        — Keyboard shortcut handling
    png_import.rs      — PNG import dialog
    setup.rs           — Font setup
    theme.rs           — Color, font & size constants
    mac/
      mod.rs
      menu_bar.rs      — egui menu bar (non-macOS)
      menu_events.rs   — macOS native menu event handling
  io/
    mod.rs
    chr.rs             — CHR decode / encode / rendering
    nes.rs             — iNES format parser / RomData type
    png.rs             — PNG / BMP import (mapping & CHR write)
  model/
    mod.rs
    palette.rs         — NES palette (MasterPalette / DatPalette)

assets/
  rchr.pal             — Default master palette (YY-CHR compatible .pal)
  rchr.dat             — Default palette sets (YY-CHR compatible .dat)
  rchr.bin             — Default CHR data displayed on startup (R-CHR logo)
  nes.pal              — NES standard 64-color palette (for reset)
  icons/               — SVG icons for toolbar & drawing tools
This tool was developed with reference to YY-CHR. YY-CHR is a well-established NES / SNES CHR editor, and served as a major reference for the basic interface design and CHR format handling.
This project is licensed under the MIT License. See the LICENSE file for details.
Daisuke Takayama