A guide to Markdown publishing using the open source Docsify-This.net project.
Before diving into publishing with Docsify-This, let's cover the basics of Markdown - the simple formatting (markup) language that makes all of this possible. Understanding these fundamentals will help you create better content and take full advantage of Docsify-This.
Markdown is a markup language used to format the display of content stored as plain text - similar but simpler than HTML formatting
- System-independent
- Text only format (perfect for version control)
- Separation of content vs. presentation
- Human-readable (i.e. more than HTML)
- Can also contain HTML snippets
- Large number of editor and publishing apps
# Your H1 Text Here
## Your H2 Text Here
_your italic text here_
**your bold text here**
* your unordered list item here
1. your numbered (and indented) list item here
[link title](https://www.google.com)

Tip: To ensure a new paragraph after text in markdown, put two spaces after the end of the line
Looking for a more detailed overview of Markdown? Check out the Markdown Cheat Sheet – How to Write in Markdown with Examples.
To use Docsify-This, your Markdown files need to be available online with a web link. While this might sound a bit technical, there are several straightforward ways that require no server management or technical expertise. Here are three popular approaches:
- Log in or Sign up to GitHub or Codeberg
- Create a new repository:
- Tap the + icon and select New Repository
- Fill in the repository details:
- Choose a Repository Name for your repository (e.g.,
docsify-this-demo) - Confirm that the Visibility is Public
- Choose a Repository Name for your repository (e.g.,
- Tap Create Repository
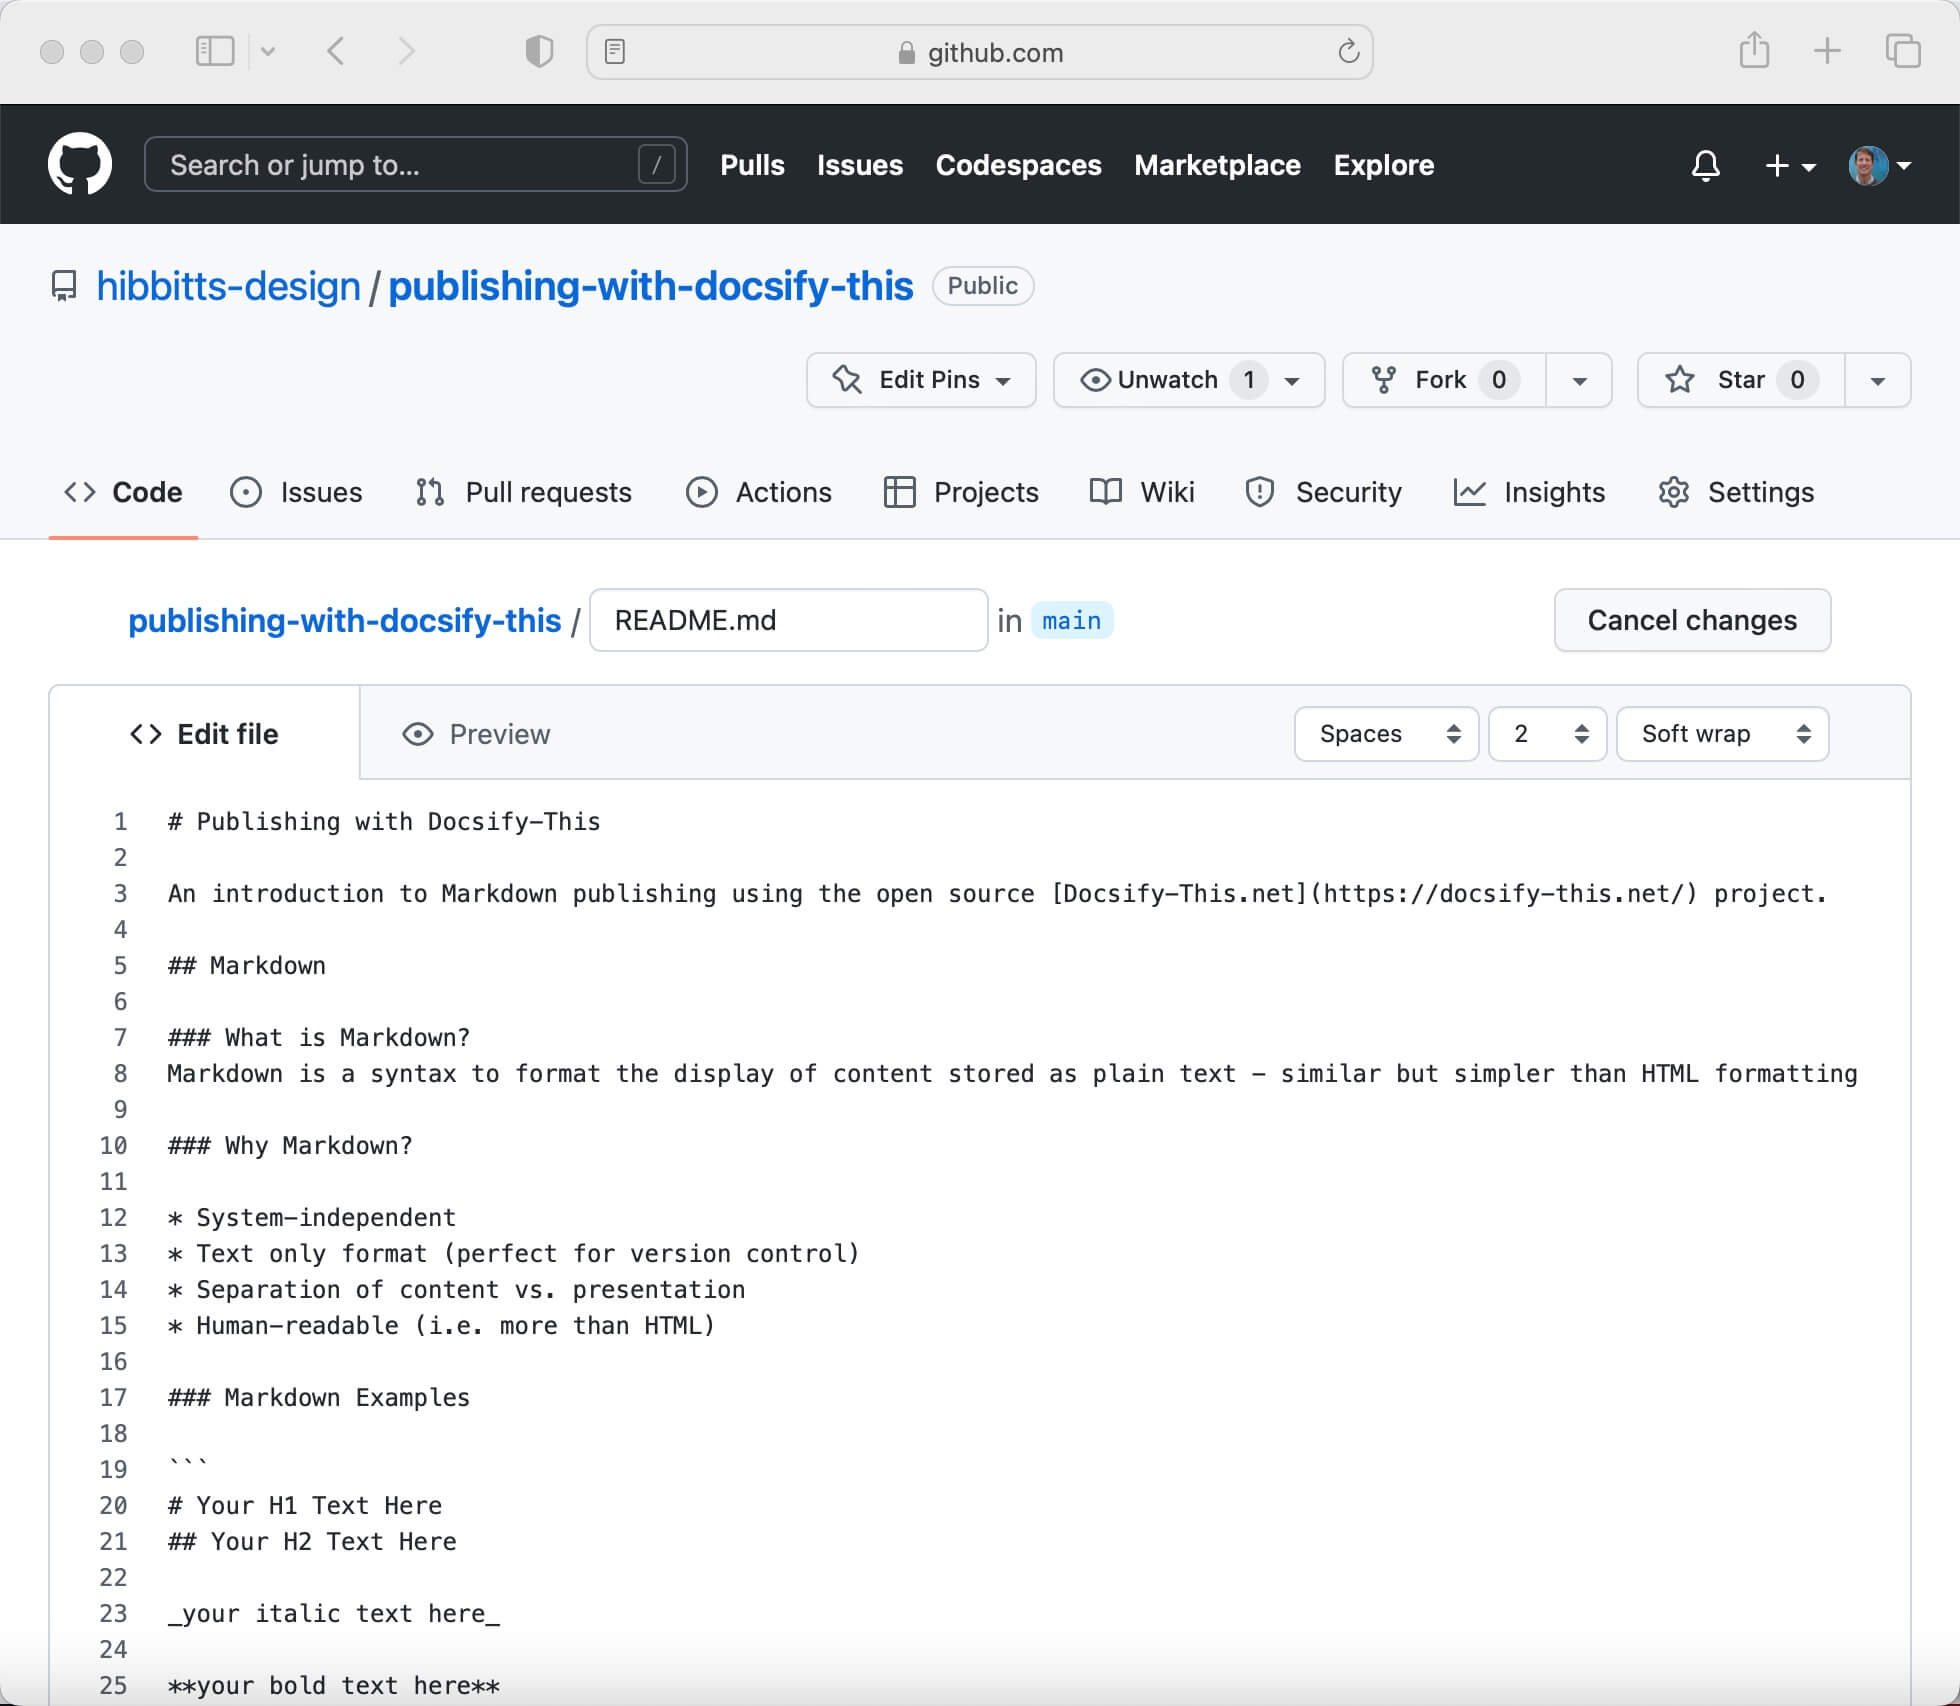
Option A: Create a New Markdown File
- Go to your new repository, tap Add File and then choose New File
- Name your file and use the
.mdextension (e.g.,demo.md) - Enter your Markdown content. For example:
# Welcome!

This is my sample Markdown file.
Option B: Upload an Existing File
- Go to your new repository, tap Add File and then choose Upload File
- Choose your file and make sure it uses the
.mdextension (e.g.,demo.md)
- Commit your file:
- Provide a Commit Message (e.g., "Create demo.md")
- Tap the Commit Changes button
- In your repository, view the file to see the rendered Markdown
- Copy the file URL from your Browser's address bar
- Go to Docsify-This.net and paste the copied URL into the Markdown File URL field
- Tap the Publish as a Web Page button to view your Markdown file rendered as a web page using Docsify-This
- Signup for a GitHub account
- Create a gist with your Markdown file at https://gist.github.com
- Enter a filename ending with
.md(e.g.mygist.md) - Choose Create public gist and tap on that button
- Tap on Raw button in the upper right of your Gist field and copy/paste that URL into the Docsify-This Markdown File URL field
- Obtain login information for your Webserver
- Upload the Markdown file to your Webserver with a filename ending with
.md(e.g.myfile.md) - Navigate to the location of that file, view the contents in your Browser, and copy/paste that URL into the Docsify-This Markdown File URL field
Now that you have Markdown files hosted online, you're ready to transform them into visually styled web pages. Docsify-This makes this process remarkably simple while offering a range of customization options to match your needs.
As an open source project, you even have the option to host your own Docsify-This instance with your own custom domain, giving you full control over your publishing platform with minimal configuration required.
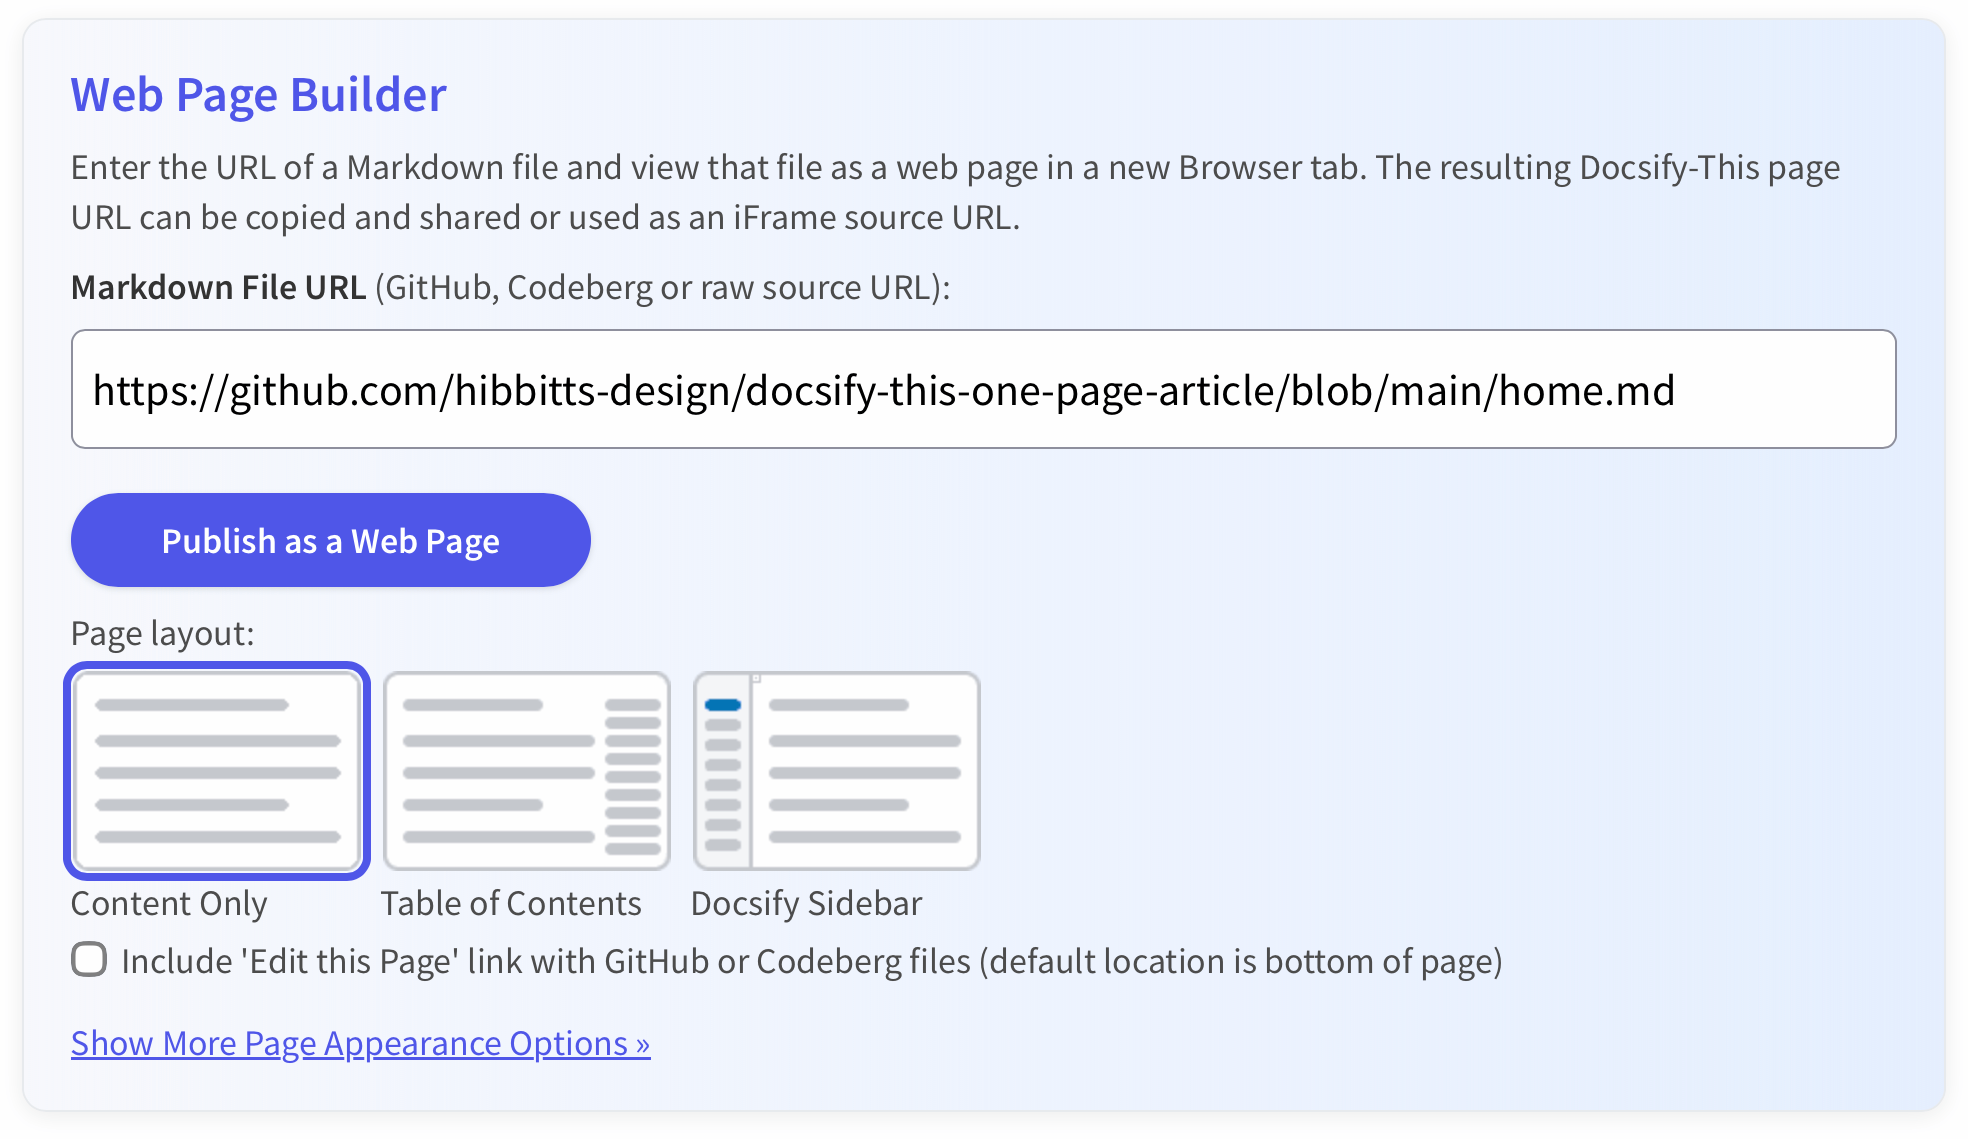
Figure 1. Docsify-This Web Page Builder
Don't have a Markdown file ready? Copy this example URL:
https://github.com/hibbitts-design/markdown/blob/main/ReadMe.md
Then follow the steps below to publish it!
Step 1: Get Your Markdown File URL
- Visit your Markdown file on GitHub, Codeberg, or your website
- Copy the URL from your browser's address bar
Step 2: Open the Web Page Builder
- Go to Docsify-This.net
Step 3: Paste Your URL
- Paste your Markdown file URL into the Markdown File URL field
- Both regular GitHub URLs (
https://github.com/username/repo/blob/main/README.md) and raw URLs (https://raw.githubusercontent.com/username/repo/main/README.md) work!
Step 4: Choose Layout
- Select your preferred page layout:
- Content Only - Simple, clean display
- Table of Contents - Adds navigation sidebar
- Docsify Sidebar - Collapsible navigation menu
Step 5: Publish
- Tap the "Publish as a Web Page" button
- Your Markdown file is now a styled web page with its own shareable URL!
See an example page published with Docsify-This →
https://docsify-this.net/?basePath=https://raw.githubusercontent.com/hibbitts-design/docsify-this-one-page-article/main&homepage=home.md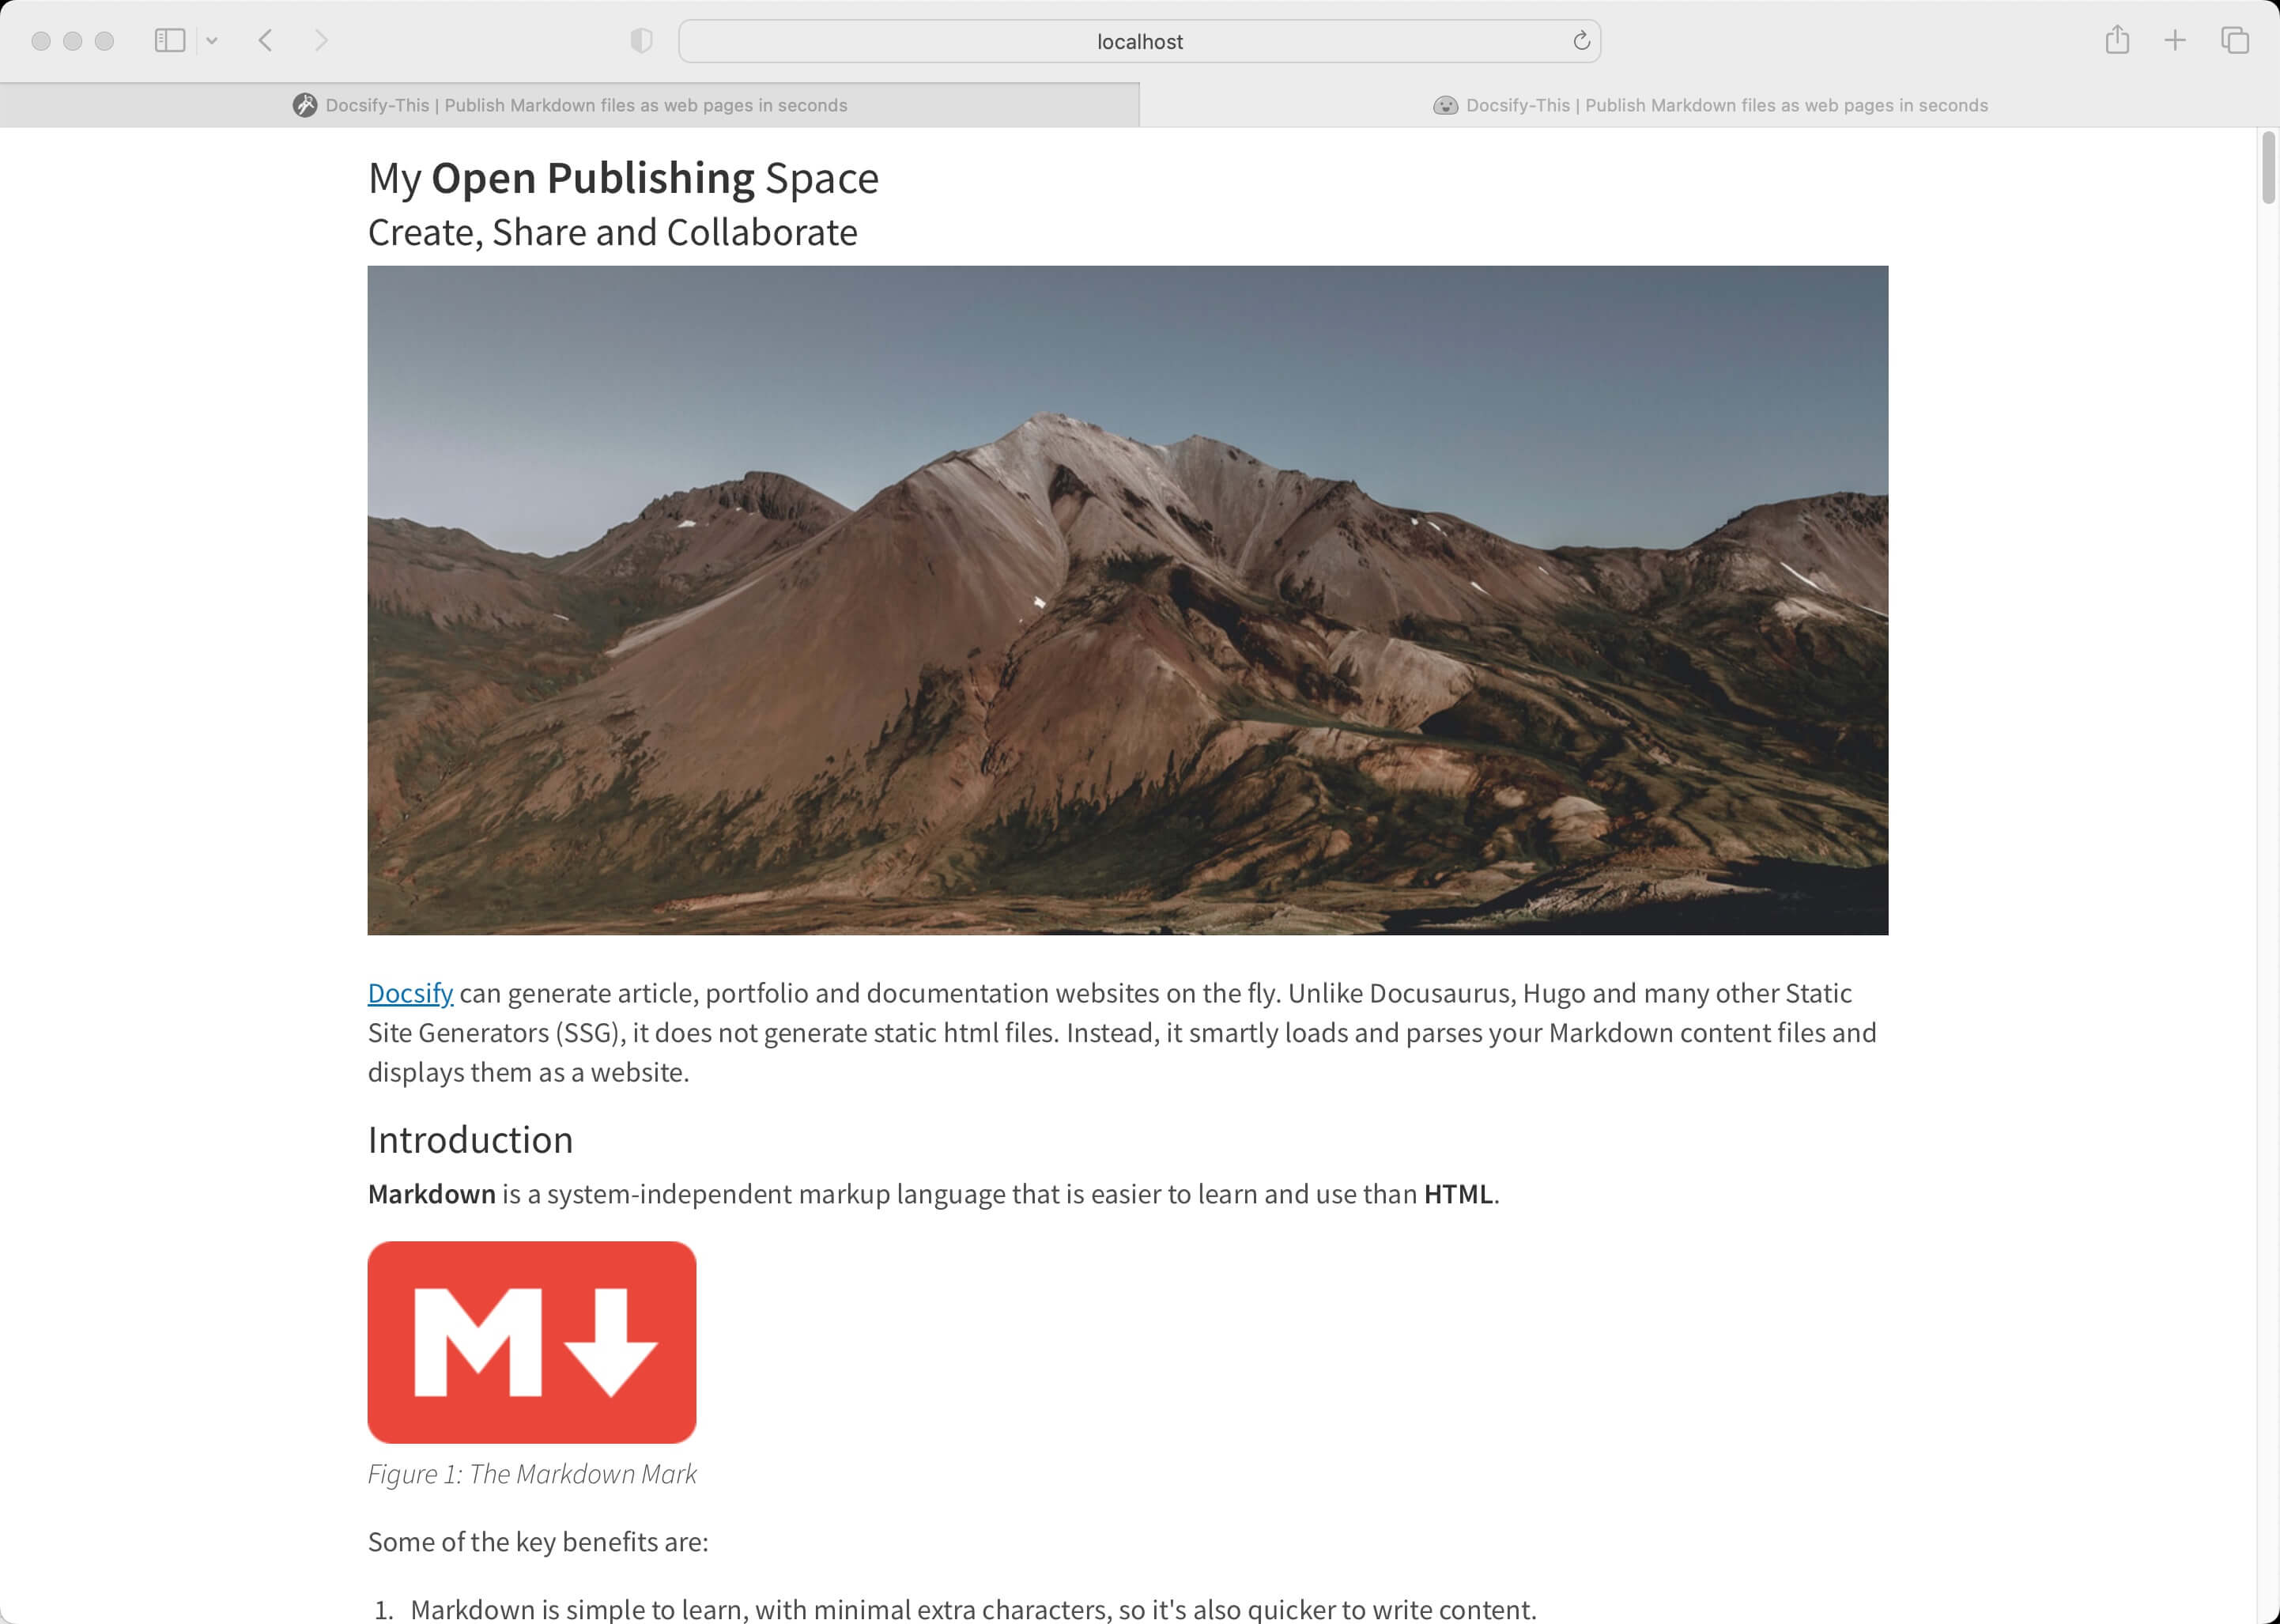
Figure 2. Docsify-This Rendered Markdown File
Docsify-This rendered Web pages are also perfect for embedding, with the ability to visually style Docsify-This pages to the destination platform.
Note
Docsify-This uses client-side rendering, which means your published content will not be indexed by search engines like Google, Bing, or DuckDuckGo. This makes it ideal for embedding, presentations, and course materials, but not suitable for content that needs to appear in search results.
The visual appearance of any Markdown file displayed by Docsify-This can be easily altered with the Web Page Builder, which provides a point-and-click interface for customization. For users comfortable with editing URLs, you can also manually add URL Parameters to the Docsify-This generated web page URL (the one starting with https://docsify-this.net/?).
For example, you can add a collapsible sidebar with the Web Page Builder Sidebar option in the Page layout section. Alternatively, the sidebar URL parameter can be modified:
https://docsify-this.net/?basePath=https://raw.githubusercontent.com/hibbitts-design/docsify-this-one-page-article/main&homepage=home.md&sidebar=true
Once you tap on the Show More Page Appearance Options » link, other page appearance options are available in the Web Page Builder.
Tip
Use the Web Page Builder first - it automatically generates properly formatted URLs and prevents syntax errors.
You can change font family with the Web Page Builder Page font family option in the Page Style and Behavior section. Alternatively, the font-family URL parameter can be modified:
https://docsify-this.net/?basePath=https://raw.githubusercontent.com/hibbitts-design/docsify-this-one-page-article/main&homepage=home.md&font-family=Open%20Sans,sans-serif
You can add a table of contents with the Web Page Builder Table of Contents option in the Page layout section. Alternatively, the toc URL parameter (especially useful when embedding into other platforms) can be modified:
https://docsify-this.net/?basePath=https://raw.githubusercontent.com/hibbitts-design/docsify-this-one-page-article/main&homepage=home.md&toc=true
You can control how many heading levels appear in the sidebar with the Web Page Builder Maximum Header depth (1-6) for Docsify Sidebar option in the Navigation Display Options section. Alternatively, the maxLevel parameter (default is 2) can be modified:
https://docsify-this.net/?basePath=https://raw.githubusercontent.com/hibbitts-design/docsify-this-one-page-article/main&homepage=home.md&sidebar=true&maxLevel=3
Please note that when you use the Docsify-This Web Page Builder the Docsify-This URL generated includes these same URL parameters. For example, selecting a custom font family like "Open Sans" will add the parameter font-family=Open%20Sans,sans-serif to your generated URL. Similarly, options like adding a sidebar for navigation or adding an "Edit this Page" link are all translated into URL parameters that can be bookmarked and shared.
For a complete list of available URL parameters and advanced customization options, see the Docsify-This URL parameter documentation.
Important: If you're manually constructing a Docsify-This URL (bypassing the Web Page Builder), you must use the raw source URL for GitHub files. You can obtain the raw URL by clicking the "Raw" button when viewing the file on GitHub, or by changing the URL format from:
https://github.com/username/repo/blob/main/README.mdto:https://raw.githubusercontent.com/username/repo/main/README.md
However, when using the Web Page Builder, you can paste either the regular GitHub URL or the raw URL - both formats are supported.
You can also render other Markdown files in the same repository by manually editing the Docsify-This URL parameter homepage, for example:
https://docsify-this.net/?basePath=https://raw.githubusercontent.com/hibbitts-design/docsify-this-one-page-article/main&homepage=anotherfile.md- Publish your Markdown files as web pages, with no website setup or build process required
- Visually style your web pages using a point-and-click Web Page Builder
- Share existing GitHub-hosted Markdown files as web pages, with an optional 'Edit this Page' link
- Seamlessly embed constraint-free Markdown/HTML into other platforms (e.g. LMS or CMS)
- Use the available options when embedding content to match each destination platform better visually
If you can edit the Markdown file that is displayed by Docsify-This the visual appearance can be further altered by using a set of provided Markdown CSS Classes. For example:
button
Required Reading Quiz due Jun 4th
[Required Reading Quiz due Jun 4th](https://canvas.sfu.ca/courses/44038/quizzes/166553 ':class=button')banner-image

For a complete reference of all available CSS classes and advanced styling options, see the Docsify-This CSS Markdown classes documentation.
<style> .markdown-section .mybutton, .markdown-section .mybutton:hover { cursor: pointer; color: #CC0000; height: auto; display: inline-block; border: 2px solid #CC0000; border-radius: 4rem; margin: 2px 0px 2px 0px; padding: 8px 18px 8px 18px; line-height: 1.2rem; background-color: white; font-family: -apple-system, "Segoe UI", "Helvetica Neue", sans-serif; font-weight: bold; text-decoration: none; } </style>In addition to the Markdown CSS classes supported by Docsify-This, you can also define your own custom classes within your displayed Markdown files, for example:
CSS in Markdown file:
<style>
.markdown-section .mybutton, .markdown-section .mybutton:hover {
cursor: pointer;
color: #CC0000;
height: auto;
display: inline-block;
border: 2px solid #CC0000;
border-radius: 4rem;
margin: 2px 0px 2px 0px;
padding: 8px 18px 8px 18px;
line-height: 1.2rem;
background-color: white;
font-family: -apple-system, "Segoe UI", "Helvetica Neue", sans-serif;
font-weight: bold;
text-decoration: none;
}
</style>Markdown:
[Required Reading Quiz due Jun 4th](https://canvas.sfu.ca/courses/44038/quizzes/168353 ':class=mybutton')As supported by standard Markdown, HTML snippets can also be included (and mixed) within Markdown , for example:
<div class="row">
<div class="column">

Lorem ipsum dolor sit amet, consectetur adipiscing elit.

</div>
<div class="column">

Lorem ipsum dolor sit amet, consectetur adipiscing elit.

</div>
</div>Starting from scratch isn't always necessary. These pre-designed templates provide a solid foundation for common publishing scenarios, from simple articles to complete course websites. You can use them as-is or change them to fit what you need.
The following Markdown templates can be cloned/forked on GitHub, imported into Codeberg, or downloaded and hosted on your own webserver.
To use these templates you would generally do the following (specific instructions are included with each template):
- Tap Use this template in the chosen template repository (upper-right green button) and then choose Create a new repository
- Choose the name for your new repository to contain the files and then tap Create repository to copy the template files to your own GitHub account
- View the home.md Markdown file in your newly created repository and copy it's URL
- Go to https://docsify-this.net and paste the copied URL into the Markdown File URL field
- Select the page options you want (e.g. Docsify Sidebar) and tap the View as a Web Page button to view your Markdown file as a web page for sharing or embedding
Now that the template files are located on your own GitHub account, modify their content to fit your needs.
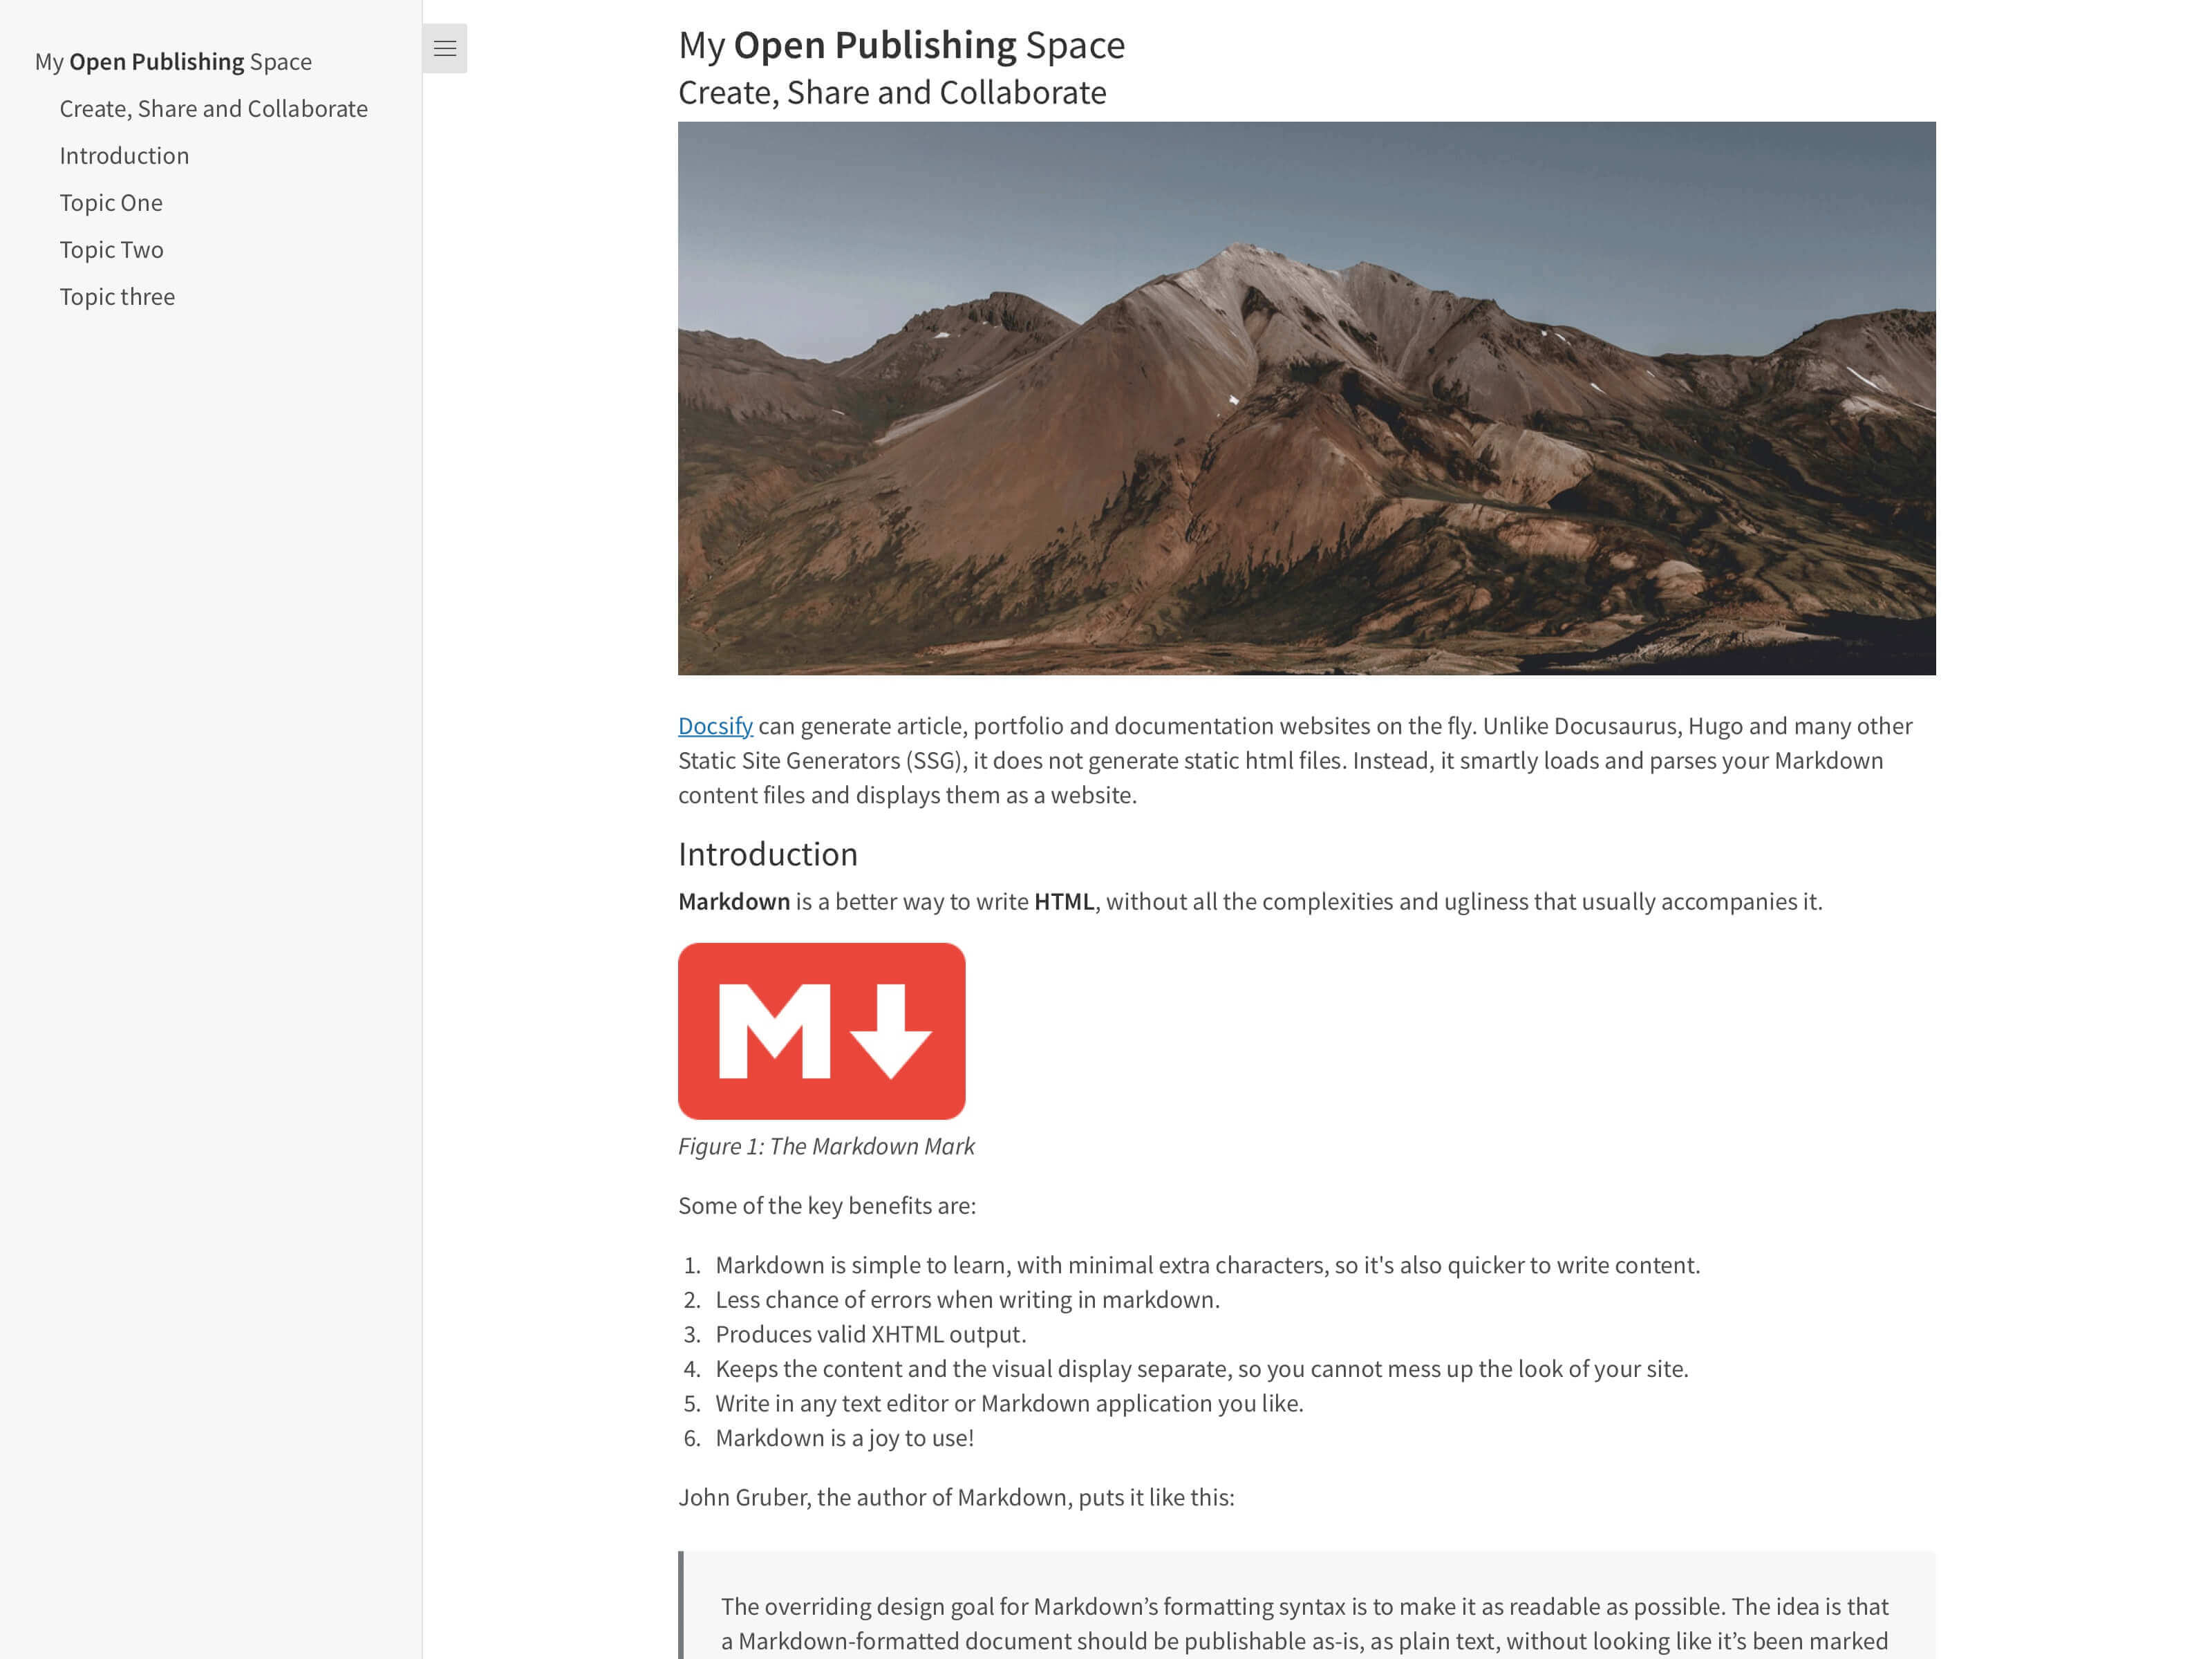
Figure 3. Docsify-This One Page Article Template, for example the Markdown file home.md and displayed by Docsify-This as https://docsify-this.net/?basePath=https://raw.githubusercontent.com/hibbitts-design/docsify-this-one-page-article/main&homepage=home.md&sidebar=true&maxLevel=3
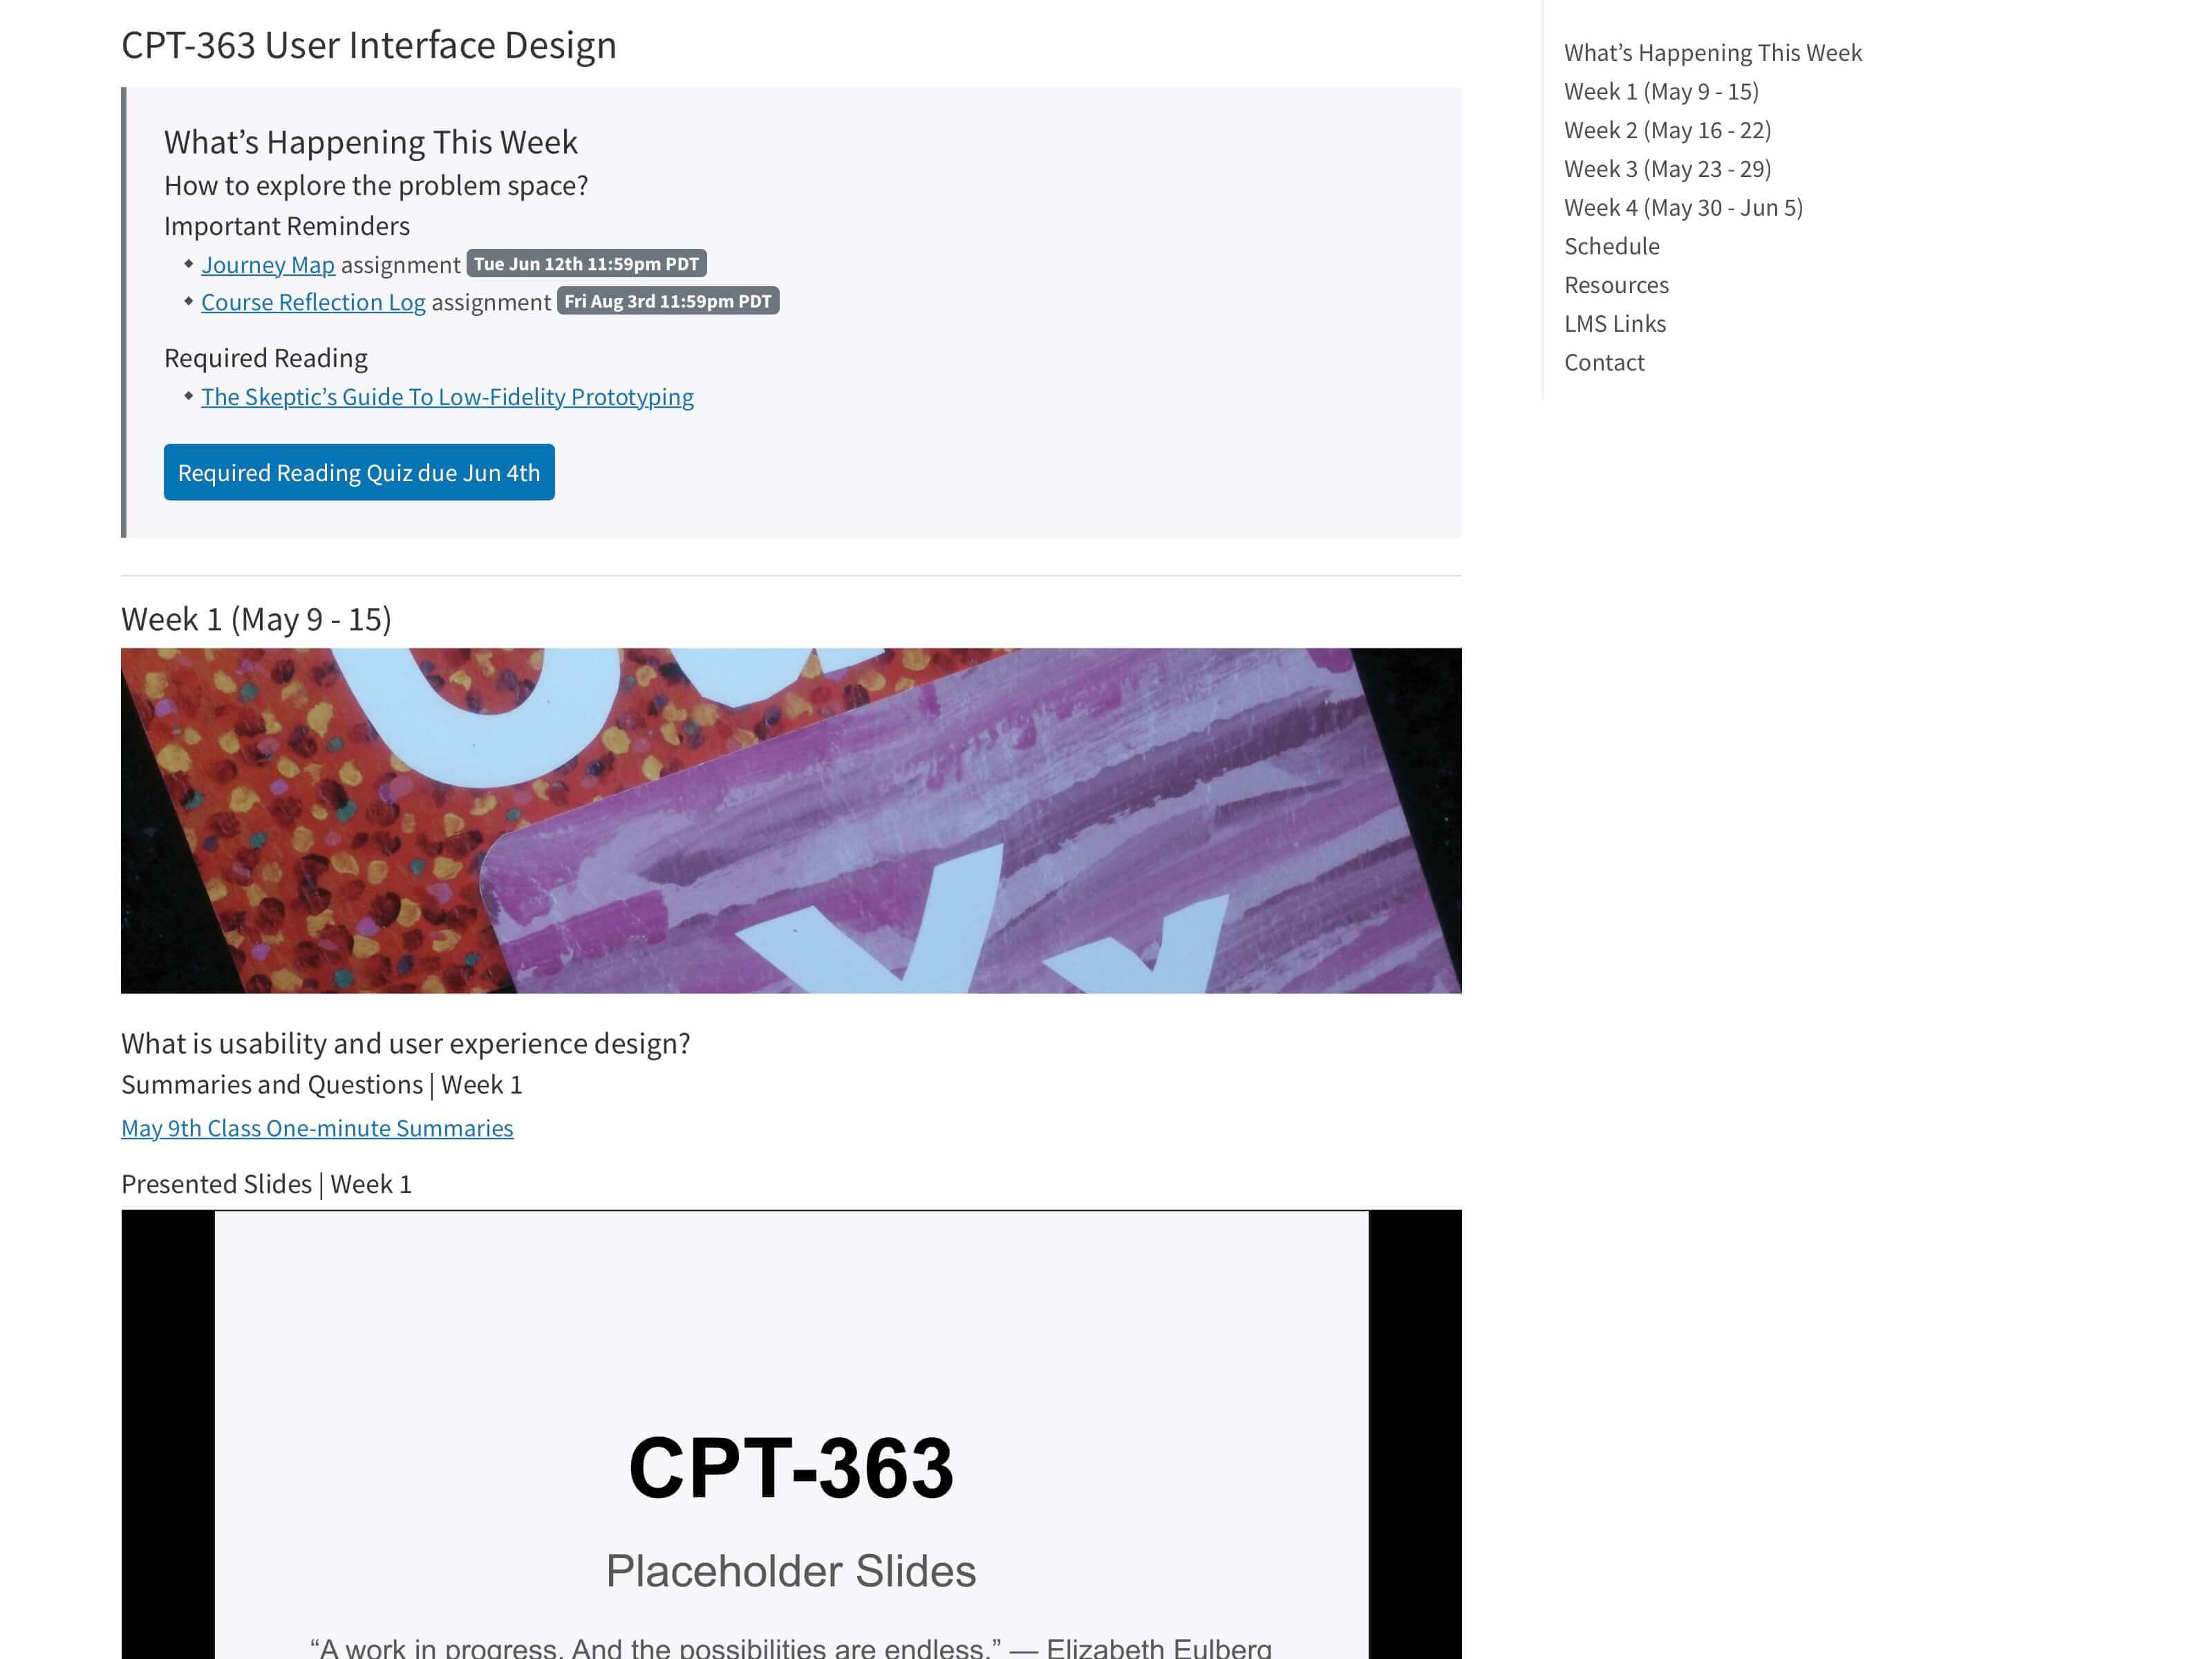
Figure 4. Docsify-This One Page Course Template, for example the Markdown file home.md and displayed by Docsify-This as https://docsify-this.net/?basePath=https://raw.githubusercontent.com/hibbitts-design/docsify-this-one-page-course/main&homepage=home.md&toc=true
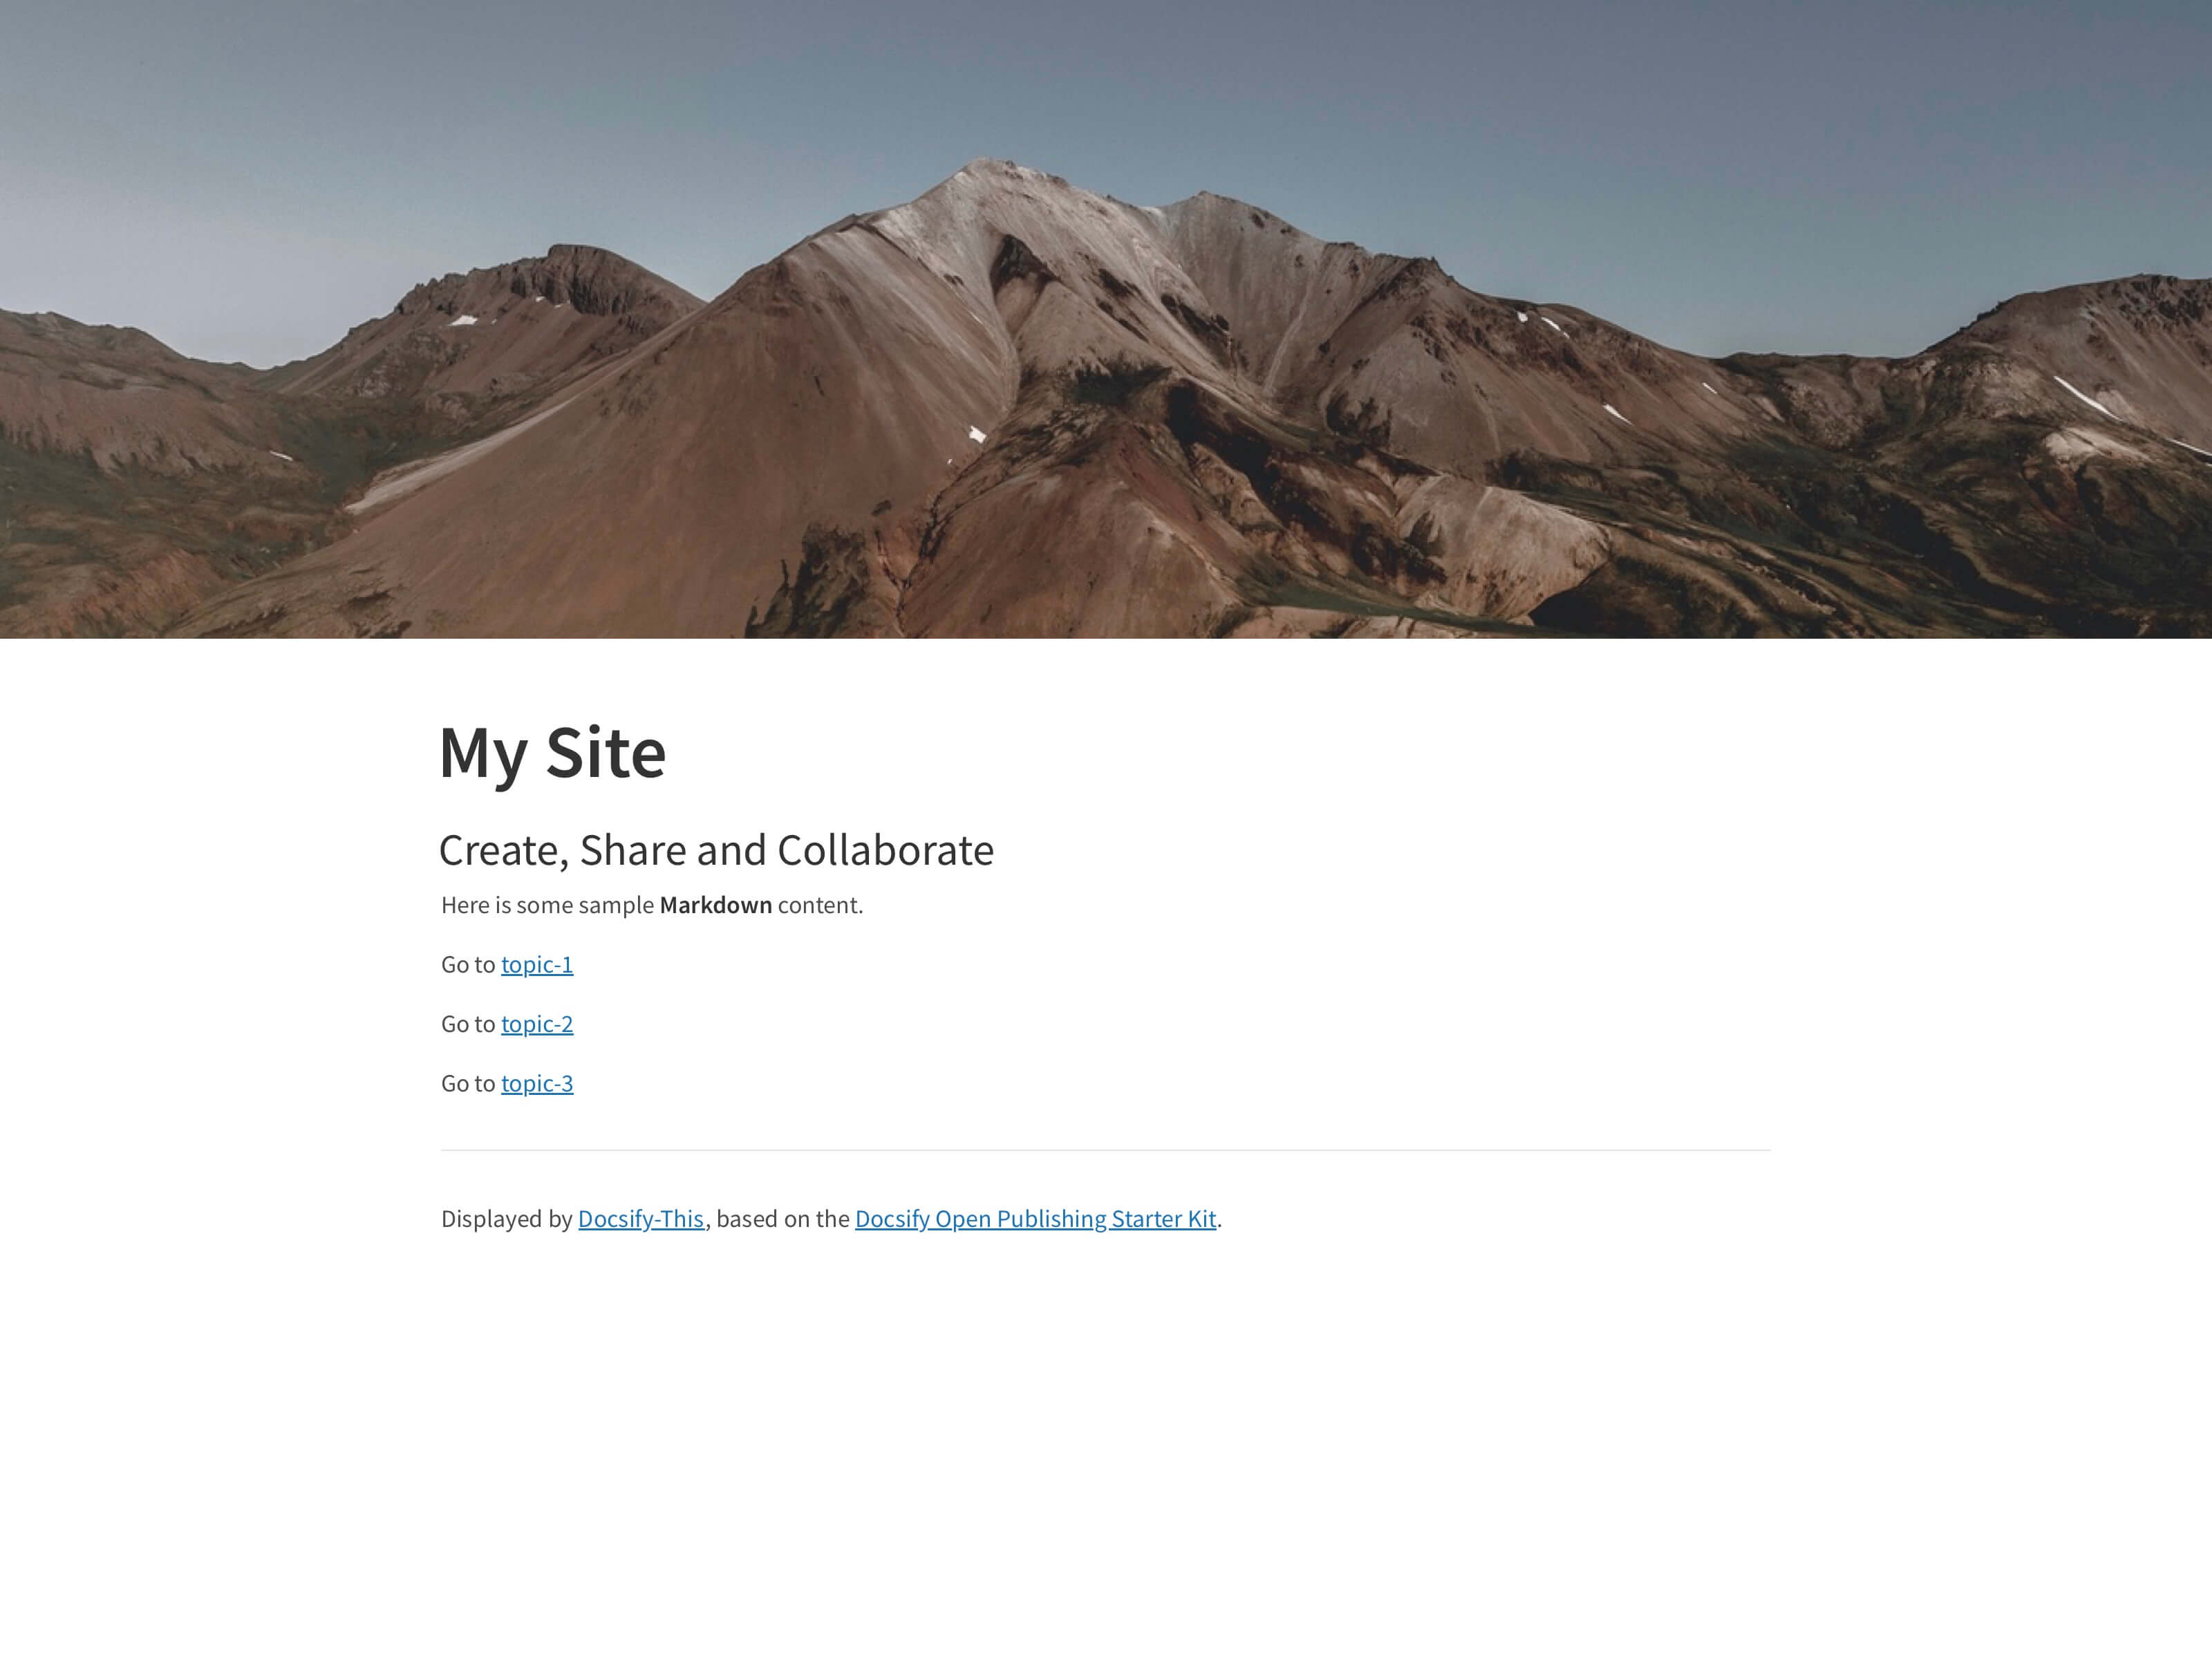
Figure 5. Docsify-This Multiple Page Basic Site, for example the Markdown file home.md and displayed by Docsify-This as https://docsify-this.net/?basePath=https://raw.githubusercontent.com/hibbitts-design/docsify-this-multiple-page-site/main&homepage=home.md
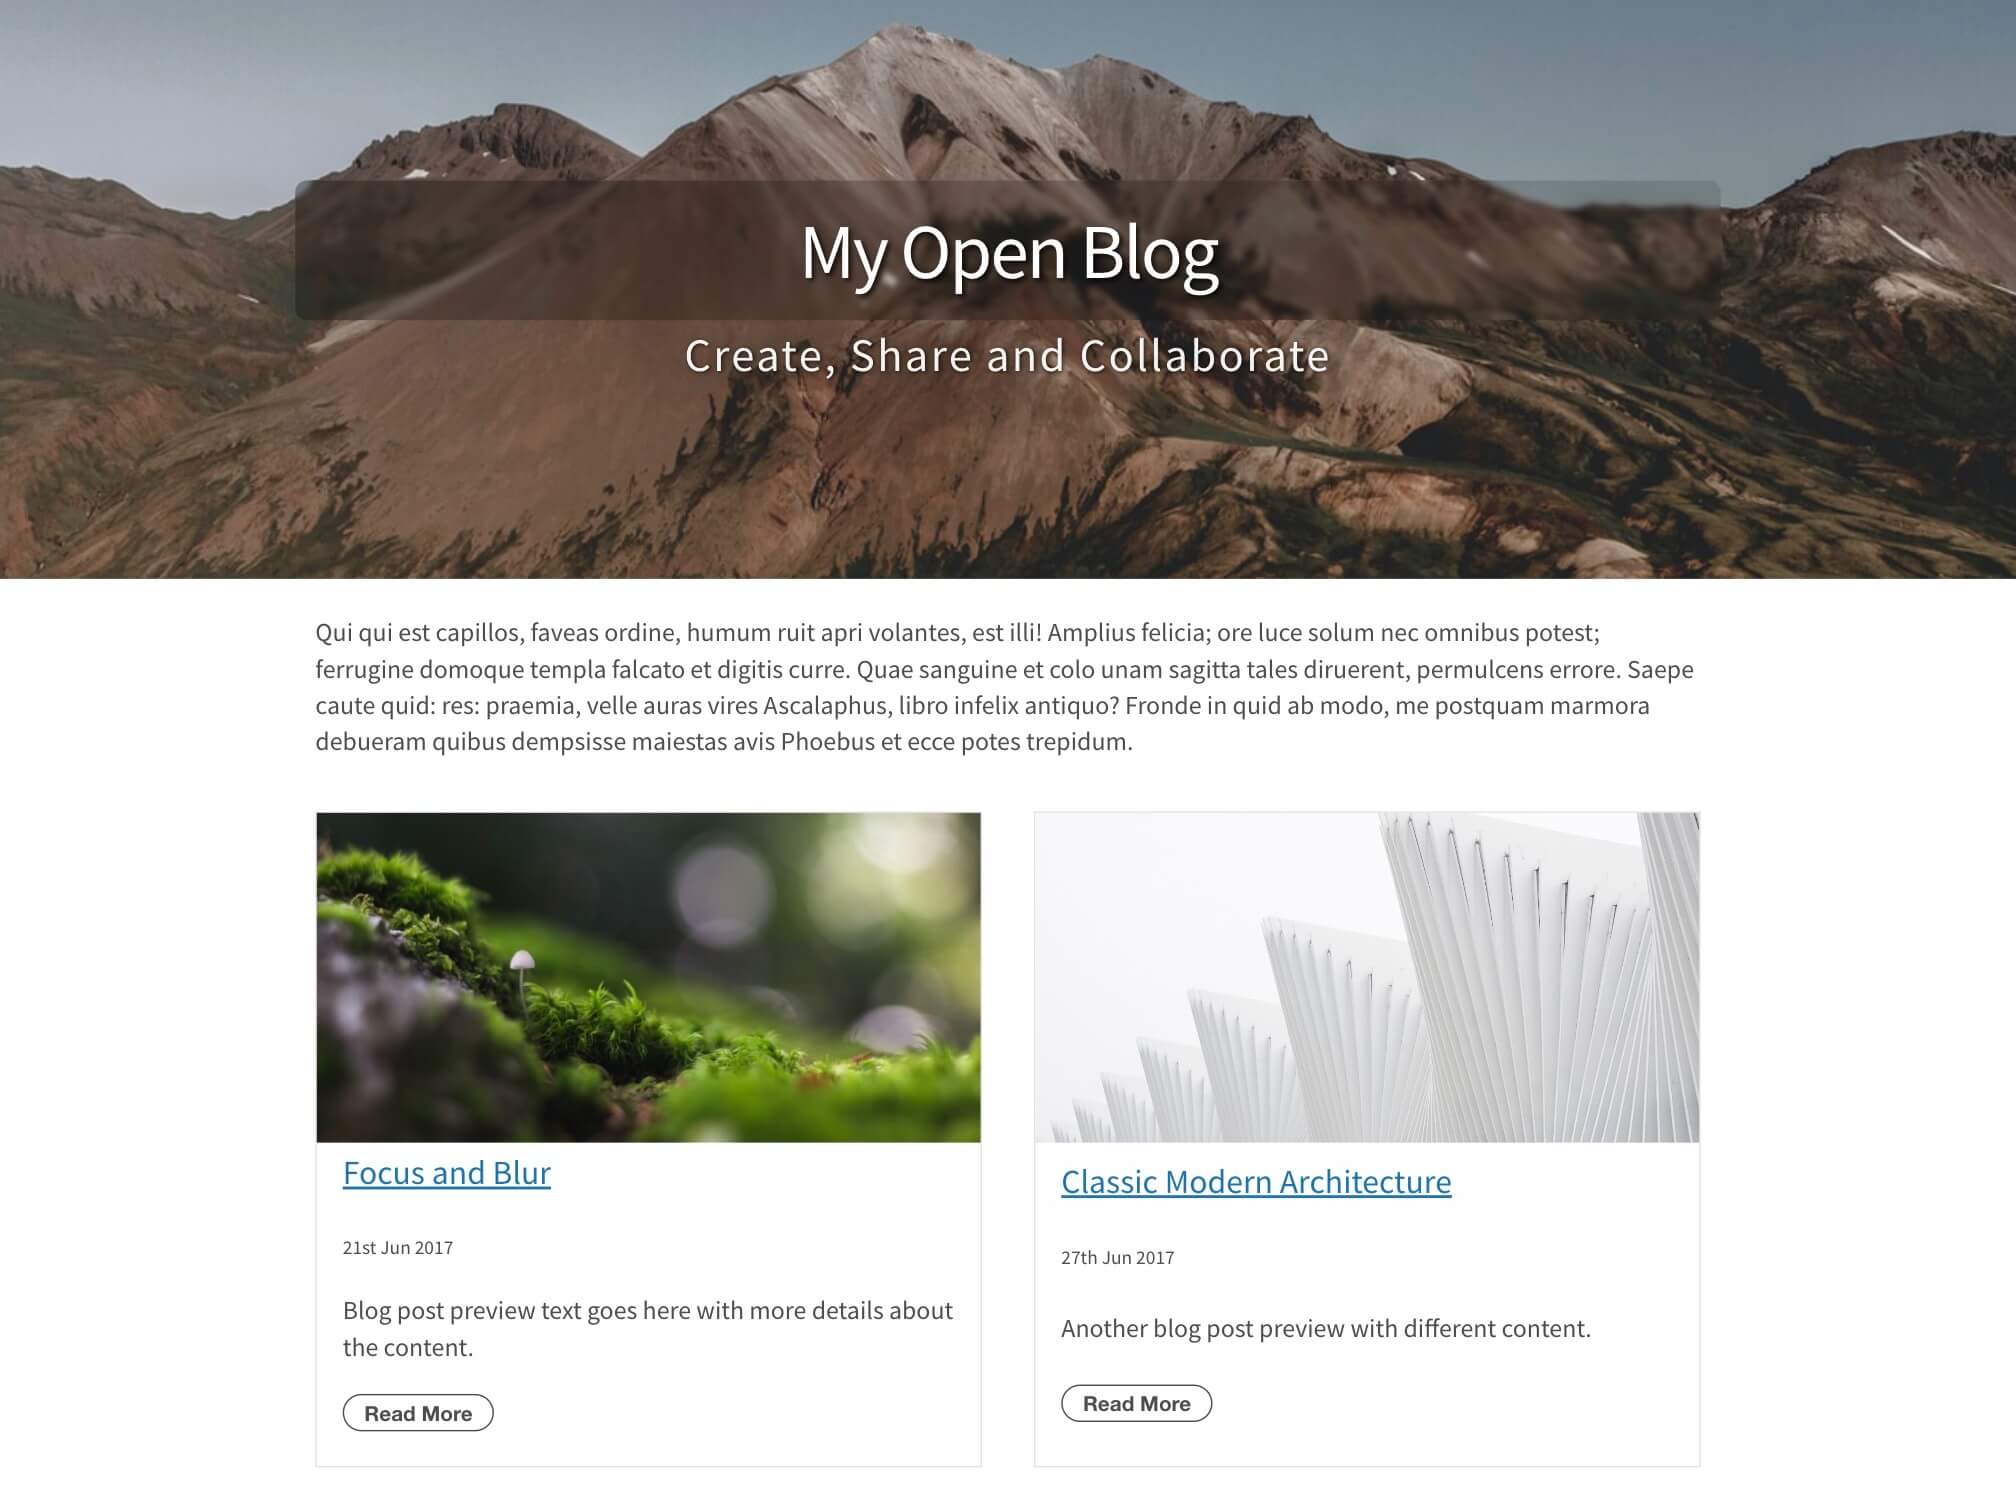
Figure 6. Docsify-This Multiple Page Blog Style Site Template, for example the Markdown file home.md and displayed by Docsify-This as https://docsify-this.net?basePath=https://raw.githubusercontent.com/hibbitts-design/docsify-this-multiple-page-blog-style-site/main&homepage=home.md
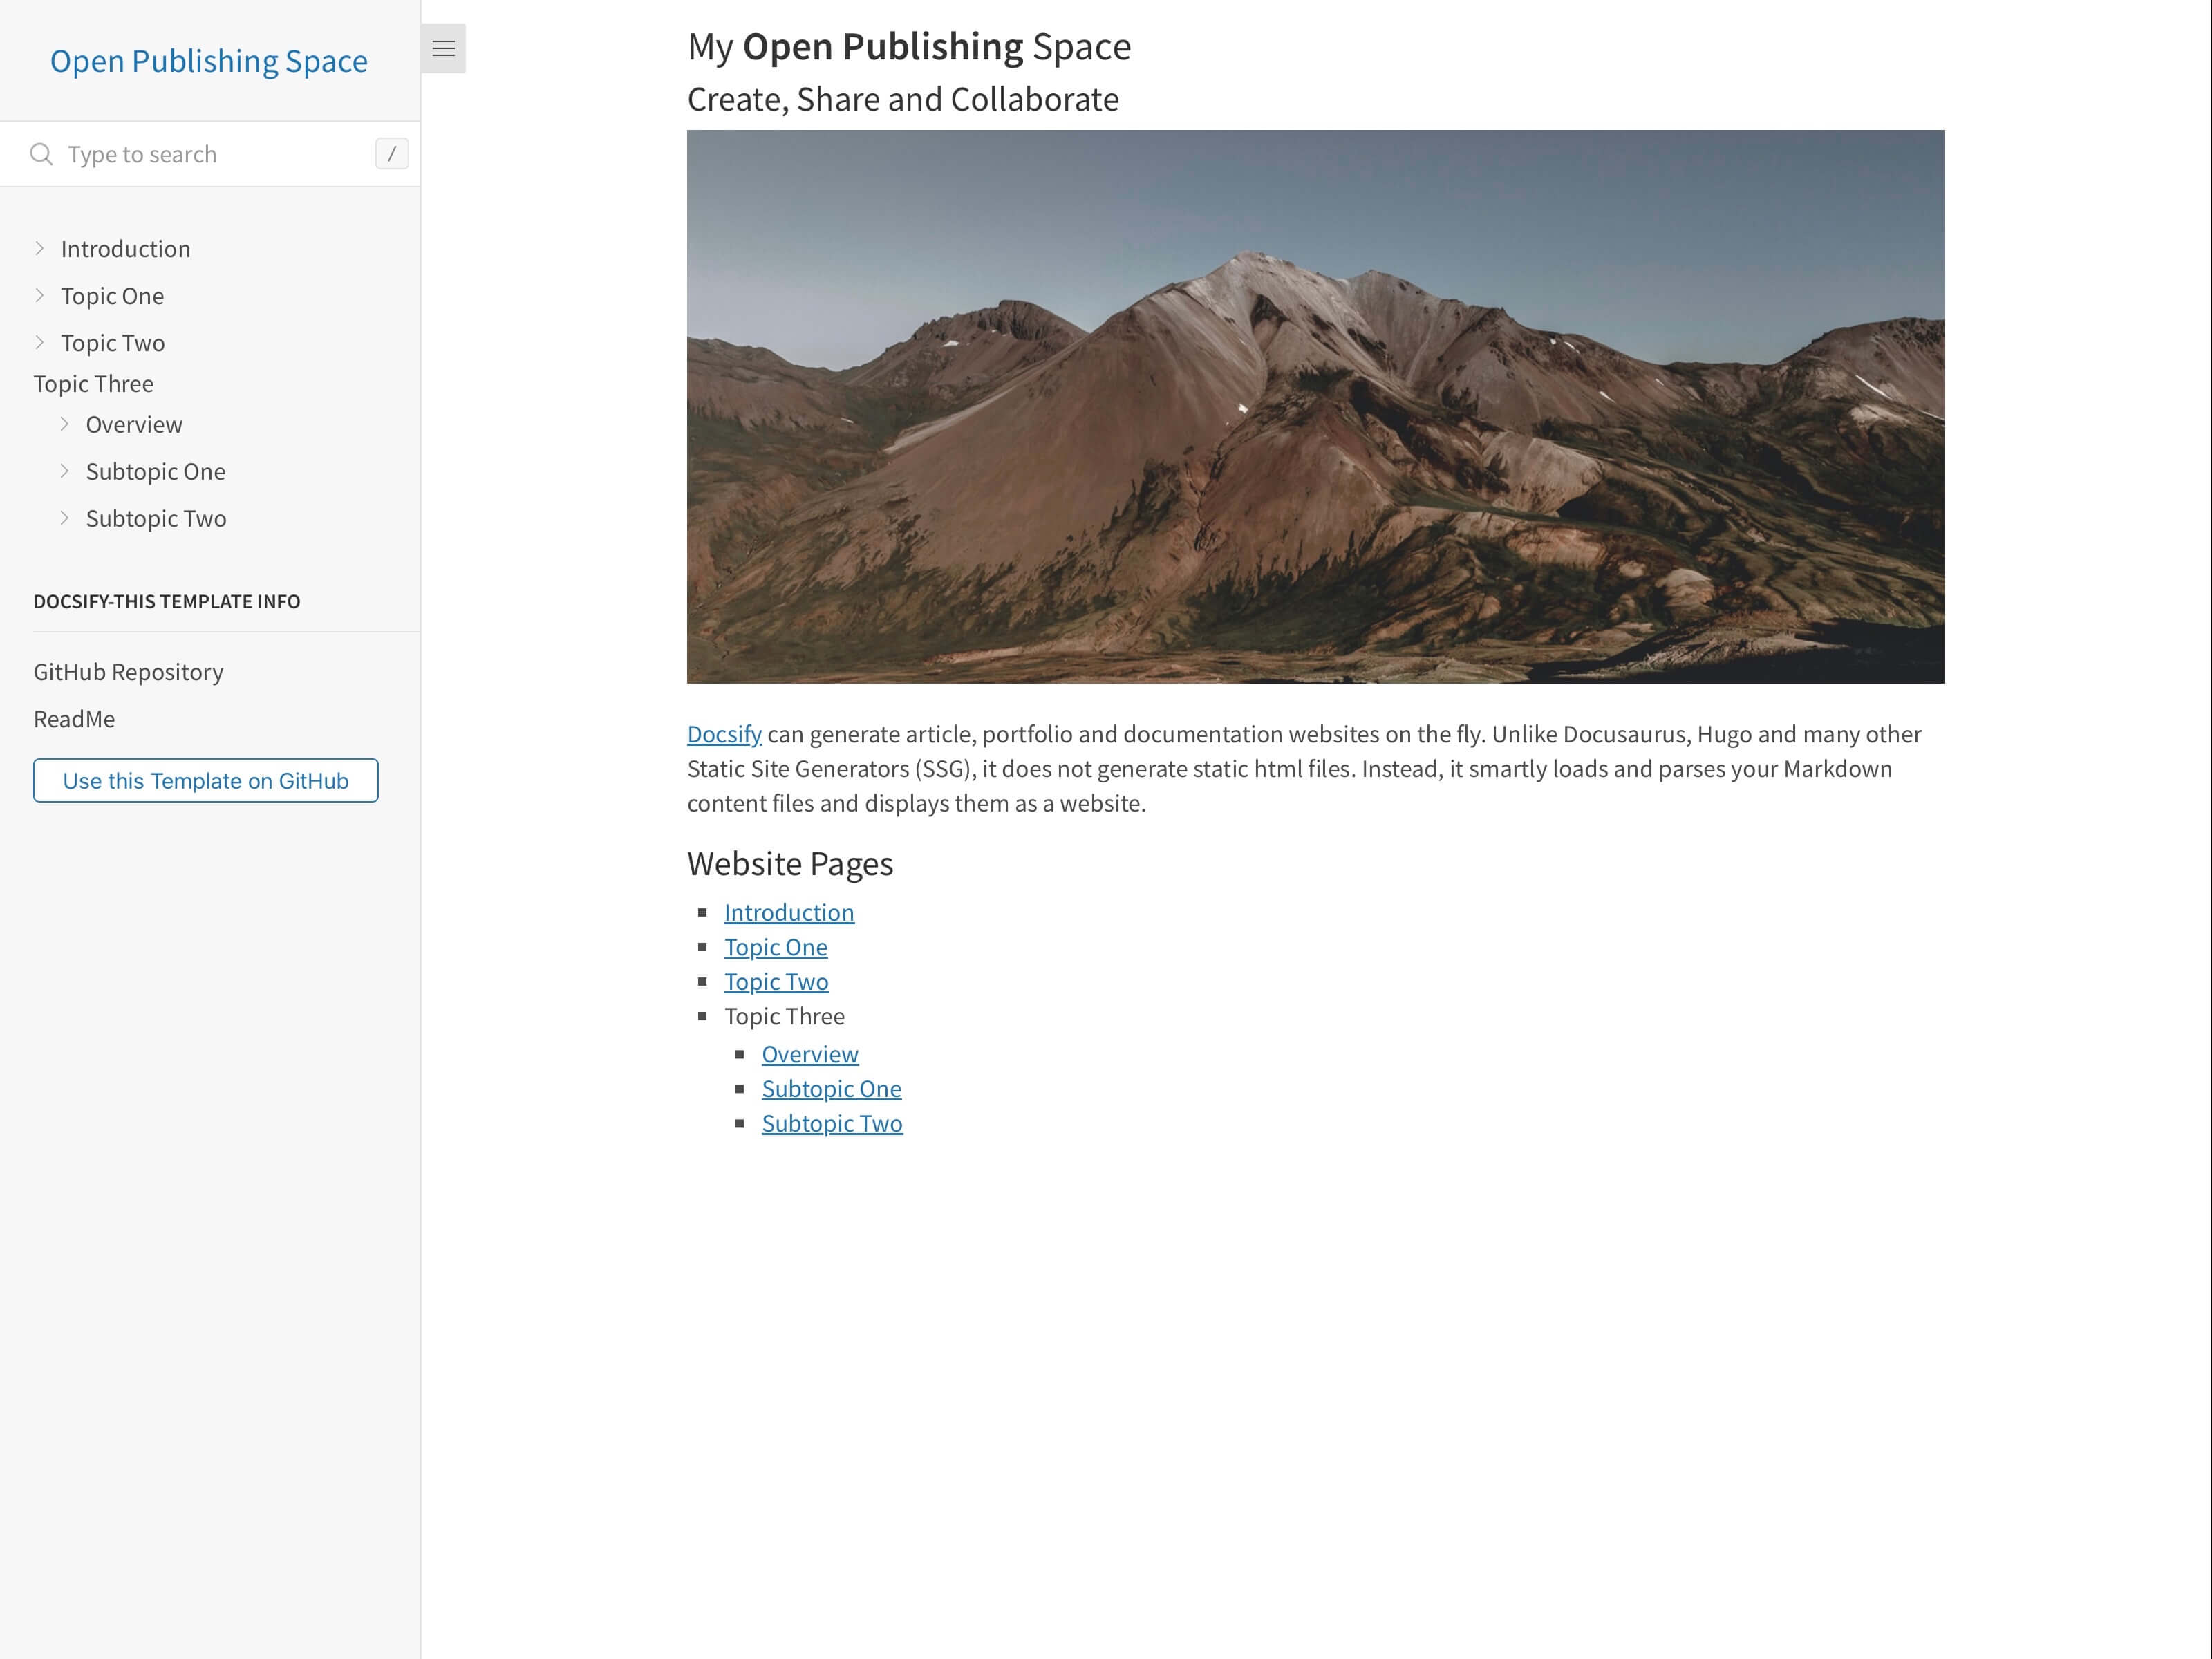
Figure 7. Multiple Page Open Publishing Site home.md file, including the use of a Docsify custom Sidebar file, displayed by Docsify-This as https://docsify-this.net?basePath=https://raw.githubusercontent.com/hibbitts-design/docsify-this-multiple-page-open-publishing-site/main&homepage=home.md&sidebar=true&loadSidebar=_sidebar.md&hide-credits=true
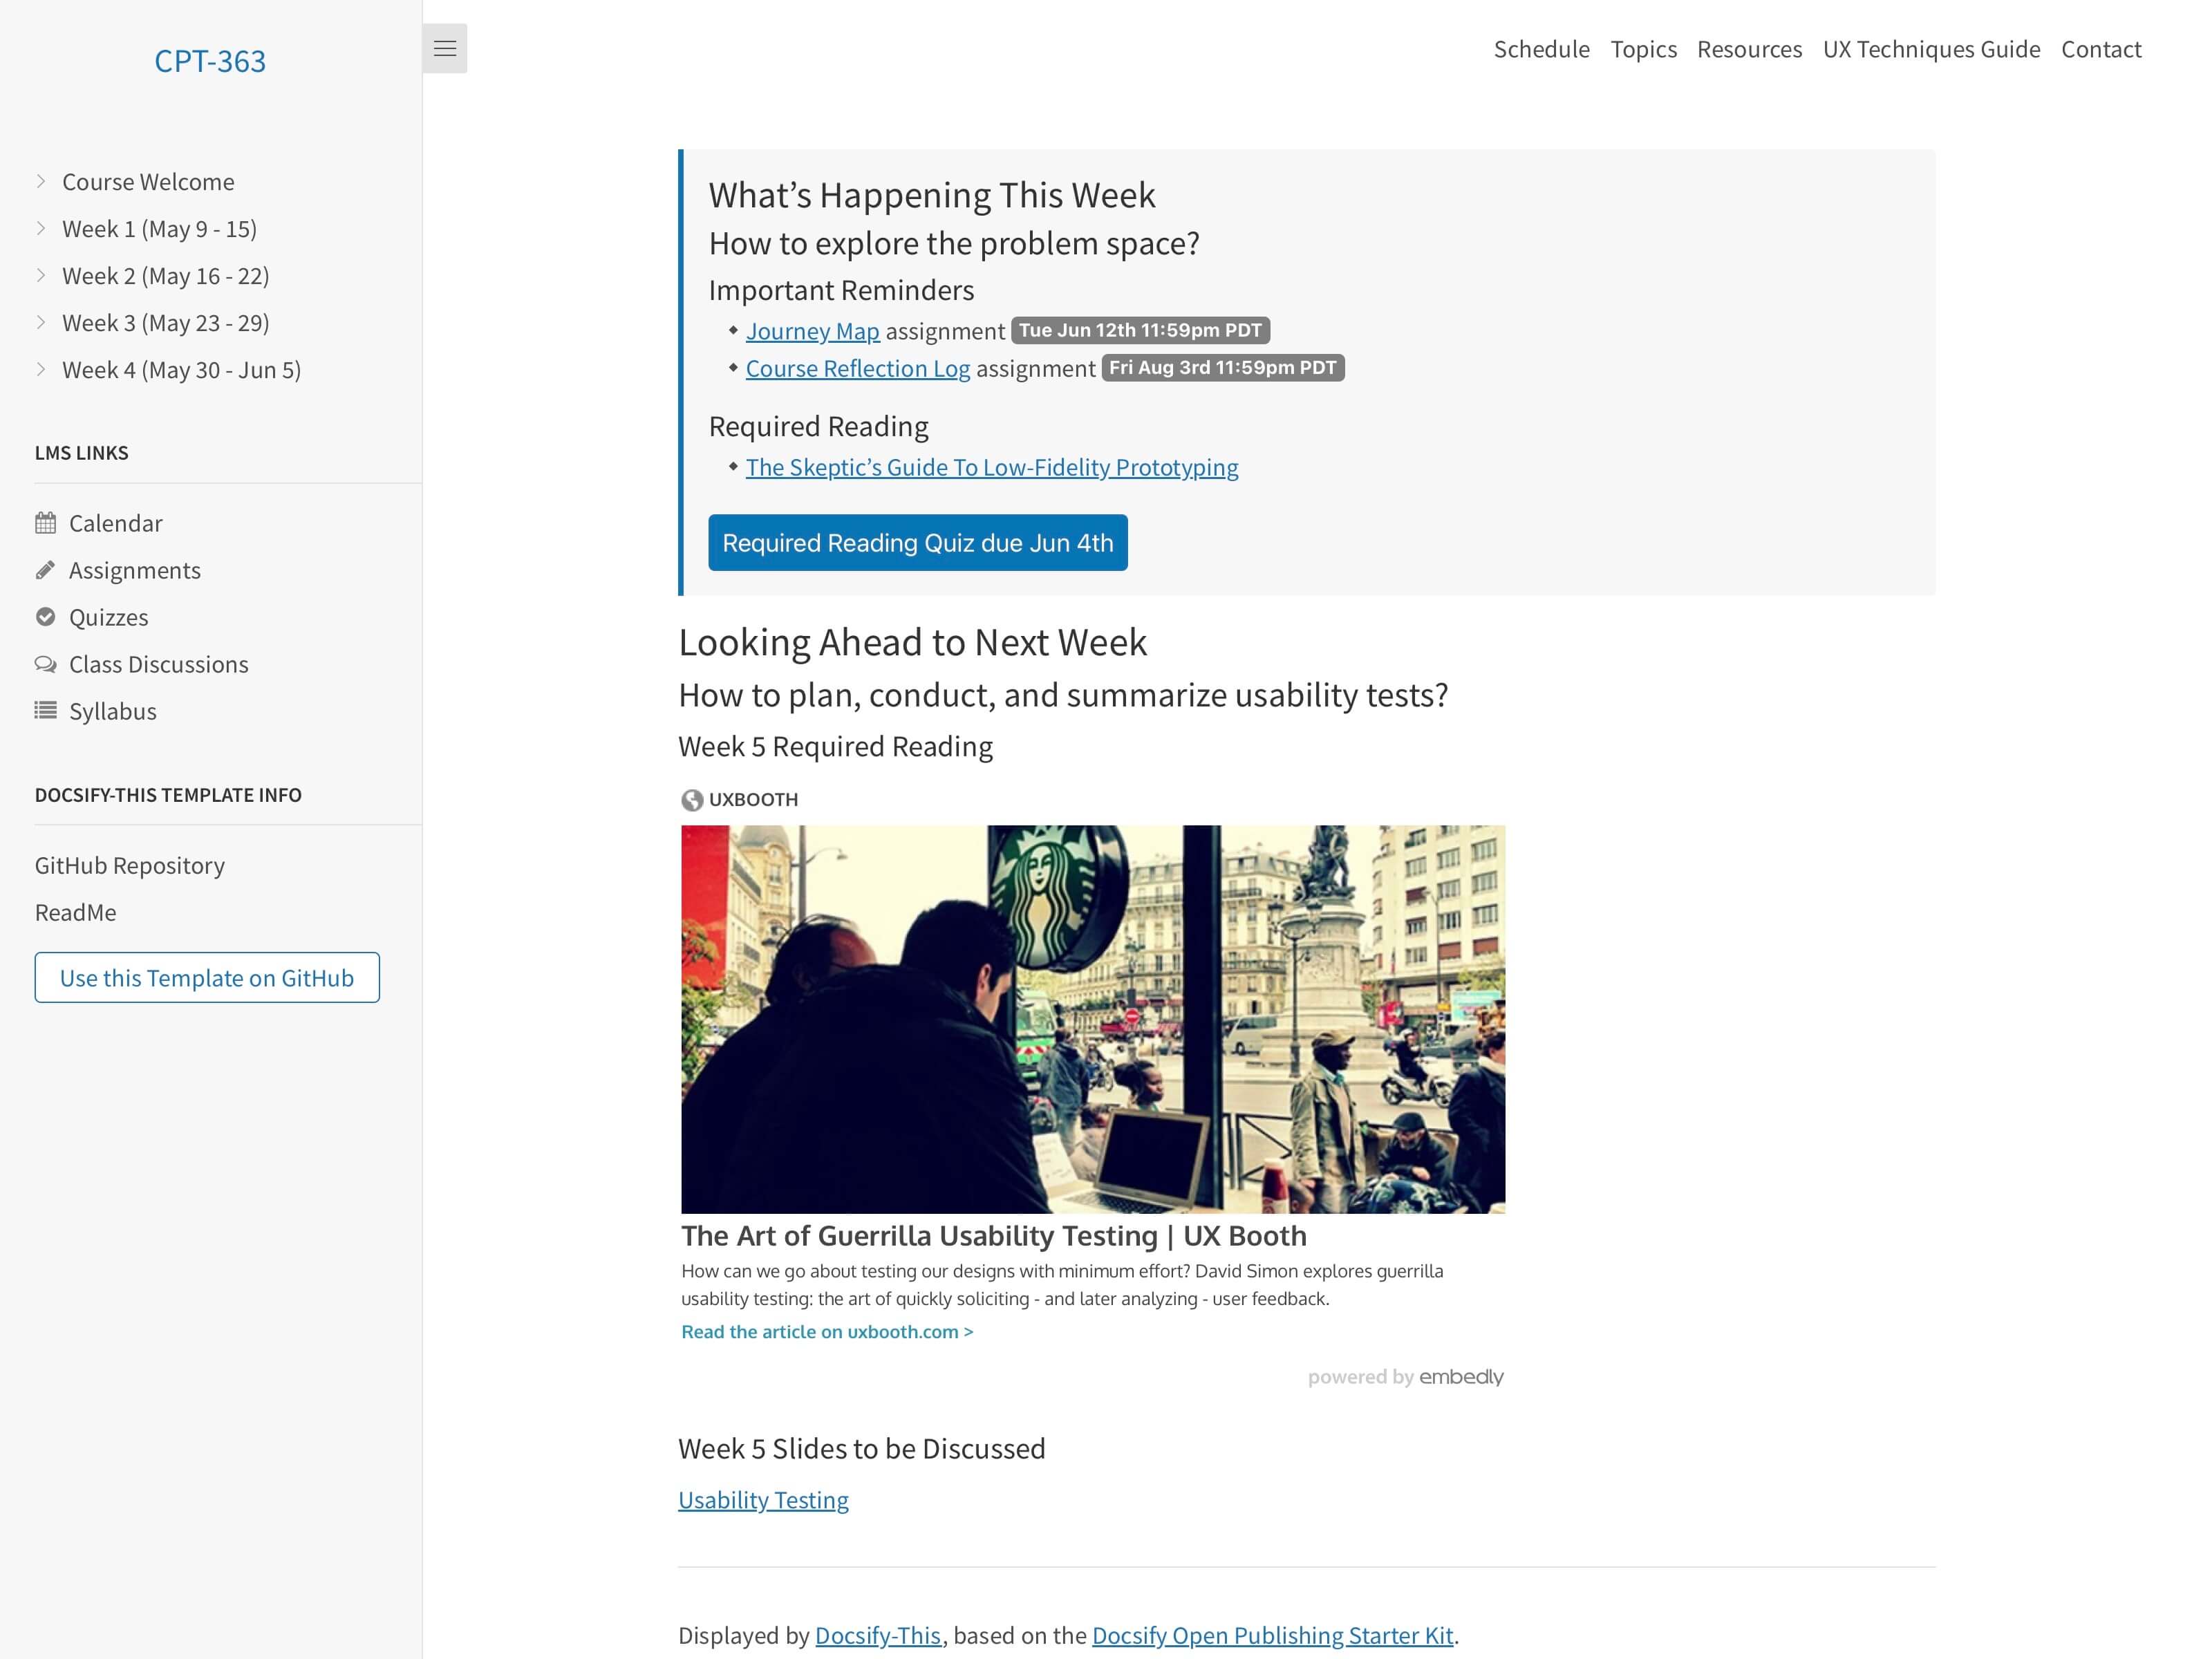
Figure 8. Docsify-This Multiple Page Site, for example the Markdown file home.md, including the use of a custom Docsify Sidebar file, and displayed by Docsify-This as https://docsify-this.net/?basePath=https://raw.githubusercontent.com/hibbitts-design/docsify-this-multiple-page-course-site/main&homepage=home.md&sidebar=true&loadSidebar=_sidebar.md&loadNavbar=_navbar.md&hide-credits=true&browser-tab-title=CPT-363
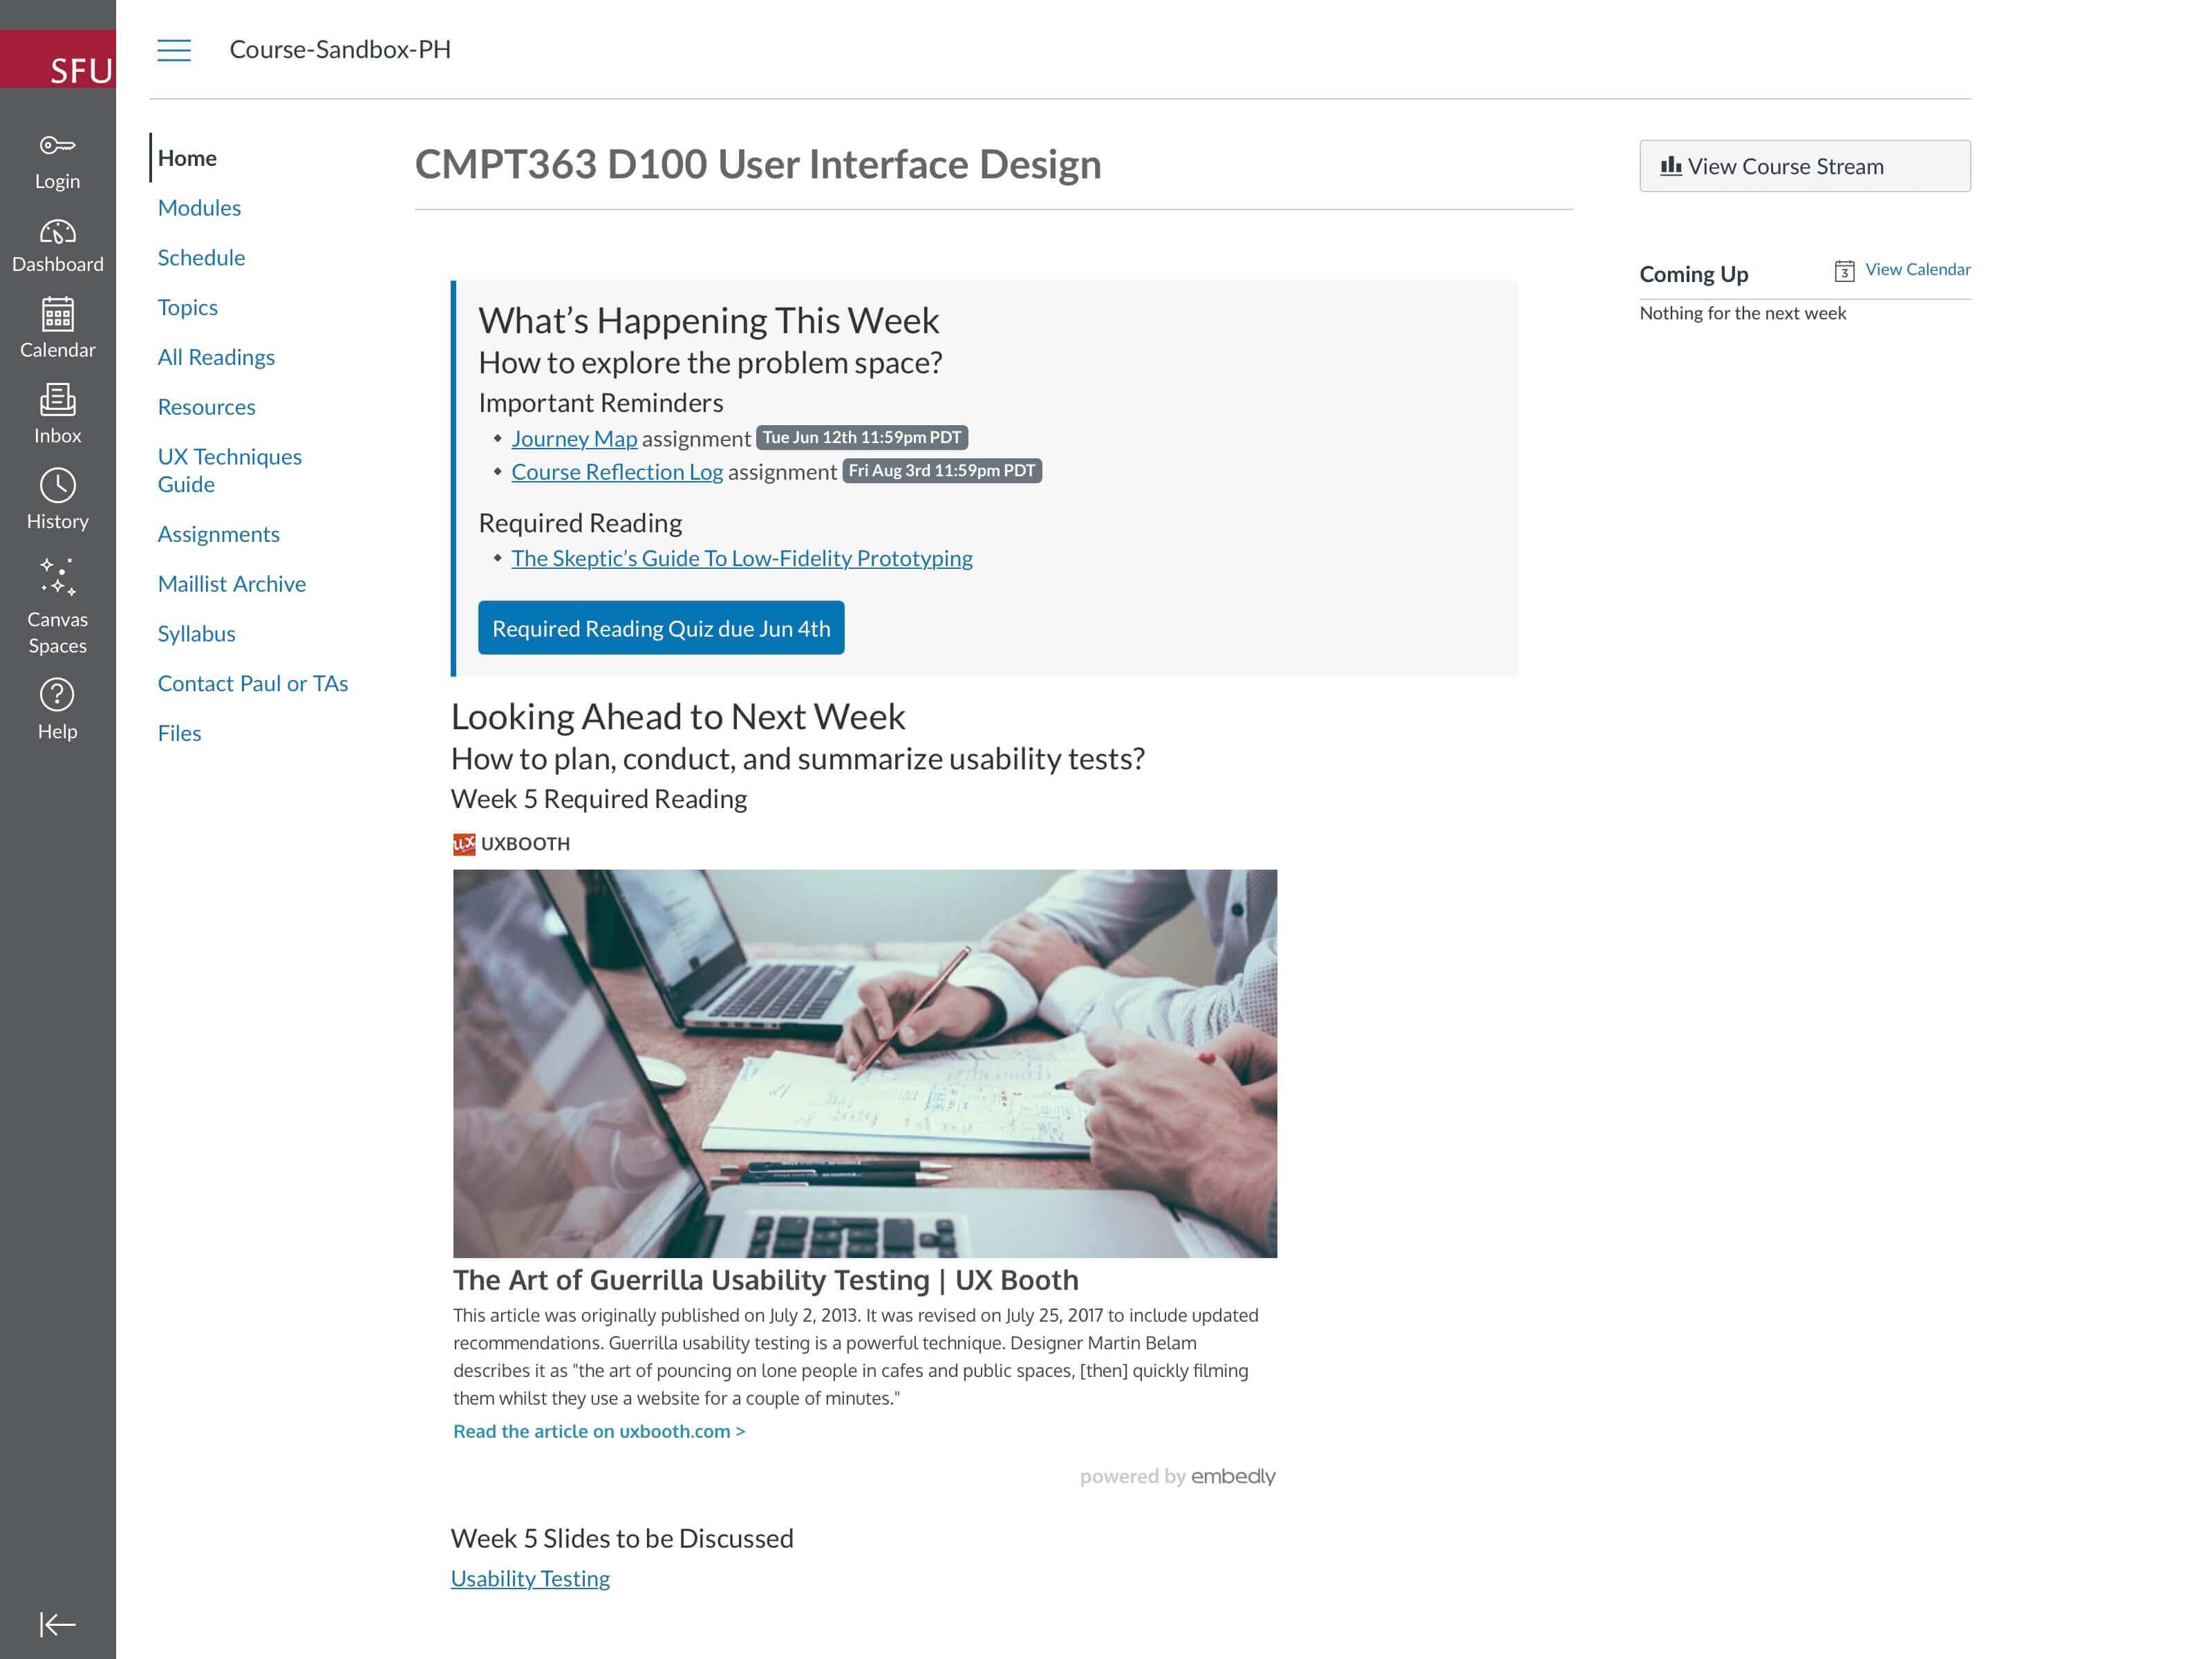
Figure 9. Docsify-This LMS Content Pages Template, including such embeddable pages as a home page, weekly module, topics and more
For additional template examples, see the Docsify-This Markdown templates
In additition to generating web pages and sites, you can embed Docsify-This web pages using iFrames in almost any platform. URL parameters can also be used to match each destination platform better visually.
In general, paste the below HTML into your HTML editor and then replace the default basepath and homepage value with your own. For WordPress users: Add the code below to a Custom HTML block.
For basic embedding with a fixed height to blend in smoothly with your other page content:
<div style="width: 100%; margin: 0; padding: 0; overflow: hidden;">
  <iframe src="https://docsify-this.net/?basePath=https://raw.githubusercontent.com/paulhibbitts/github-demo-markdown-file/main&homepage=README.md&max-width=100&hide-credits=true"
    style="width: 100%; height: 2700px; border: none; display: block;"
    scrolling="no"
    frameborder="0">
  </iframe>
</div>
Adjust the height value (2700px) to match your content length. Test on different devices to ensure all content is visible.
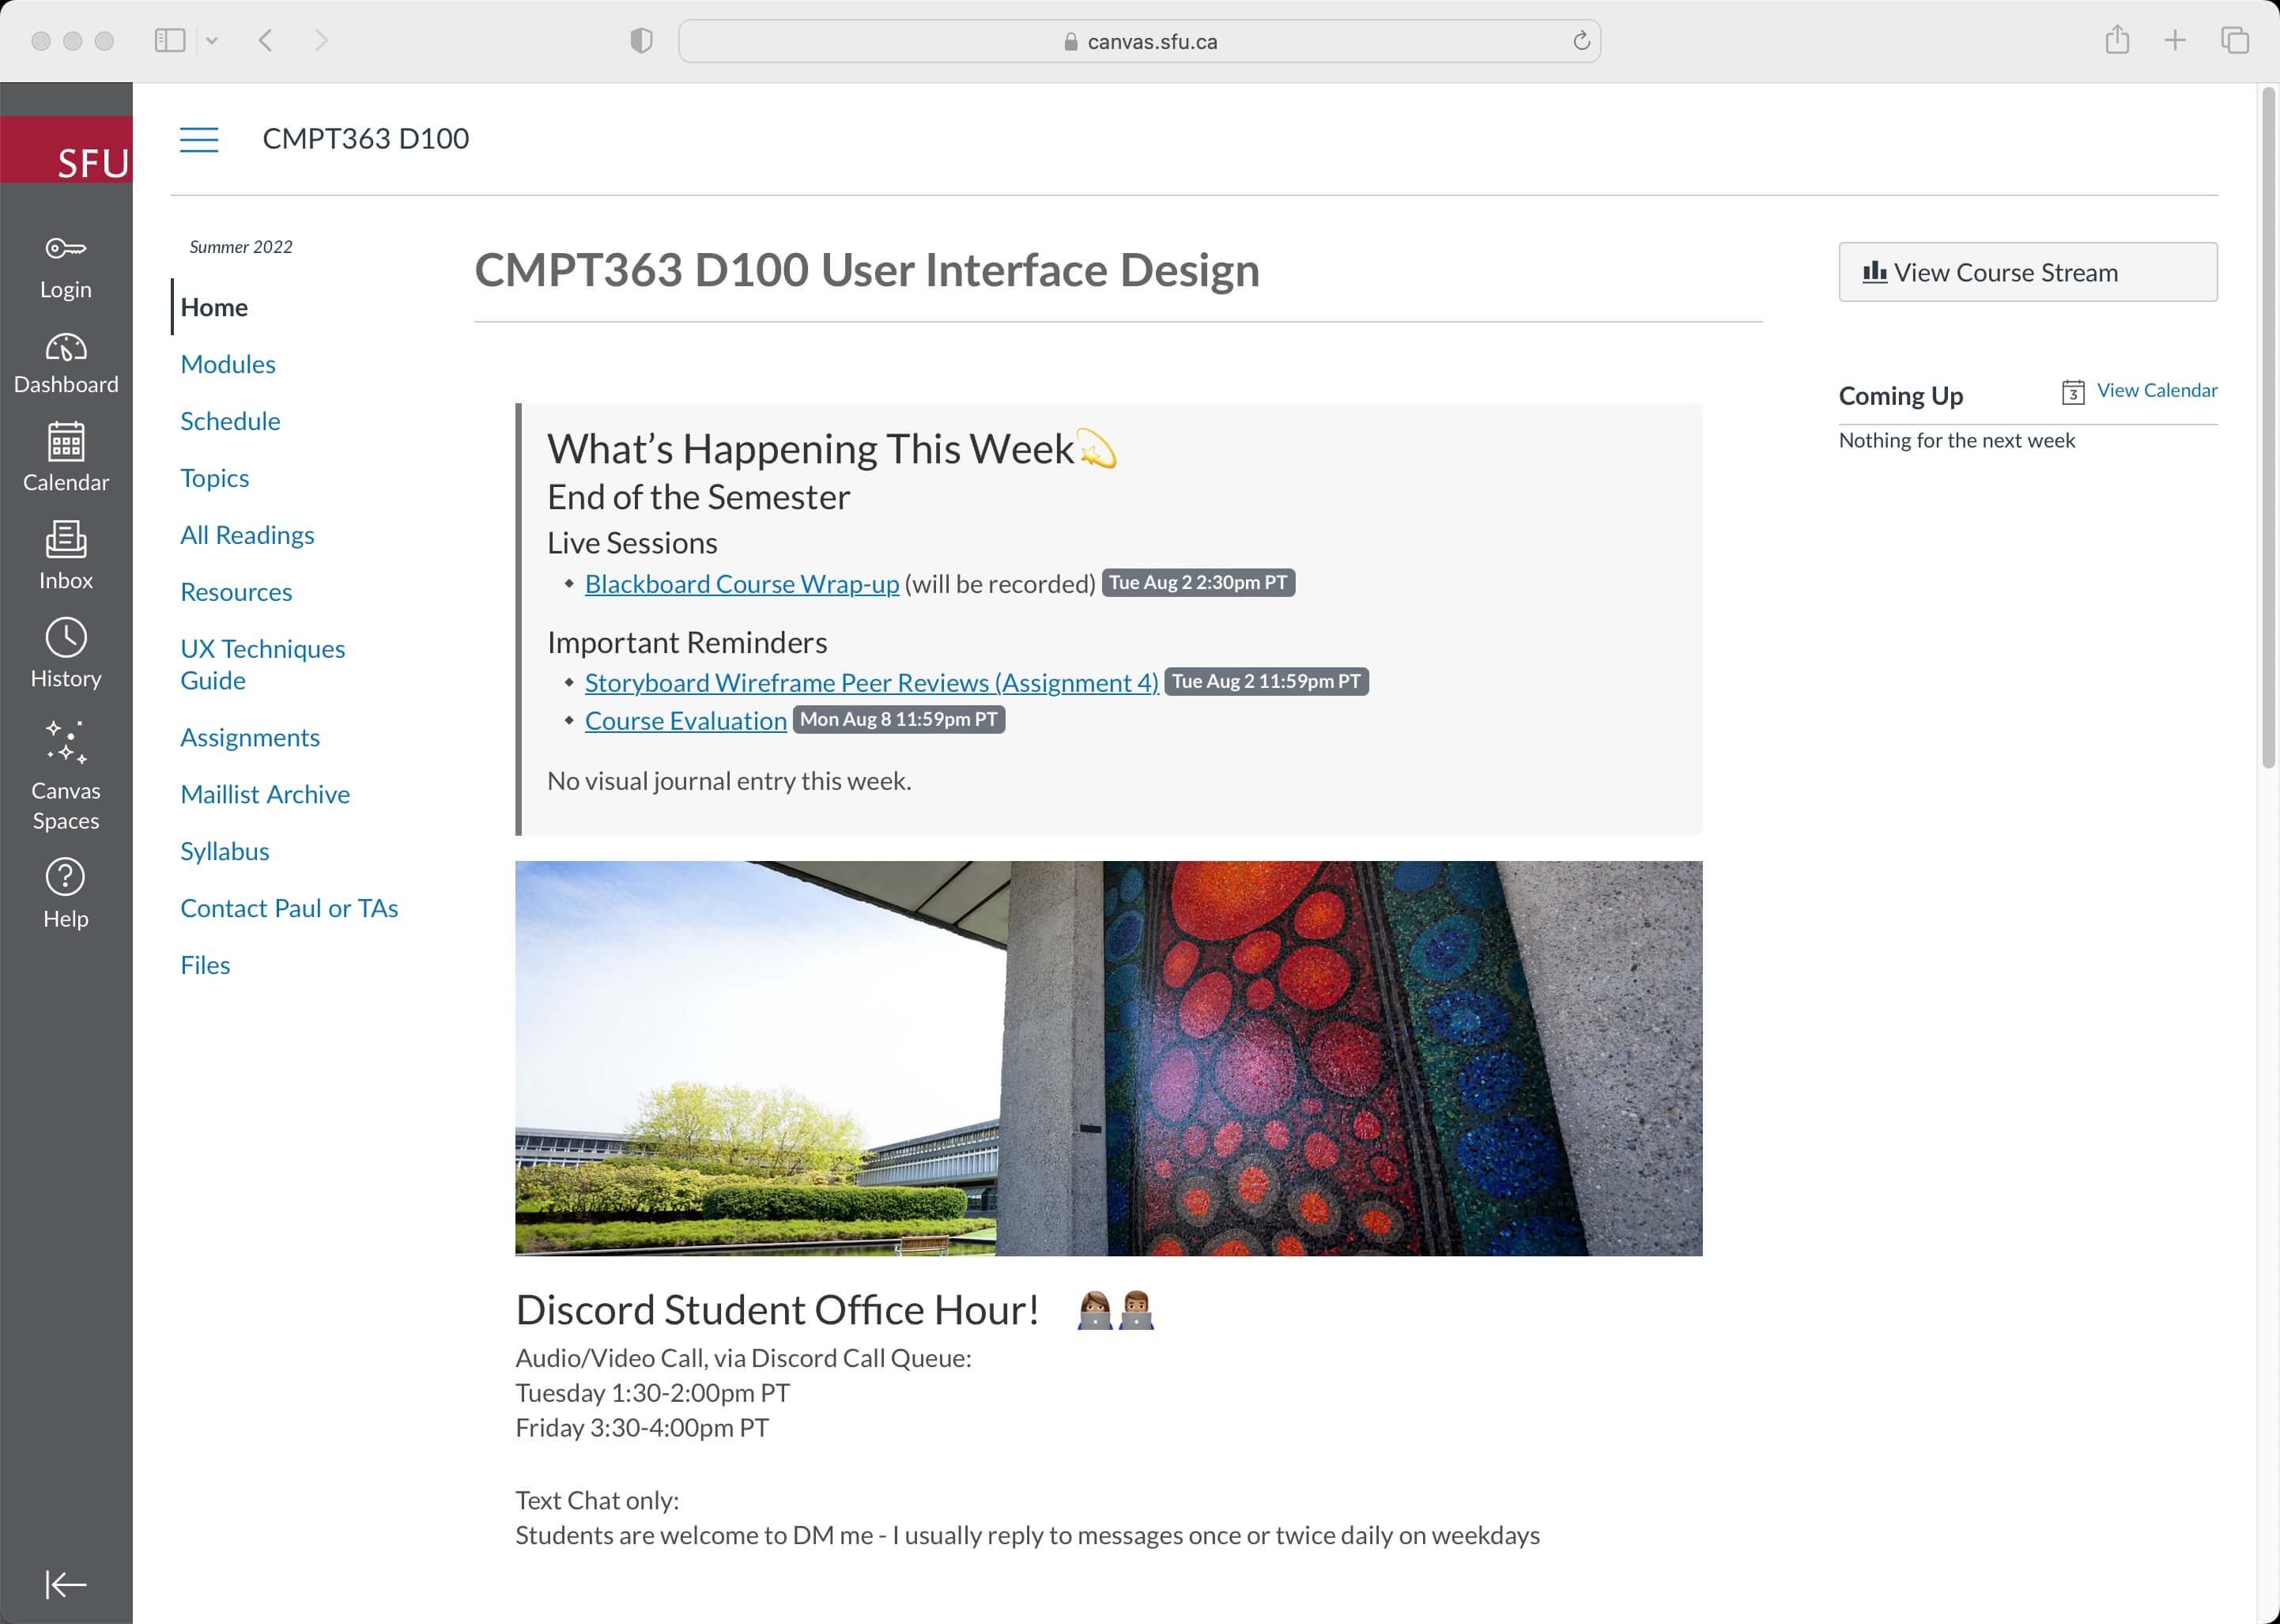
Figure 10. Docsify-This iFrame (within the Canvas LMS Homepage), for example https://canvas.sfu.ca/courses/76289
<p>
  <iframe style="overflow: hidden; border: 0px #ffffff none; background: #ffffff;"
    src="https://docsify-this.net?basePath=https://raw.githubusercontent.com/paulhibbitts/cmpt-363-222-pages/main&homepage=home.md&font-family=Lato%20Extended,Lato,Helvetica%20Neue,Helvetica,Arial,sans-serif&font-size=16px&hide-credits=true"
      width="800px"
      height="1400px"
      allowfullscreen="allowfullscreen">
  </iframe>
</p>
As shown above, with the Canvas LMS a Canvas Page can be set as the course Homepage, and then an iFrame can be used for the content of that page. For more details, view How do I set a Front Page in a course? and Embed content in Canvas.
If a scroll bar is present, you may want to re-edit your iFrame code and adjust the "height" value.
The URL of a Markdown file rendered by Docsify-This can also be included inside of other systems as an external URL.
Many LMSs, including Canvas and Moodle, have the ability to include external URLs in their course navigation menus. For example, with the Canvas LMS you would use the Redirect Tool to display Docsify-This web pages.
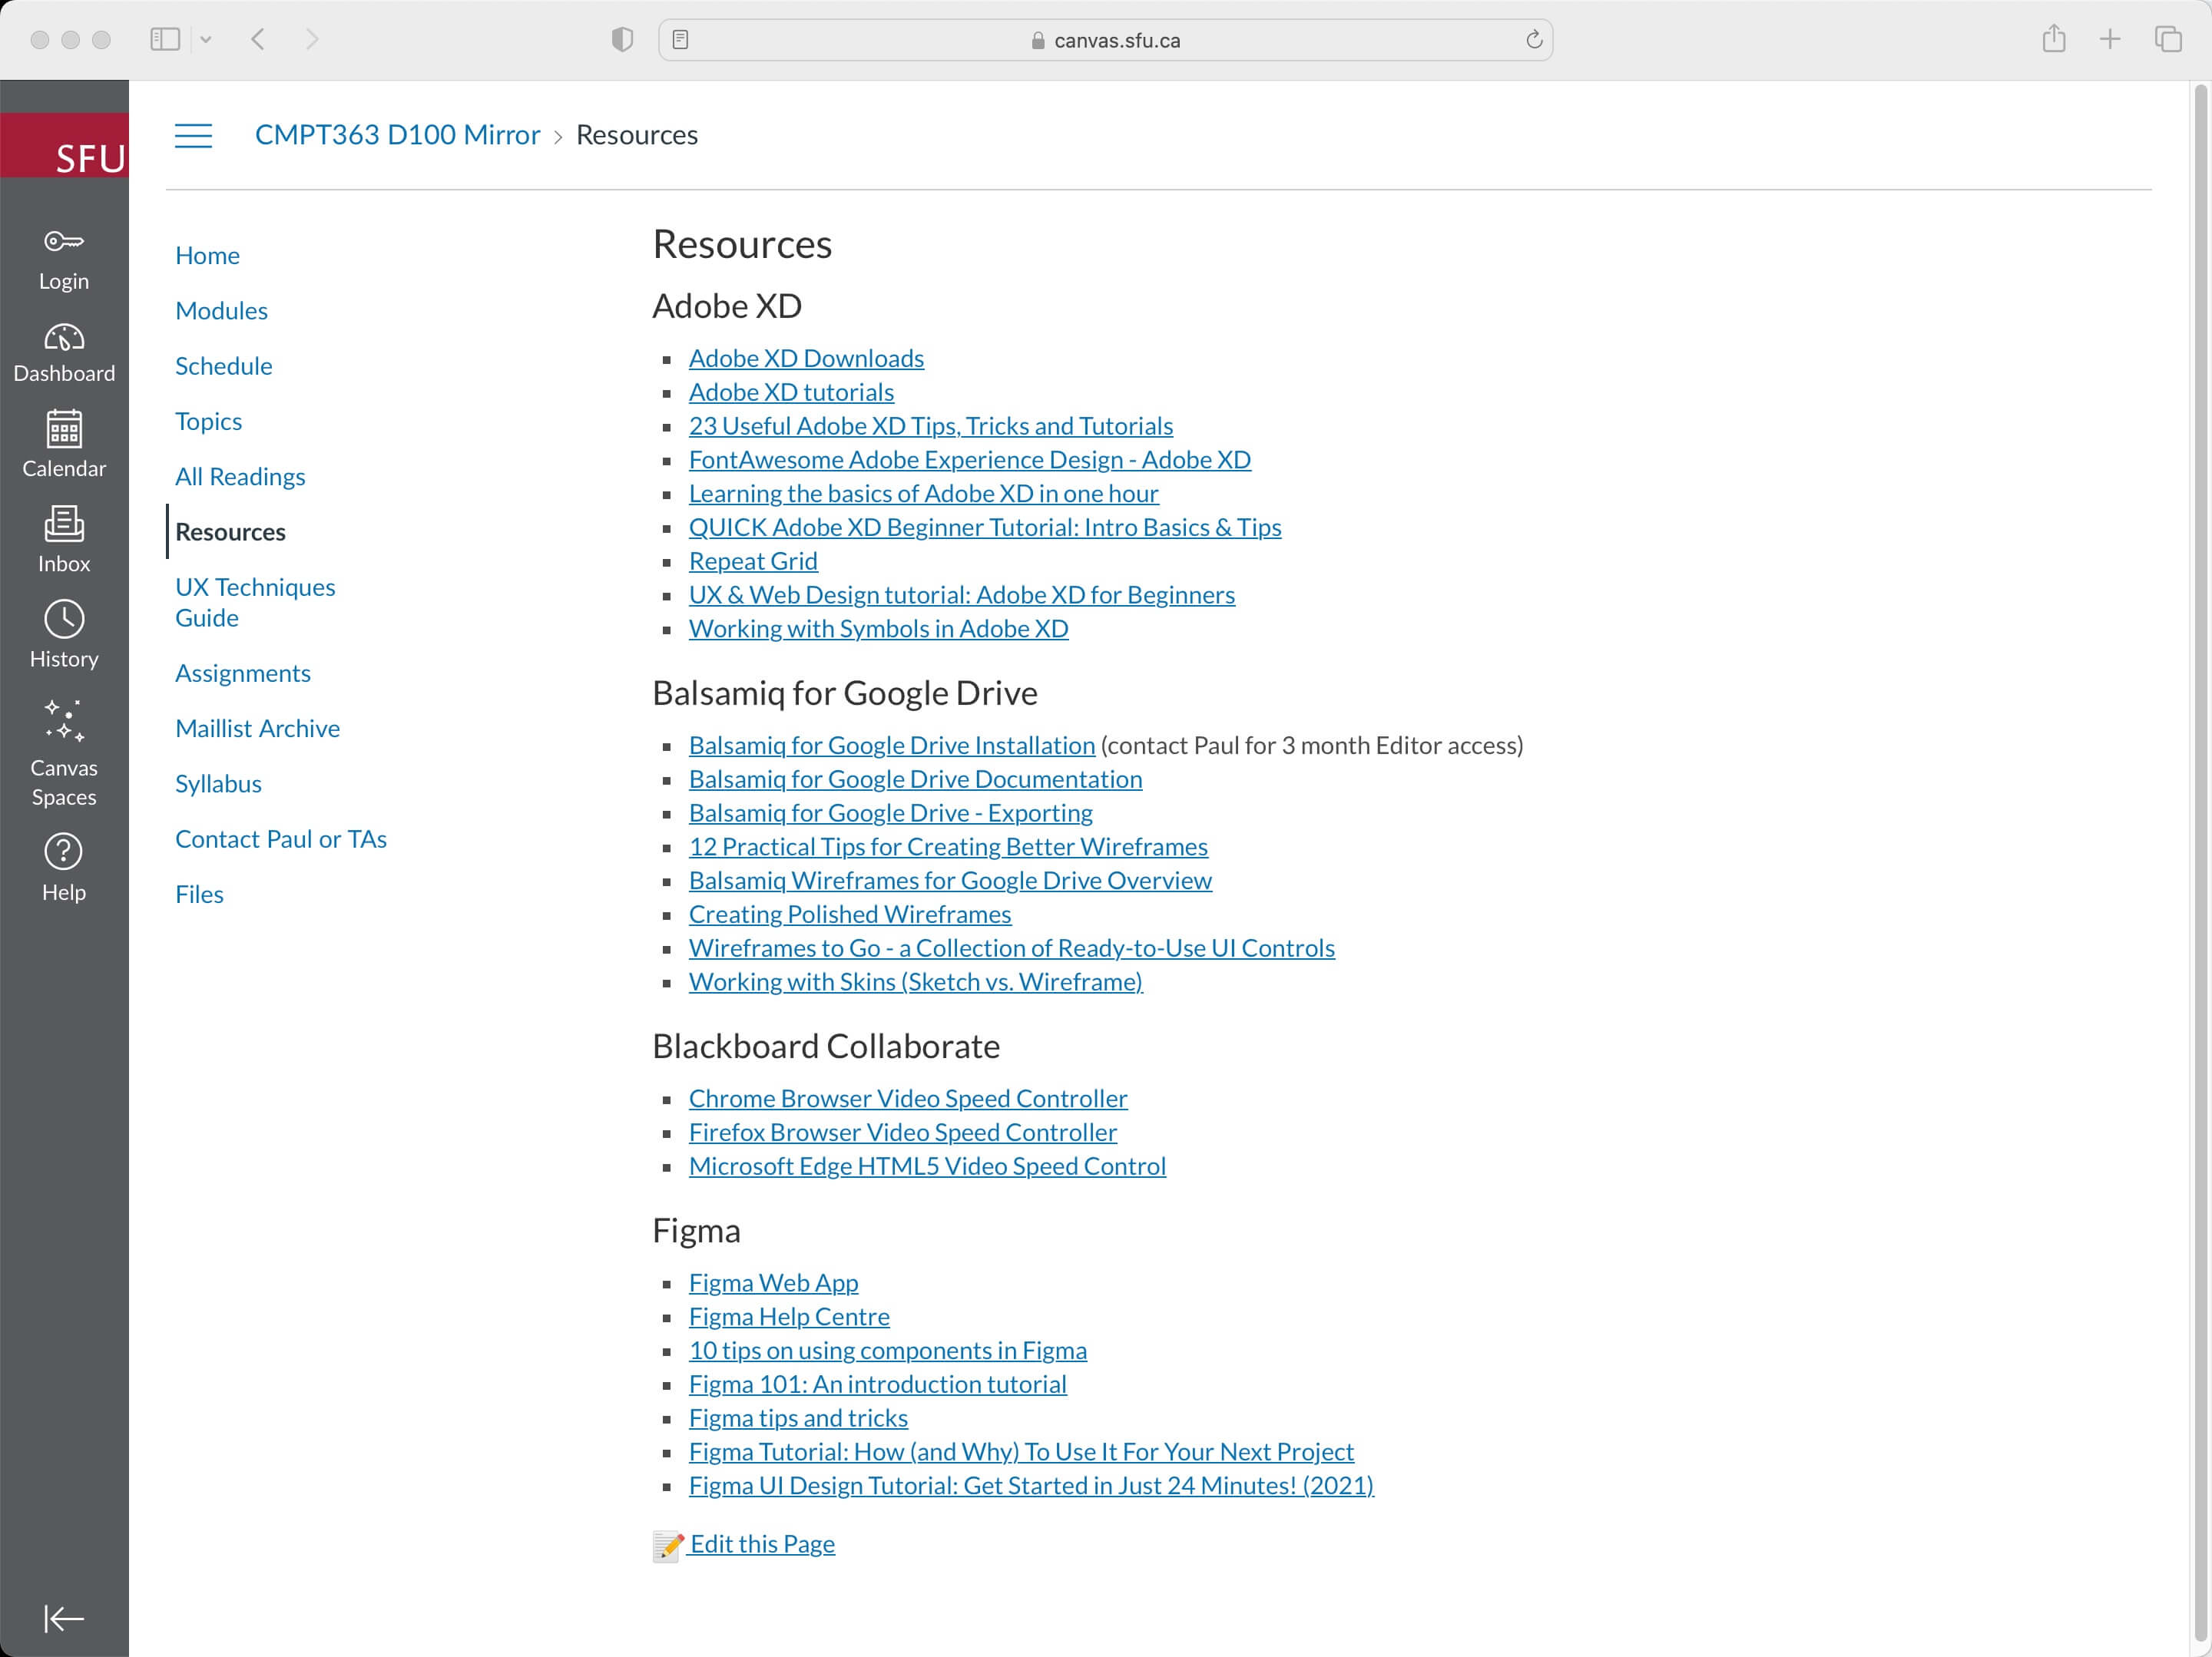
Figure 11. Docsify-This External URL within Canvas LMS (used with the Redirect Tool), for example https://canvas.sfu.ca/courses/76289/external_tools/36154
url=https://docsify-this.net/?basePath=https://raw.githubusercontent.com/hibbitts-design/cmpt-363-222-pages/main&homepage=resources.md&edit-link=https://github.com/hibbitts-design/cmpt-363-222-pages/blob/main/resources.md&font-family=Lato%20Extended,Lato,Helvetica%20Neue,Helvetica,Arial,sans-serif&font-size=1&hide-credits=trueWith the Canvas LMS it is also possible to use an external web page as content within a course Module.
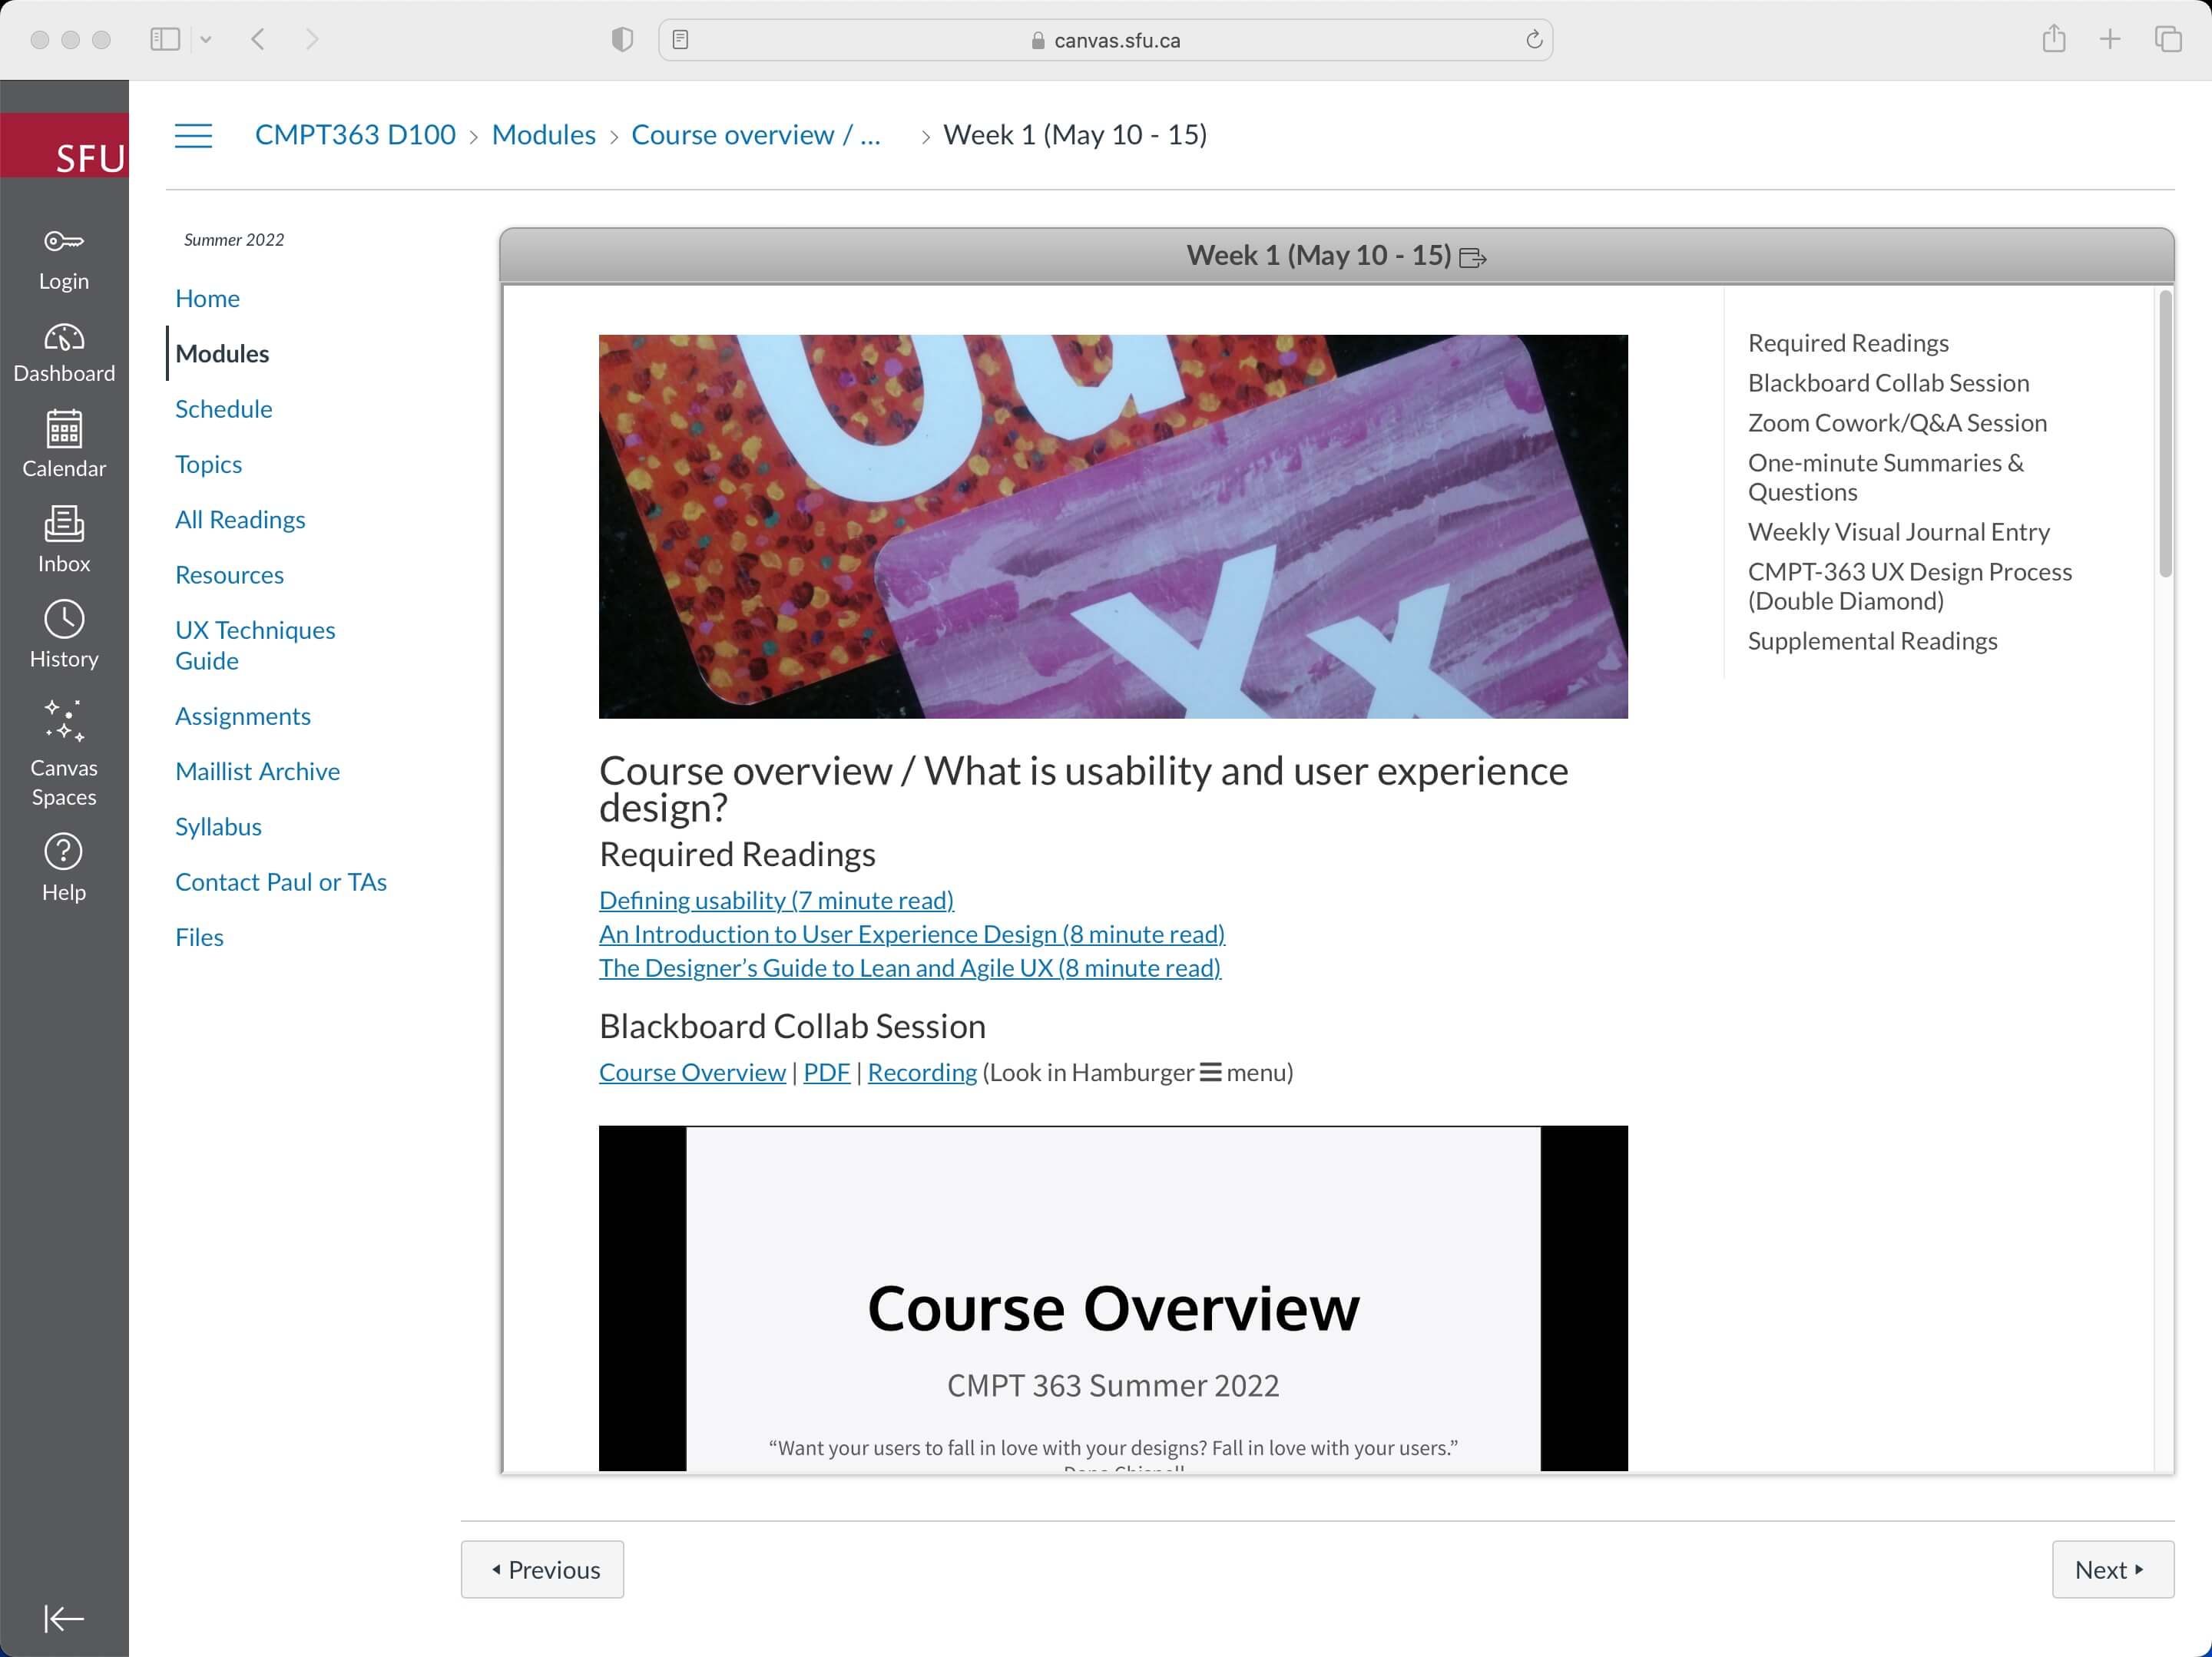
Figure 12. Docsify-This External URL with Page Table of Contents (used as a Canvas LMS Module), for example https://canvas.sfu.ca/courses/76289/modules/items/2816273
https://docsify-this.net?basePath=https://raw.githubusercontent.com/hibbitts-design/cmpt-363-222-pages/main&homepage=week-01.md&toc-narrow=true&font-family=Lato%20Extended,Lato,Helvetica%20Neue,Helvetica,Arial,sans-serif&font-size=1&hide-credits=trueTo get the most out of Docsify-This, consider using GitHub or Codeberg repositories to store your Markdown files. This approach provides version control, enables collaboration through "Edit this Page" links, and allows you to edit content locally on your desktop using your choice of text editor.
Git is a free and open source distributed version control system, originally created by Linus Torvalds in 2005 for development of the Linux kernel.
Version control supports the management of changes, called revisions, to files... especially useful for pure text files such as those used by Docsify-This.
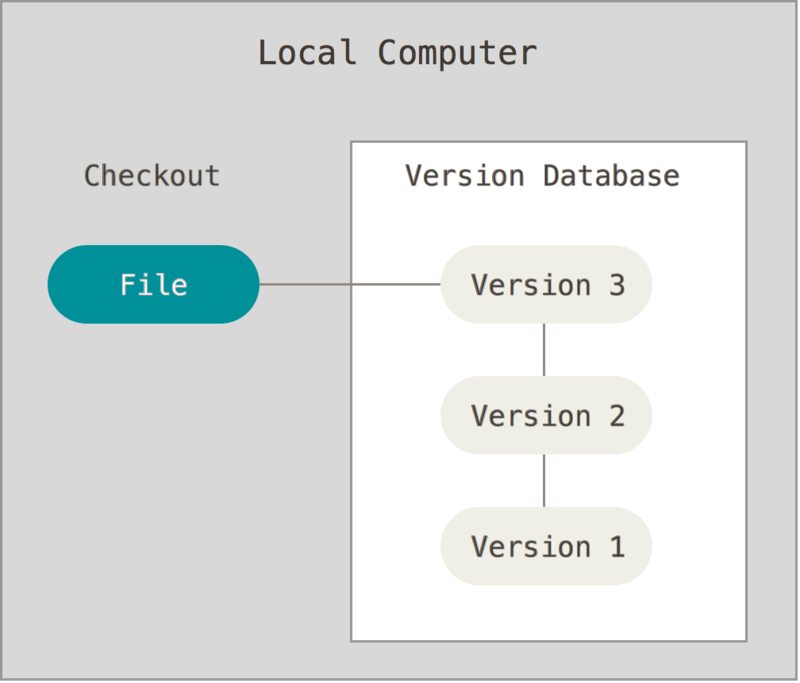
Figure 13. Local Version Control (source: https://git-scm.com)
As a distributed version control system, Git also support collaboration with multiple contributors.

Figure 14. Distributed Version Control (source: https://git-scm.com)
GitHub and Codeberg are examples of online Git services, letting you more easily create and manage Git repositories.
Besides hosting your files, online editing of repository content such as Markdown files (using the filename extension .md) is also provided.
To get the most from version control, and potentially collaboration using an optional "Edit this Page" link, store your Docsify-This Markdown pages within a GitHub or Codeberg repository and optionally use an app such as GitHub Desktop to push/pull changes to your desktop.
- Install GitHub Desktop (https://desktop.github.com)
- Enter your GitHub credentials as prompted
- Go to a GitHub repository web page, tap < > Code and then choose Open with GitHub Desktop OR go to a Codeberg repository web page, copy the HTTPS address, then in GitHub Desktop choose File > Clone Repository and paste the copied URL
- Choose the location for your cloned repository and tap the Clone button
- Locally Store Git/GitHub/Codeberg Repositories
- Push and Pull Repository Changes
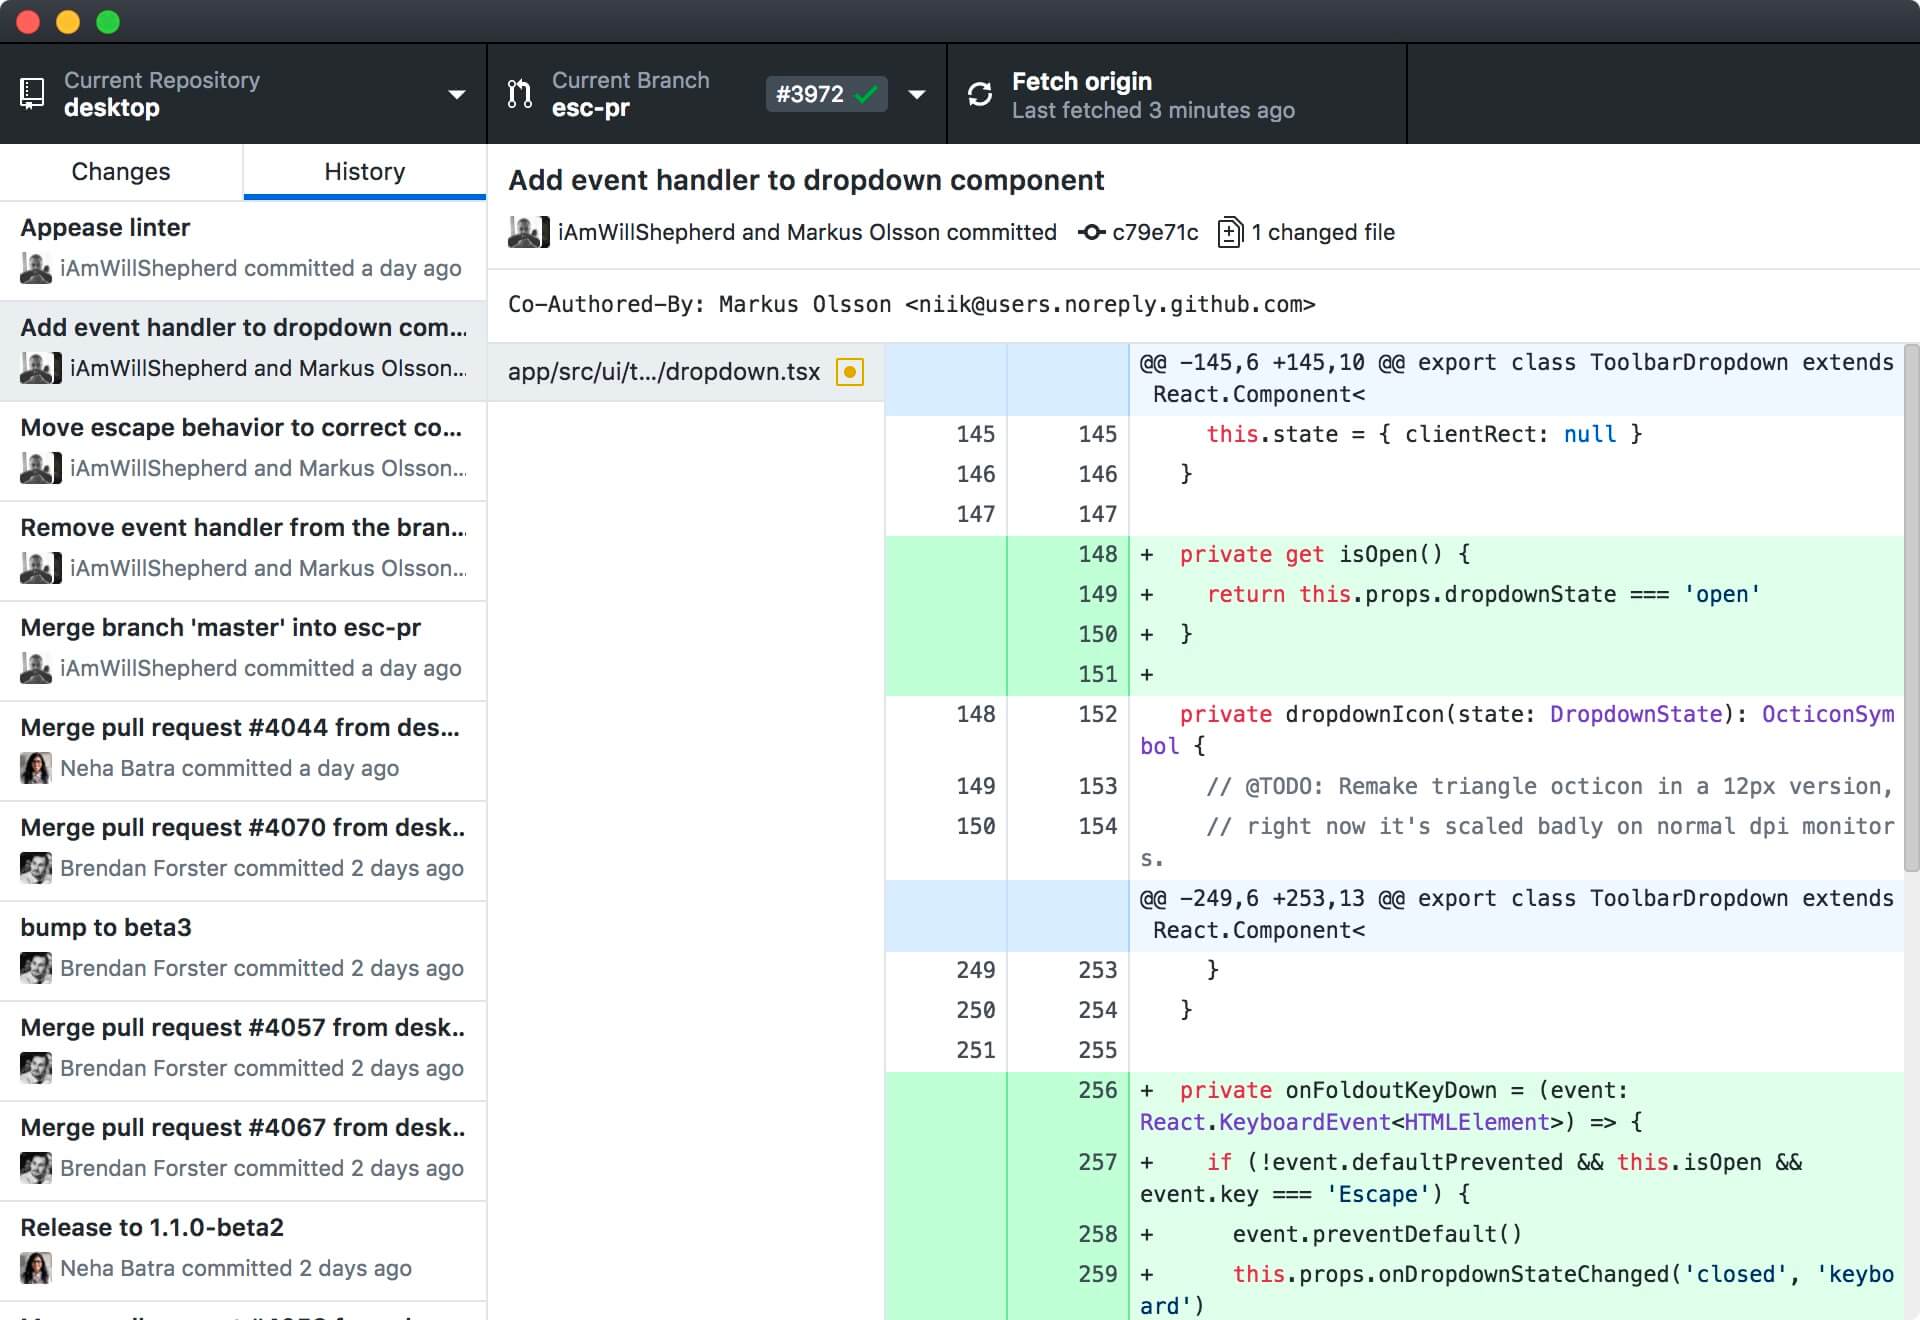
Figure 16. GitHub Desktop Mac (source: https://git-scm.com)
Once your Docsify-This Markdown files are synced (i.e. cloned) to your desktop via GitHub Desktop you can then use the text editor of your choice, such as VSCode, Pulsar Beta (was Atom.io), Typora etc.
Using GitHub Desktop you can preview any changes and then commit those changes back to the repository. VSCode can also be used alone to both sync and editing files.
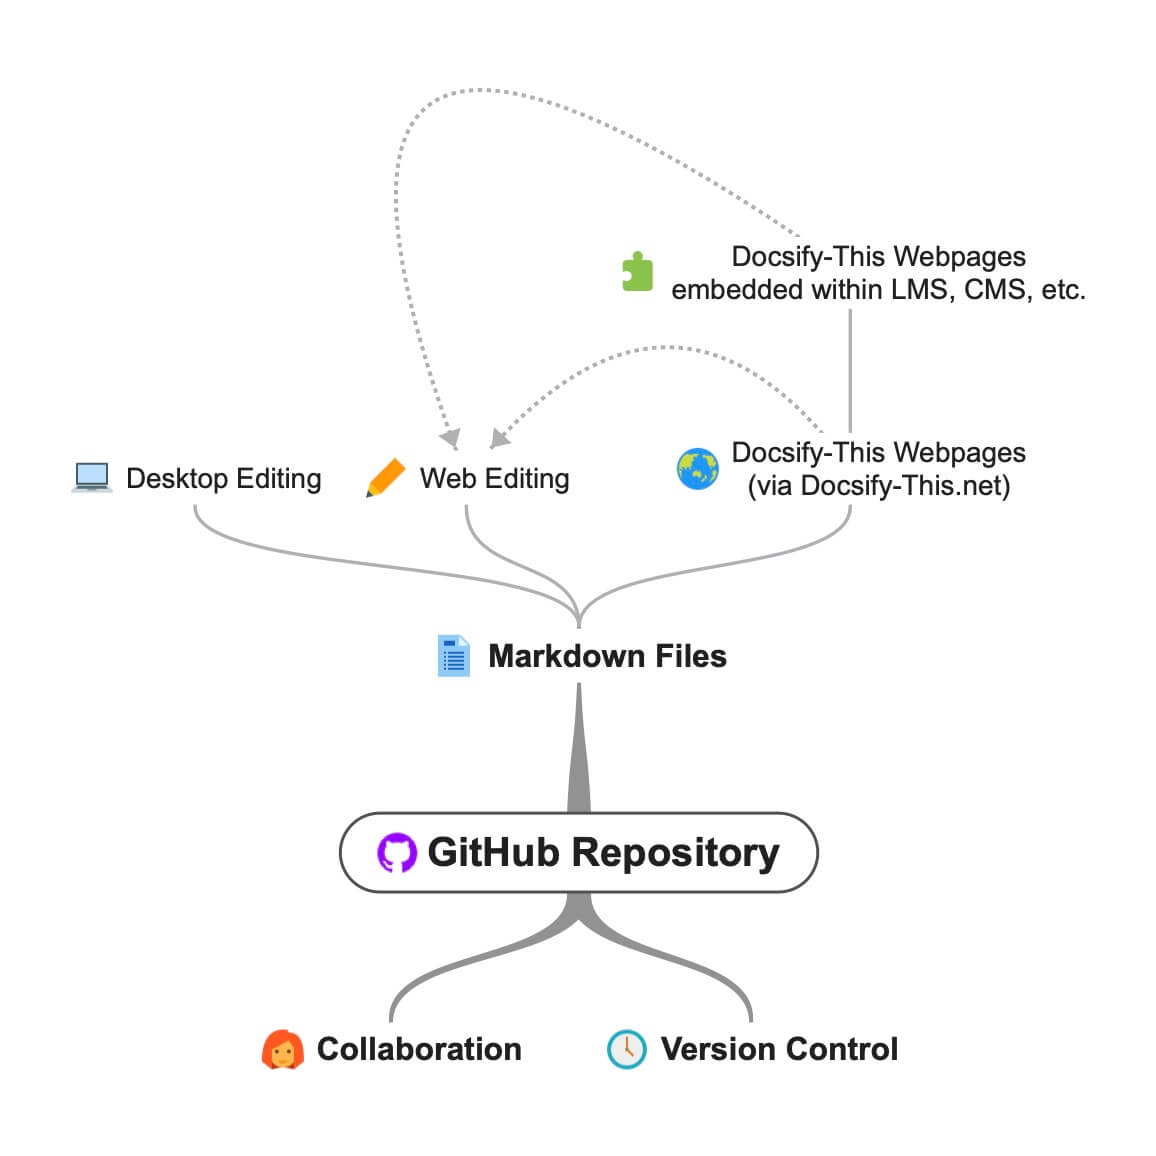

Figure 18. Docsify-This + Webserver Markdown Files
- Markdown Format
- Accessibility
- Creating and Editing Markdown on GitHub
- GitHub and Open Education Resources (OER)
- GitHub Desktop
- Markdown Desktop Editors