
- First of all you should open your web browser and go to the official firebase website 👉 Link

- Second if you are new for firebase console create a new firebase account from the following arrow below 👇, if you have a firebase account continue with the following steps
- Then after creating a firebase account click to add new project from the box below 👇
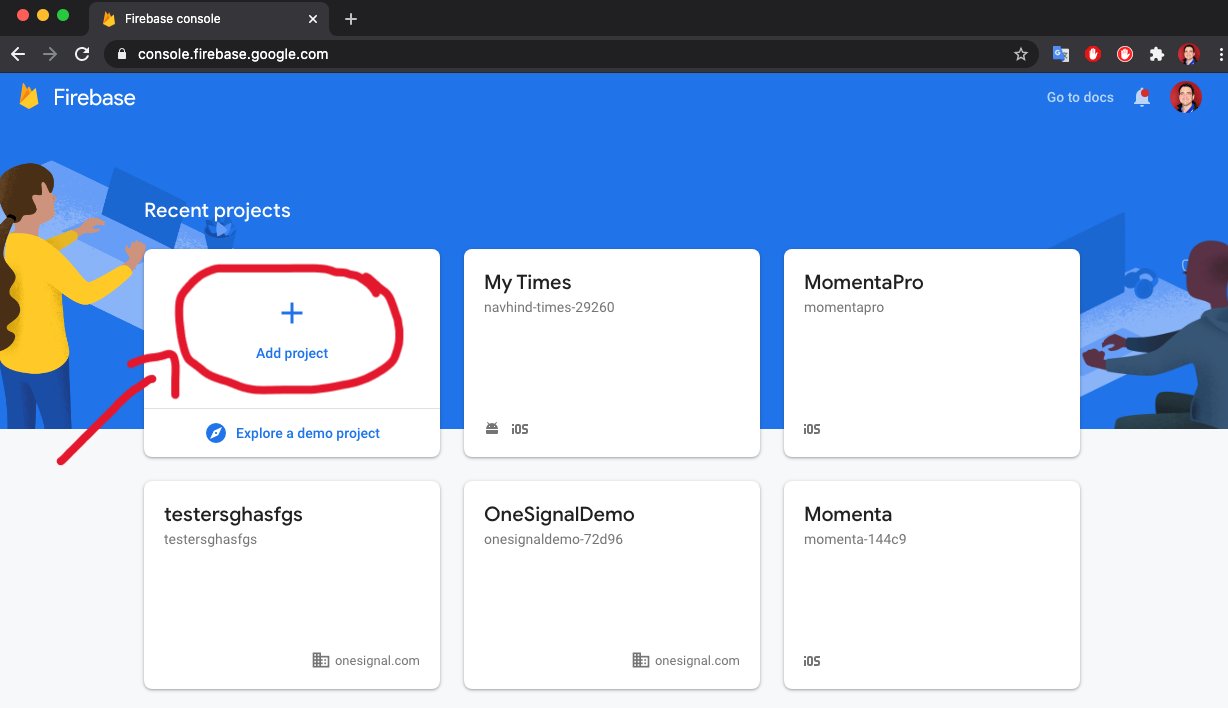
- Opening an account and adding a project through the firebase console has ended
- Now we are going to create a flutter app on our IDE. I prefer Visual Studio Code IDE for my flutter projects, if you use another IDE for flutter projects Ex: Android Studio or Intellij IDEA you can skip the Visual Studio Code Download Operations
- first of all operations you should download flutter SDK from the link below 👇
- SDK Link: https://flutter.dev
- Then if you dont have Visual Studio Code IDE on your computer you can go to the following link to download and install it 👉 Link
- After finishing download and install operations on Visual Studio Code open Visual Studio Code app, Click to Extensions part and type Flutter to search bar
- Then click download button, it will automatically download the Dart Extension too
- But if you have a problem you can type Dart and click download
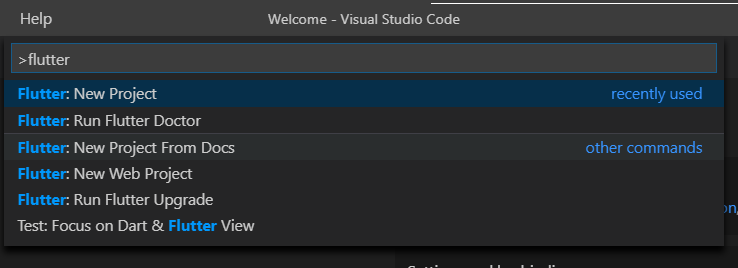
- After finishing the Visual Studio Code installing app and Extensions, Click Ctrl+Shift+P to open terminal and click Flutter New Project as below 👇
- 1- Select your project type Ex: Application, Package etc. (it's type will be Application, it's compulsory)
- 2- Choose your project location from your computer
- 3- Name your flutter app
- Everything is ready for now
- After clicking to Add project button it will redirect us to the page below 👇
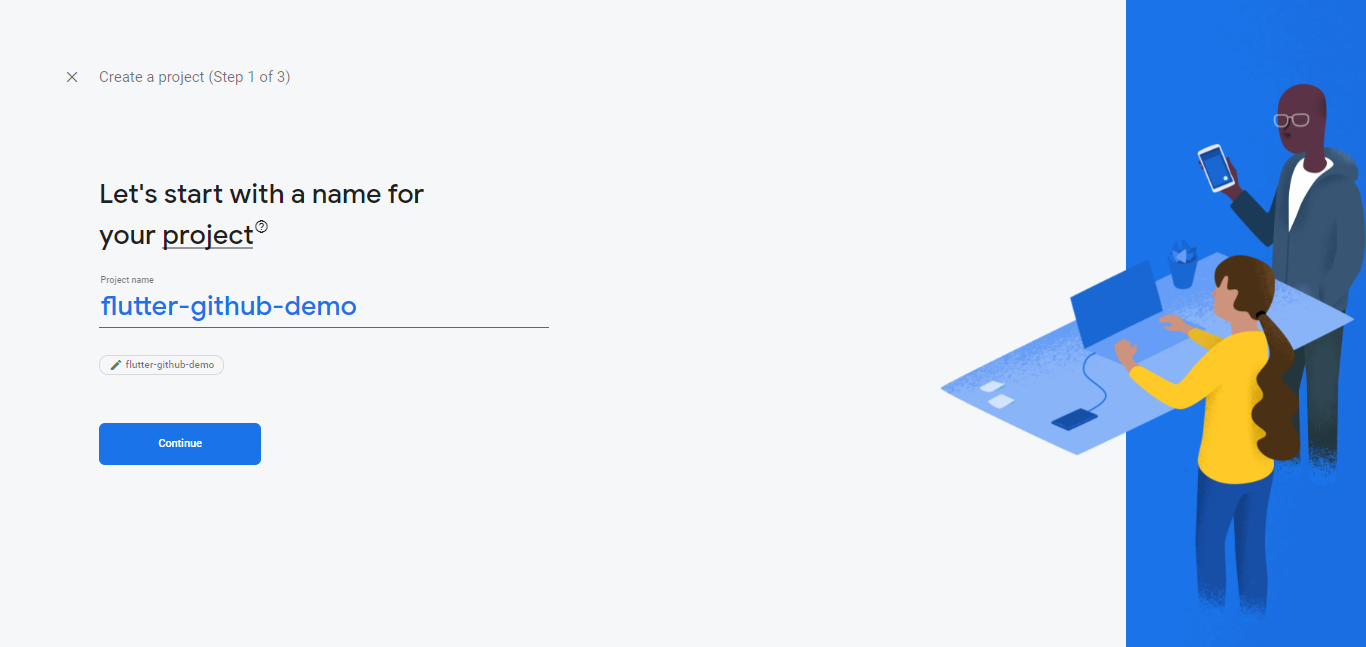
- Here you can name your firebase project and Continue
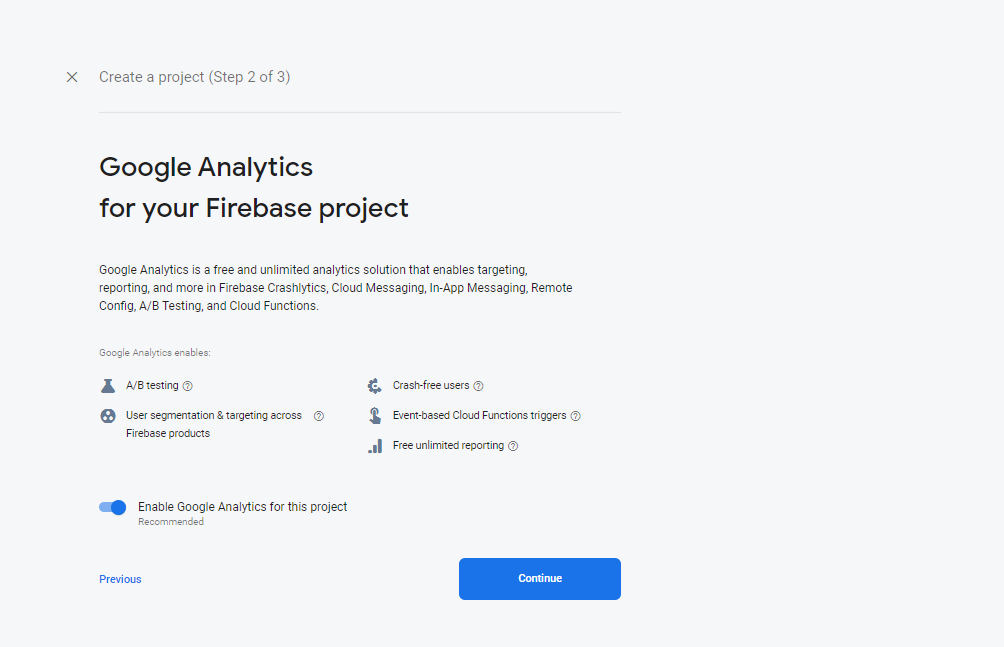
- Now we activate Google Analytics and click the continue button
Firebase.console.-.Video.mp4
- After that in the upper video as you see select the default account for firebase option and Click the continue button
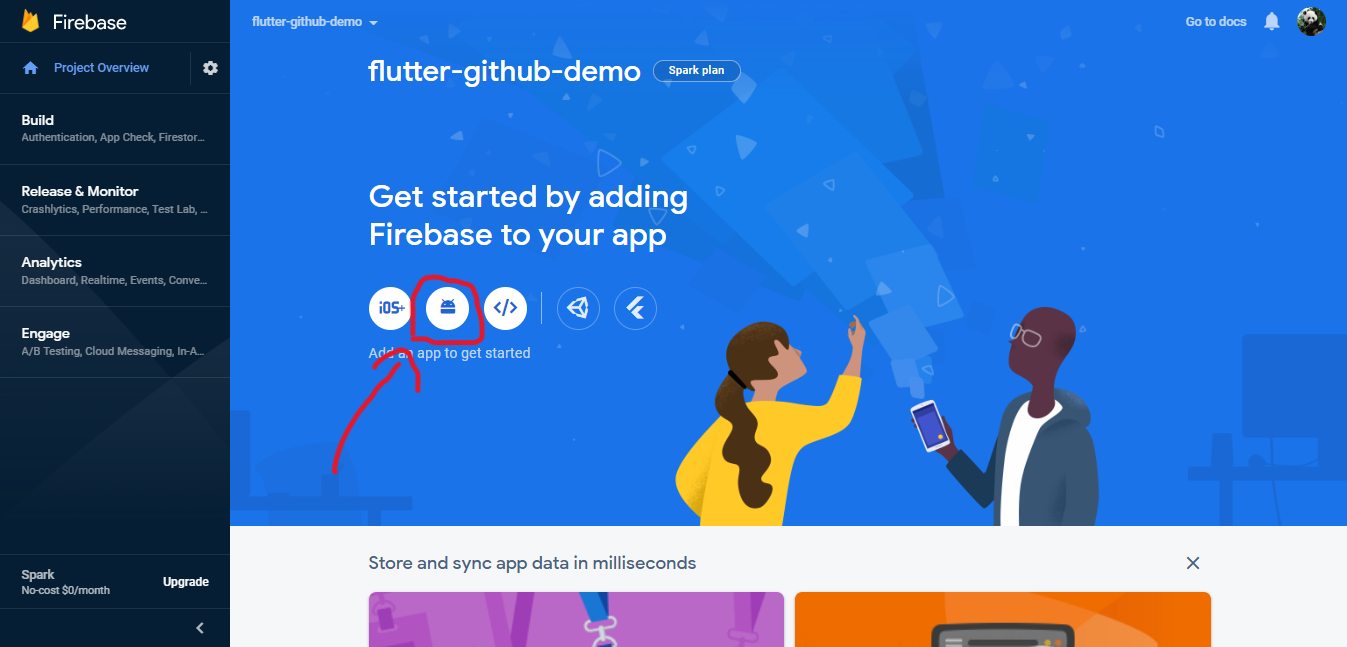
- After finishing create account operations on firebase console, it will redirect you to homepage of your project
- Select here Android icon as you see in the upper photo
- I prefer here Android because i use Windows as OS (Operating System), if you use Mac Os you should select IOS, Also this project made for android, meaning these steps will not work with IOS
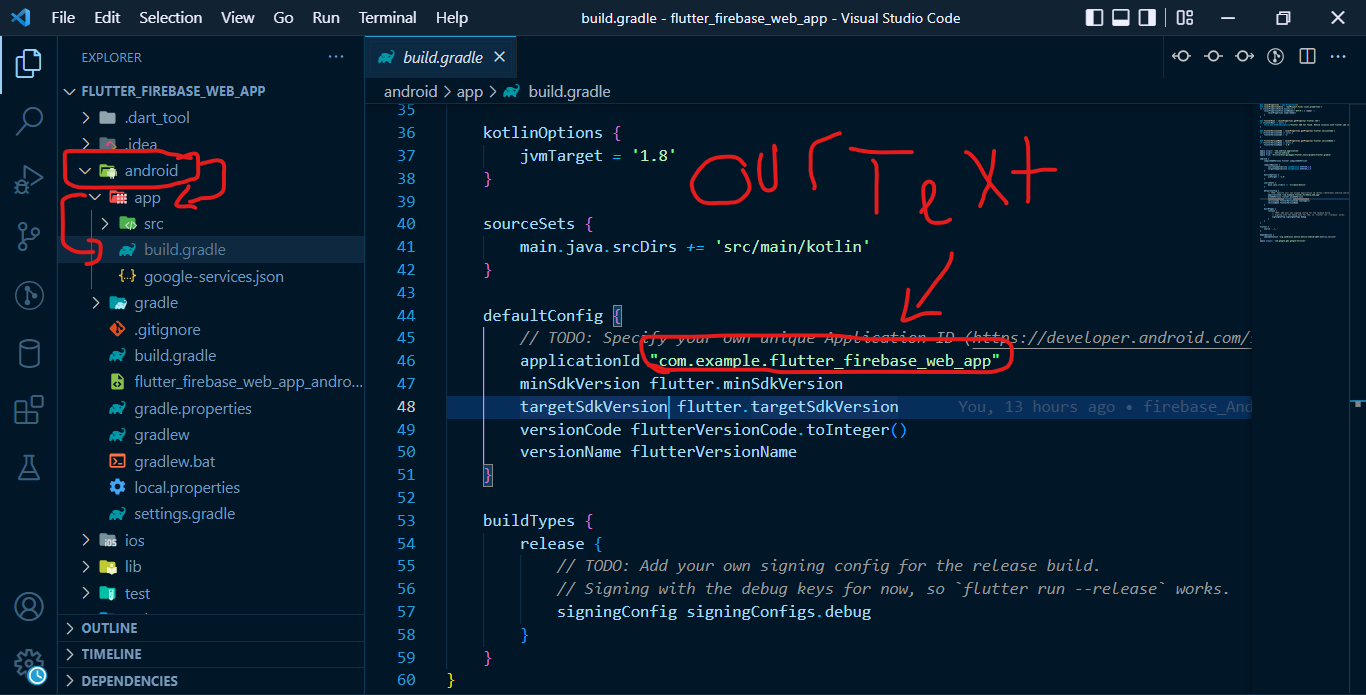
- In our flutter app we will open Android -> App -> build.gradle file
- Then as you see in the upper photo we will copy The Text inside double quotes
- Ex: "com.example.flutter_firebase_web_app"
- Now we will go to our firebase app and after clicking Android we will paste the text we copied before like at the photo in below 👇
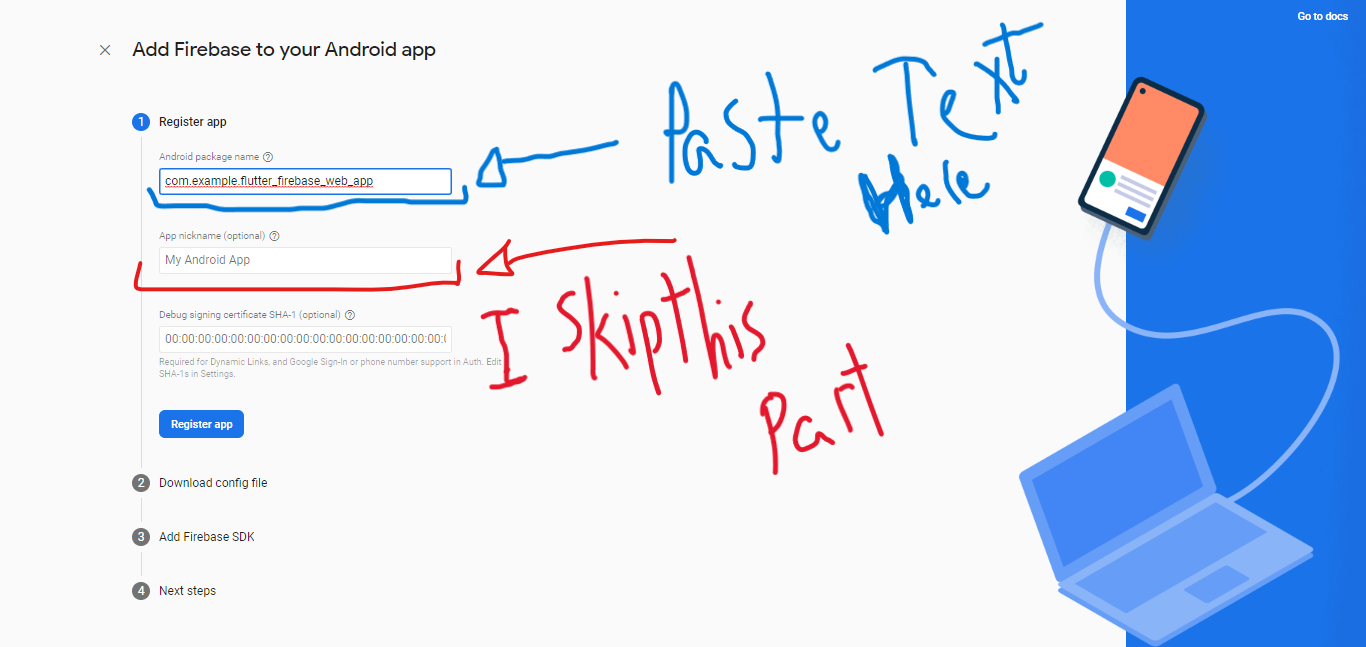
- It's not compulsory to give your app a nick name, So i will skip this part
- Now we will click the Register app button
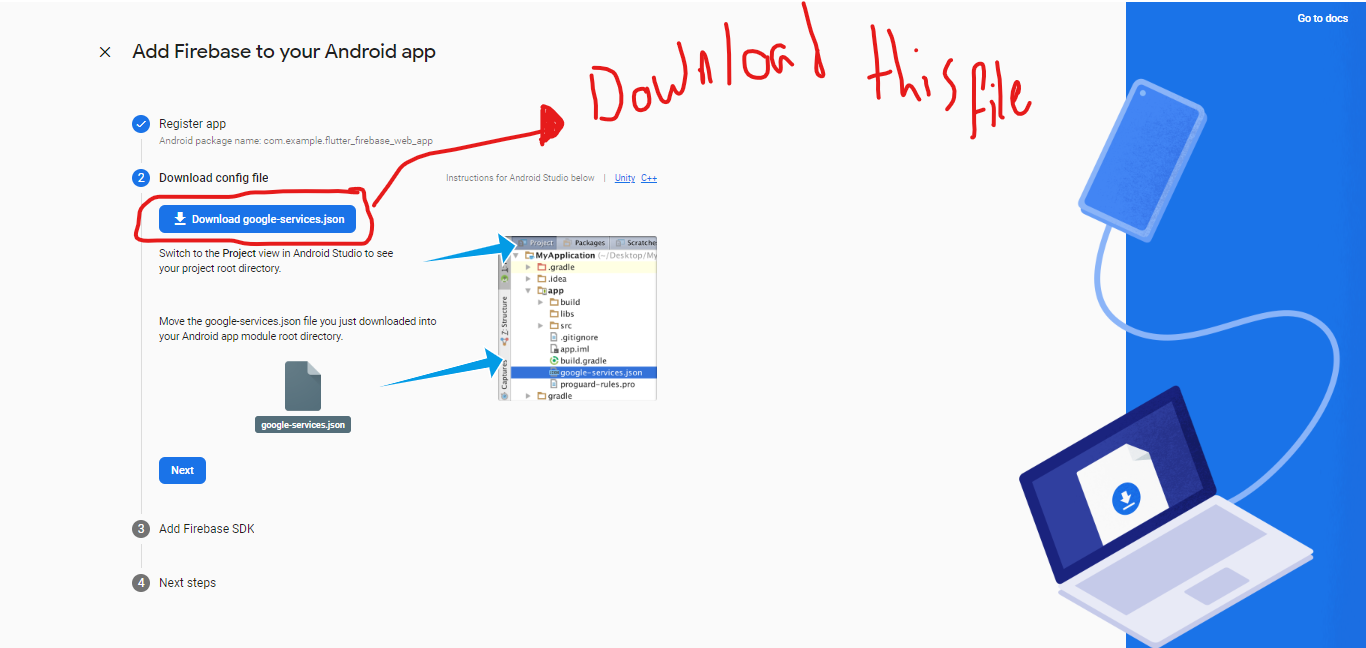
- In the next step we will download this json file tou our computer
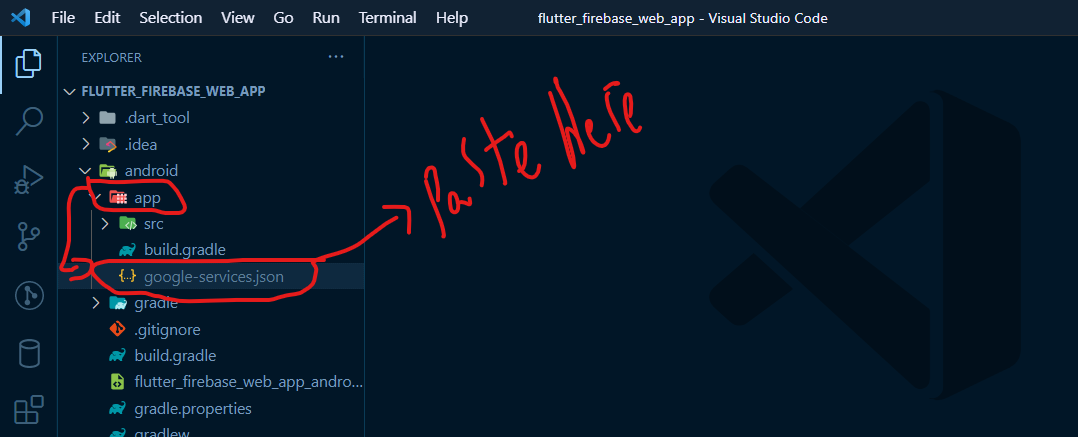
- Then we will move this file inside Android -> App folder like below 👇
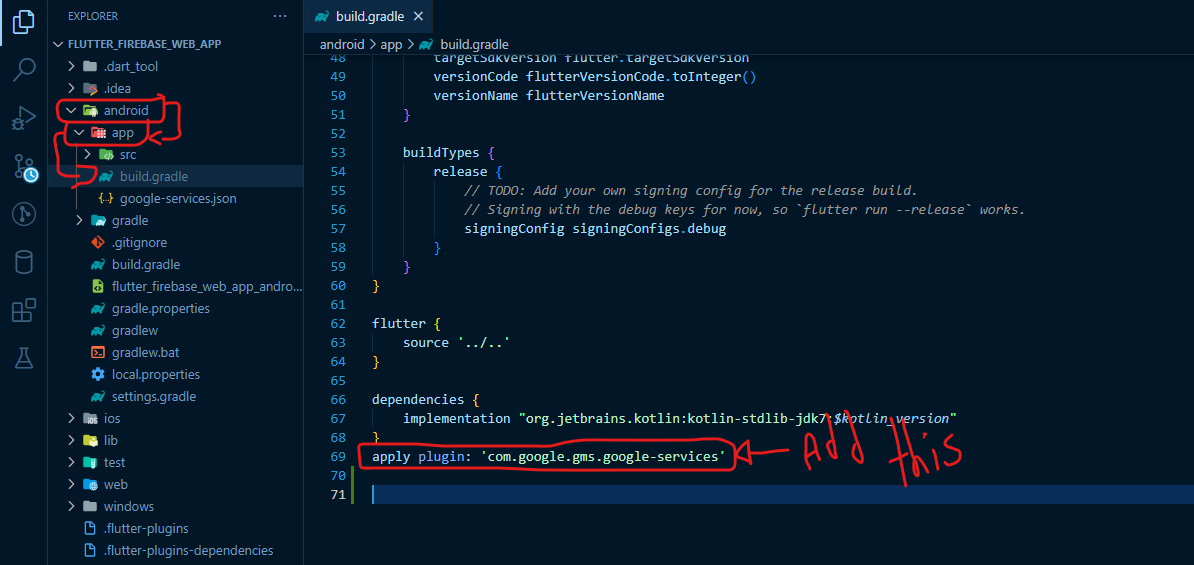
- We will add this part of code to Android -> App -> build.gradle, like the photo below 👇
- The code 👉 apply plugin: 'com.google.gms.google-services'
- Then we will add another code to Android -> build.gradle file, like the photo below 👇
- The Code 👉 classpath 'com.google.gms:google-services:4.3.5'
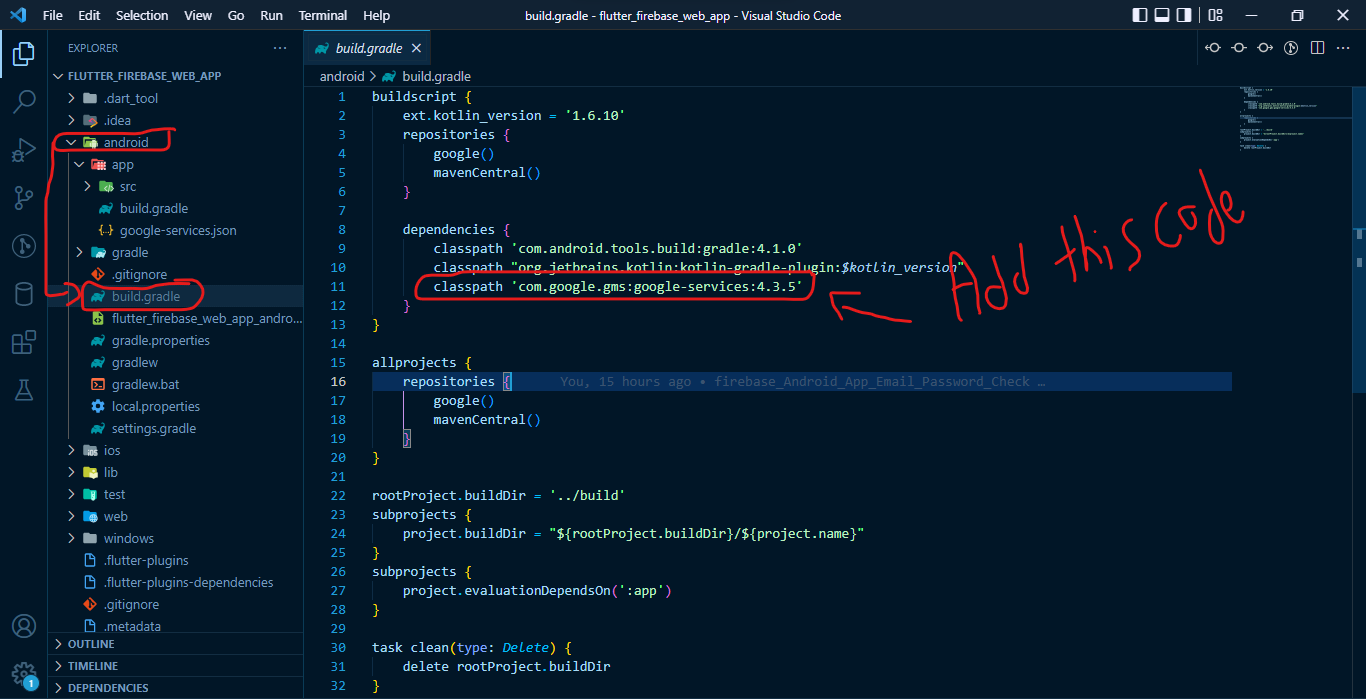
Note❗❗❗💥: The first added code part is added to Android -> App -> build.gradle file, But the next code part is added to Android -> build.gradle
- Just be careful to not mess things up, one is inside Android -> App -> build.gradle file and The next one is inside Android -> build.gradle
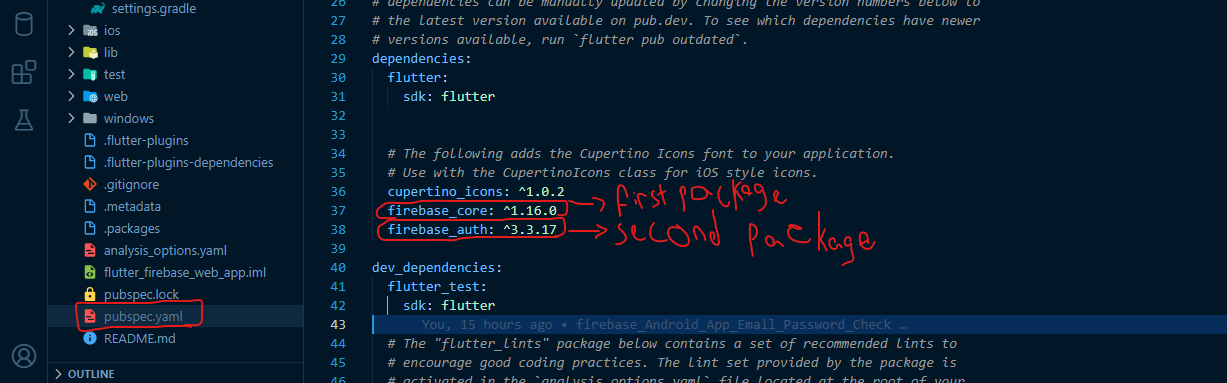
- We need to add some packages inside Pubsbec.yaml file to authenticate the Email & Password
- Packages will Add is below 👇
- firebase_core: ^1.16.0
- firebase_auth: ^3.3.17
- We added this packages for our flutter app from https://pub.dev/ site
Note❗❗❗💥: Since the packages we use in our flutter project are always updated, I recommend you to get the latest update version of the packages from this link 👉 https://pub.dev/
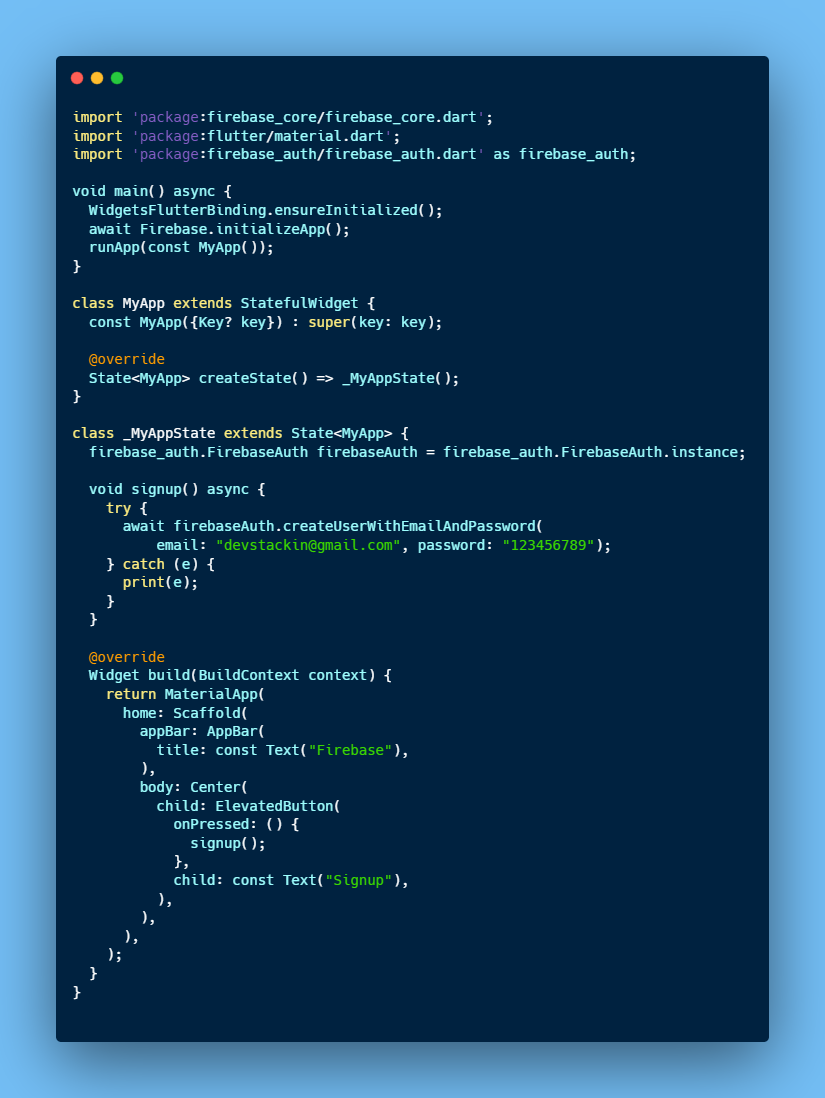
- We completed the options of firebase in our app now we will go to Lib -> main.dart file and paste this code below 👇 inside it
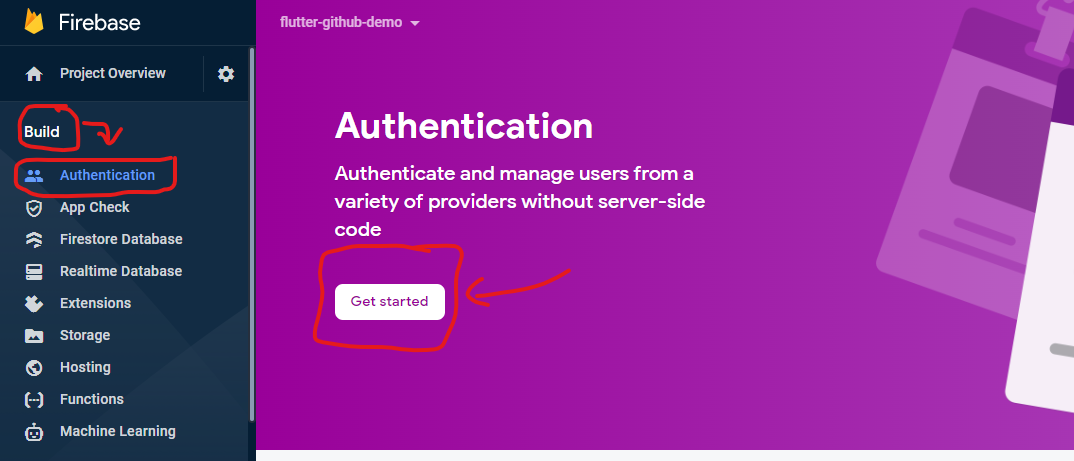
- First of all we will go to our firebase project and click authentication from the side bar, like the photo below 👇
- Next we click the Get started button
- After that we will go to page in the photo below 👇
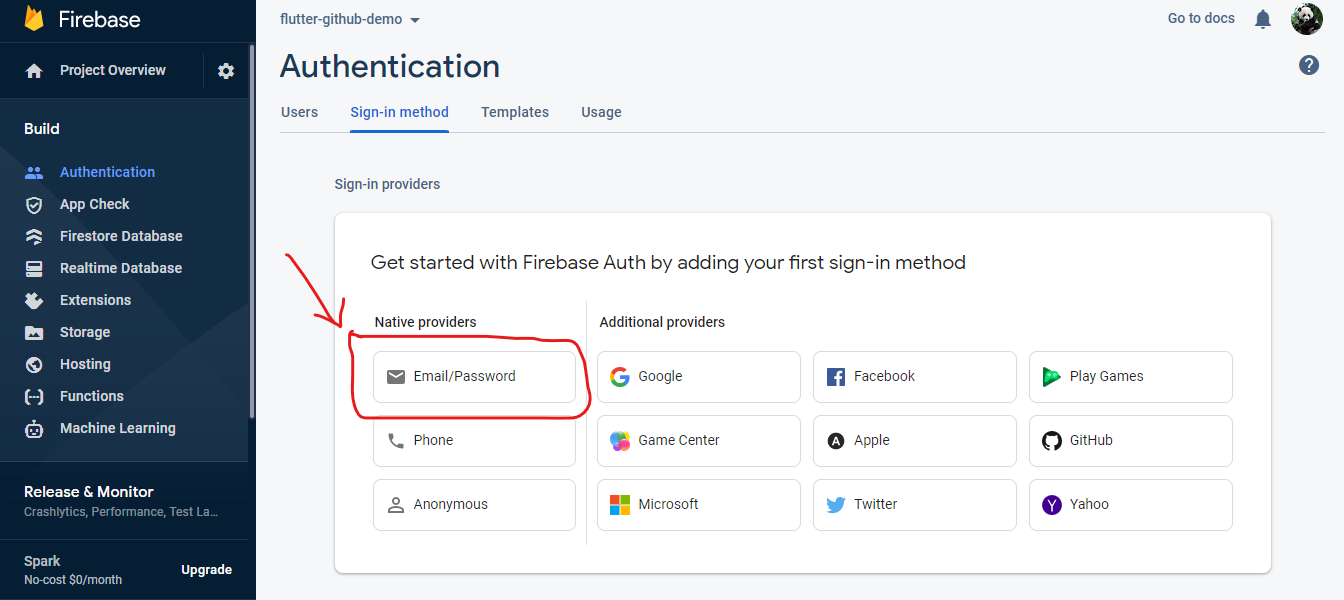
- Then we click on Email box and enable the Email & Password authentication
- After that we return to our flutter app and Run our app
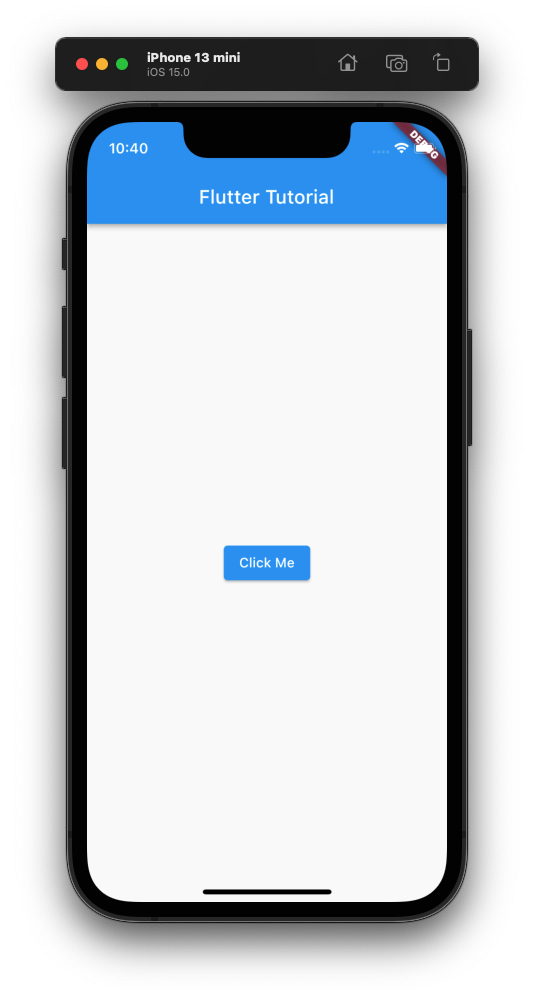
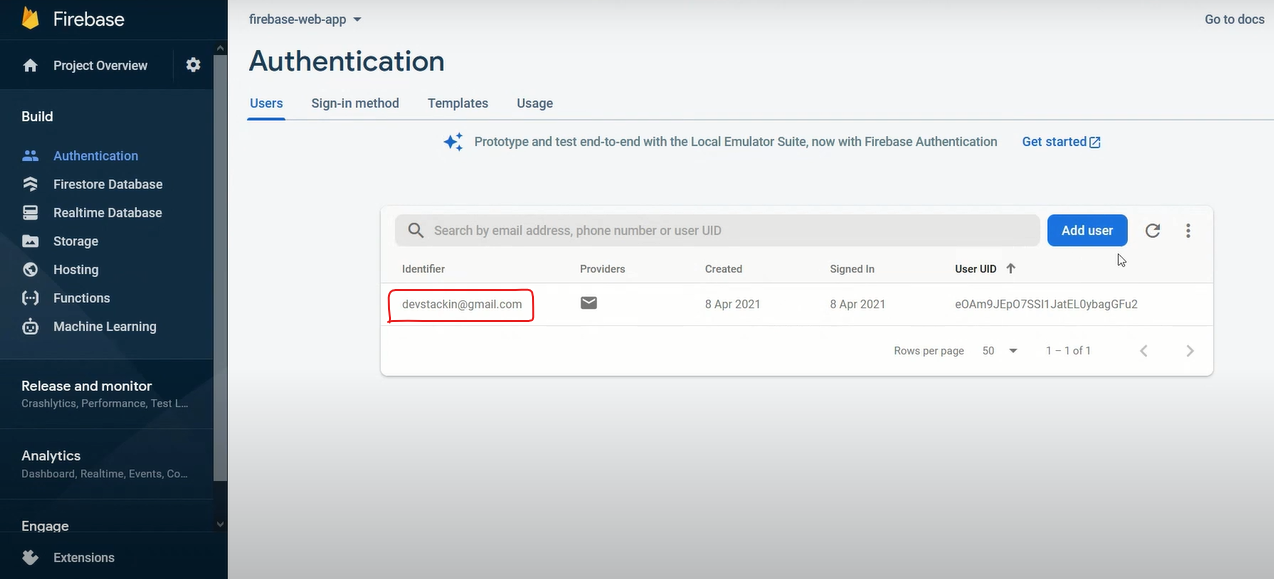
- When we click the Click me button and go to our firebase app email page we can see there is a user added at real time
- You can see the added user in the photo below 👇
- 1- We created a firebase account on https://console.firebase.google.com/
- 2- We Downloaded Visual Studio Code IDE on our computer with it extensions
- 3- We downloaded flutter SDK on our computer
- 4- We created a new flutter project on Visual Studi Code IDE
- 5- We entered our firebase account and created a new project
- 6- We made some options on Google-services.json, Android -> App -> build.gradle and Android -> build.gradle files
- 7- We added some packages to Pubsbec.yaml file
- 8- We enabled Email & Password on our Android firebase app
- 9- We wrote some part of code on our flutter app and Just added an elevated button
- 10- Finally we wrote a program that when we clcik on the elevated button, The app adds a new user email on firebase console at real time
- 👻 Following me on Linkedin 👉 Link
- 👽 Following me on Github 👉 Link
- 💻 You can connect with me from email on 👉 [email protected]
