1. How to Build a Simple Form
Play walk-through video of creating a form.
-
Assign a user "Assigning a user" regards the ability to make this lead form be auto assigned to a specific user in the Disciple.Tools system. Unfortunately, at the moment, you can only do this by adding the user id to this field. You can find the user id in the Disciple Tools user management area. At the bottom of the user record in light grey is the user id.
-
Assign a source These sources are created and managed in the
Disciple.Tools > Settings > Fields (tab) > Dropdown: Contacts - Sources. You can add sources, relabel them, or hide them here and these sources will be reflected in the webform dropdown.
-
Change labels All field labels can be customized to any phrase or language localization.
-
Hide or Show Fields You can hide the core fields but you cannot delete them.
-
Required Fields You can choose if you will require or not require name, phone, or email per field. If a field is required you cannot submit the form without that field being filled in.
You do not need to add or configure the extra fields in order to collect the minimum form data. Use this "Extra Fields" box to add advanced form fields and data collection.
-
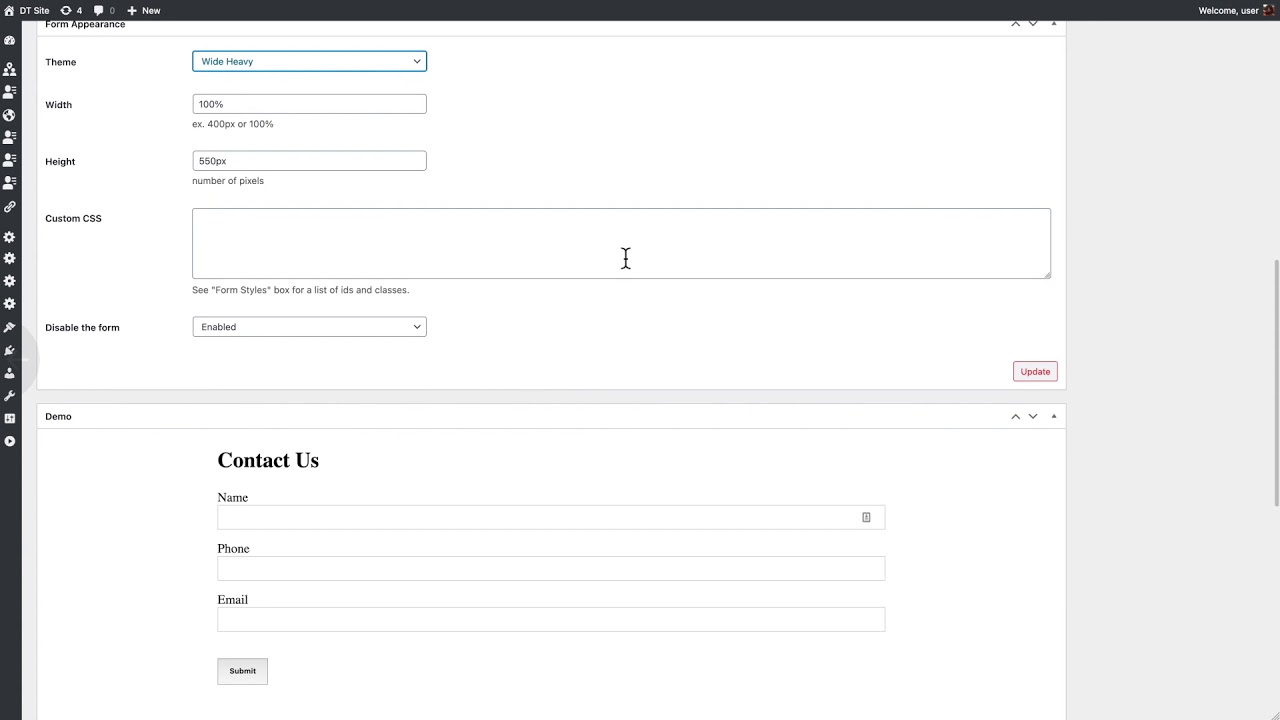
Assign Theme style These theme styles are basic templates to stylize the form. We recommend "inherit" if the form is embedded in a website with its own styles. Inherit will attempt to pass the site styles through to the form. The other styles are basic clean and modern typography. "None" removes any default styles and will publish only the custom css.
-
Modify width, height. NOTE: If you add many fields, you will need to increase the "height". One drawback to an iFrame embed is that it does not auto sense height of its own contents. Therefore, you need to set the height of the iframe to expand and contain all the fields you have included.
-
Add any custom CSS. Use the form styles box for the list of field ids and classes to modify. With the Custom CSS field, you can override all CSS styles. For example, if you start with the "Wide Heavy" style but want to change the colors of the header lines, you can copy that style into the Custom CSS box and override the default style. This does require some knowledge of CSS, but it makes the forms extremely flexible. You can find a full list of the ids and classes for styling each element in the metabox called Styles to the right side of the Form page.
- Add language translations for the strings. Apart from the labels for the fields, where you can add translations, you need to add translations for a few more strings that serve the validation and event message processes.